Dron Telemetry 101
TL;DR
Not making a desktop app to control a dron, but just a pwa to watch telemetry of FPV with betaflight
Intro
Ive got to fly a FPV drone!
google-chrome --new-window /home/jalcocert/Desktop/meteor-dron/Eachine/my-first-flight/btfl_all_report.htmlWith this, i can analyze the flights:
#cd ./meteor-dron
make coast
ZUPT_DECODED=BTFL_BLACKBOX_LOG_METEOR75_PRO_20260710_165531_BETAFPV
G473_decoded.json
25-30% throttle: ~9-10 W
30-35% throttle: ~12-13 W
35-40% throttle: ~14-15.5 W
40-45% throttle: ~16-18 W
10-15% throttle: ~7.7 W, ~746 eRPM, 1.82 A
15-20% throttle: ~7.4 W, ~752 eRPM, 1.90 A
20-25% throttle: ~8.7 W, ~817 eRPM, 2.21 A
25-30% throttle: ~9.6 W, ~974 eRPM, 2.46 A
30-35% throttle: ~11.9 W, ~1066 eRPM, 3.07 A
35-40% throttle: ~14.9 W, ~1177 eRPM, 3.88 A
40-45% throttle: ~16.5 W, ~1210 eRPM, 4.46 A
Interesting things:
- Power rises faster than eRPM at higher throttle.
From 35-40% to
40-45%, eRPM barely rises, but power goes up. That can mean more
load, sag, airflow inefficiency, or less efficient operating
range.
- Around 35-40% throttle, the quad seems to “coast/hold” around 14- 15 W and ~1170 eRPM.
- peak current: 24.9A
- peak power: 94.9W
python .\telemetry_video.py --decoded .
\BTFL_BLACKBOX_LOG_METEOR75_PRO_20260710_165531_BETAFPVG473_decoded
.json --log-index 1 --duration-s 158.4
You are looking right at the heart of what makes an FPV drone feel so intensely athletic: an absurd Power-to-Weight Ratio, and a fascinating look at how much energy is spent just “coasting” (hovering) versus sprinting.
Let’s look at the actual physics of your specific setup (Meteor75 Pro + 680mAh battery) to see how the numbers divide up.
- The Insane Power-to-Weight Ratio
Your drone weighs roughly 31 grams empty.
With the new 680mAh battery ($\approx 16\text{g}$), your total takeoff weight is about 47 grams.
- The Power Input: At 100% throttle, your motors draw about 16 Amps at 4.0V = 64 Watts of electrical power.
- The Power-to-Weight Ratio: $$\frac{64\text{ Watts}}{0.047\text{ kg}} \approx 1,361\text{ Watts per Kilogram}$$
To put that into perspective, a high-performance sports car like a Ferrari or Bugatti usually has a power-to-weight ratio around 400 to 600 Watts per kilogram.
Your tiny plastic micro-drone packs nearly triple the proportional power of a hypercar!
That’s why it accelerates like a rocket ship when you punch the throttle.
- Look at the Thrust Profile (Grams of Lift)
Your four 1102 motors spinning those 45mm propellers at full blast generate a combined maximum of roughly 200 grams of total upward thrust.
$$\text{Thrust-to-Weight Ratio} = \frac{200\text{g Max Thrust}}{47\text{g Total Weight}} \approx 4.25 : 1$$
Your drone can push up into the sky with over 4 times its own weight.
- Coasting vs. Sprinting: Where is the energy going?
This is where your observation about “coasting” efficiency gets really interesting.
Because of those exponential aerodynamic laws we talked about earlier, the energy map of your flight splits cleanly into two modes:
| Flight State | Thrust Needed | Power Drank | The Aerodynamic Reality |
|---|---|---|---|
| Basic Hover (“Coasting”) | 47g (Exactly its own weight) | $\approx$ 13 Watts | High Efficiency: The motors use only about 20% of their total available power just to float. Because it sits in this highly efficient low-RPM zone, you get those long 6-minute cruise sessions! |
| Full Throttle Punch (“Sprinting”) | 200g (Max acceleration) | $\approx$ 64 Watts | Brutal Inefficiency: Moving from a hover to full throttle gives you 4x more thrust, but costs 5x more electrical power. The extra energy is violently eaten up by air resistance and propeller drag. |
🧠 The Engineering Insight
When you write your Python script to analyze your logs, look at the Throttle % vs. Power line.
You’ll see that “coasting” around your living room keeps the drone in an incredibly peaceful, low-drain sweet spot.
The moment you try to fight a gust of wind outside or do a massive loop, you cross a threshold where the drone throws its efficiency away in exchange for pure, raw, physics-defying acceleration.
It’s a beautiful piece of engineering—it leaves 80% of its power completely hidden in reserve, waiting for you to call on it!
That $200\text{g}$ calculation comes directly from real-world bench tests (thrust stands) that pilots and engineers perform on your exact hardware combination!
When companies design motors, they bolt them down to a scale, plug in specific propellers, spin them to 100% throttle, and measure how many grams of physical force push down on the scale.
The math behind that $200\text{g}$ estimate breaks down like this:
1. The Per-Motor Data
For a BetaFPV 1102 motor running at 22,000KV on a fresh 1S LiHV battery ($\approx 4.35\text{V}$), pushing a Gemfan 45mm 3-blade propeller, a single motor generates roughly 48 to 52 grams of raw static thrust at maximum throttle.
2. The Multiplier
Since your Meteor75 Pro has four motors working together:
$$\text{Total Thrust} = 4 \times 50\text{g} = 200\text{ grams of total thrust}$$
📉 Why this matches your real flights (The Reality Check)
This $200\text{g}$ figure is the maximum dynamic burst capability right when your battery is completely fresh.
In real life, that number shifts slightly due to three factors you can actually track in your Python logs:
- Voltage Sag: When you punch to 100% throttle, your battery voltage drops from $4.35\text{V}$ down to maybe $3.9\text{V}$ or $4.0\text{V}$. Because motor RPM drops with lower voltage, your thrust dips closer to $170\text{g} - 180\text{g}$ later in the flight.
- Duct Efficiency: Your Meteor75 Pro frame has plastic guard rings (ducts) around the propellers. These rings actually act like tiny airplane wings, trapping air and increasing thrust by roughly 5% to 10% compared to a drone with open propellers!
- The 80% Throttle Limit: In normal indoor flight, you will find that your drone hovers at roughly 25% throttle. Your data will show that to move up from a hover, you rarely ever need to punch the radio all the way to 100%; you have a massive mountain of extra thrust sitting completely in reserve!
make findingsmake plot-throttle-current
# make telemetry-latest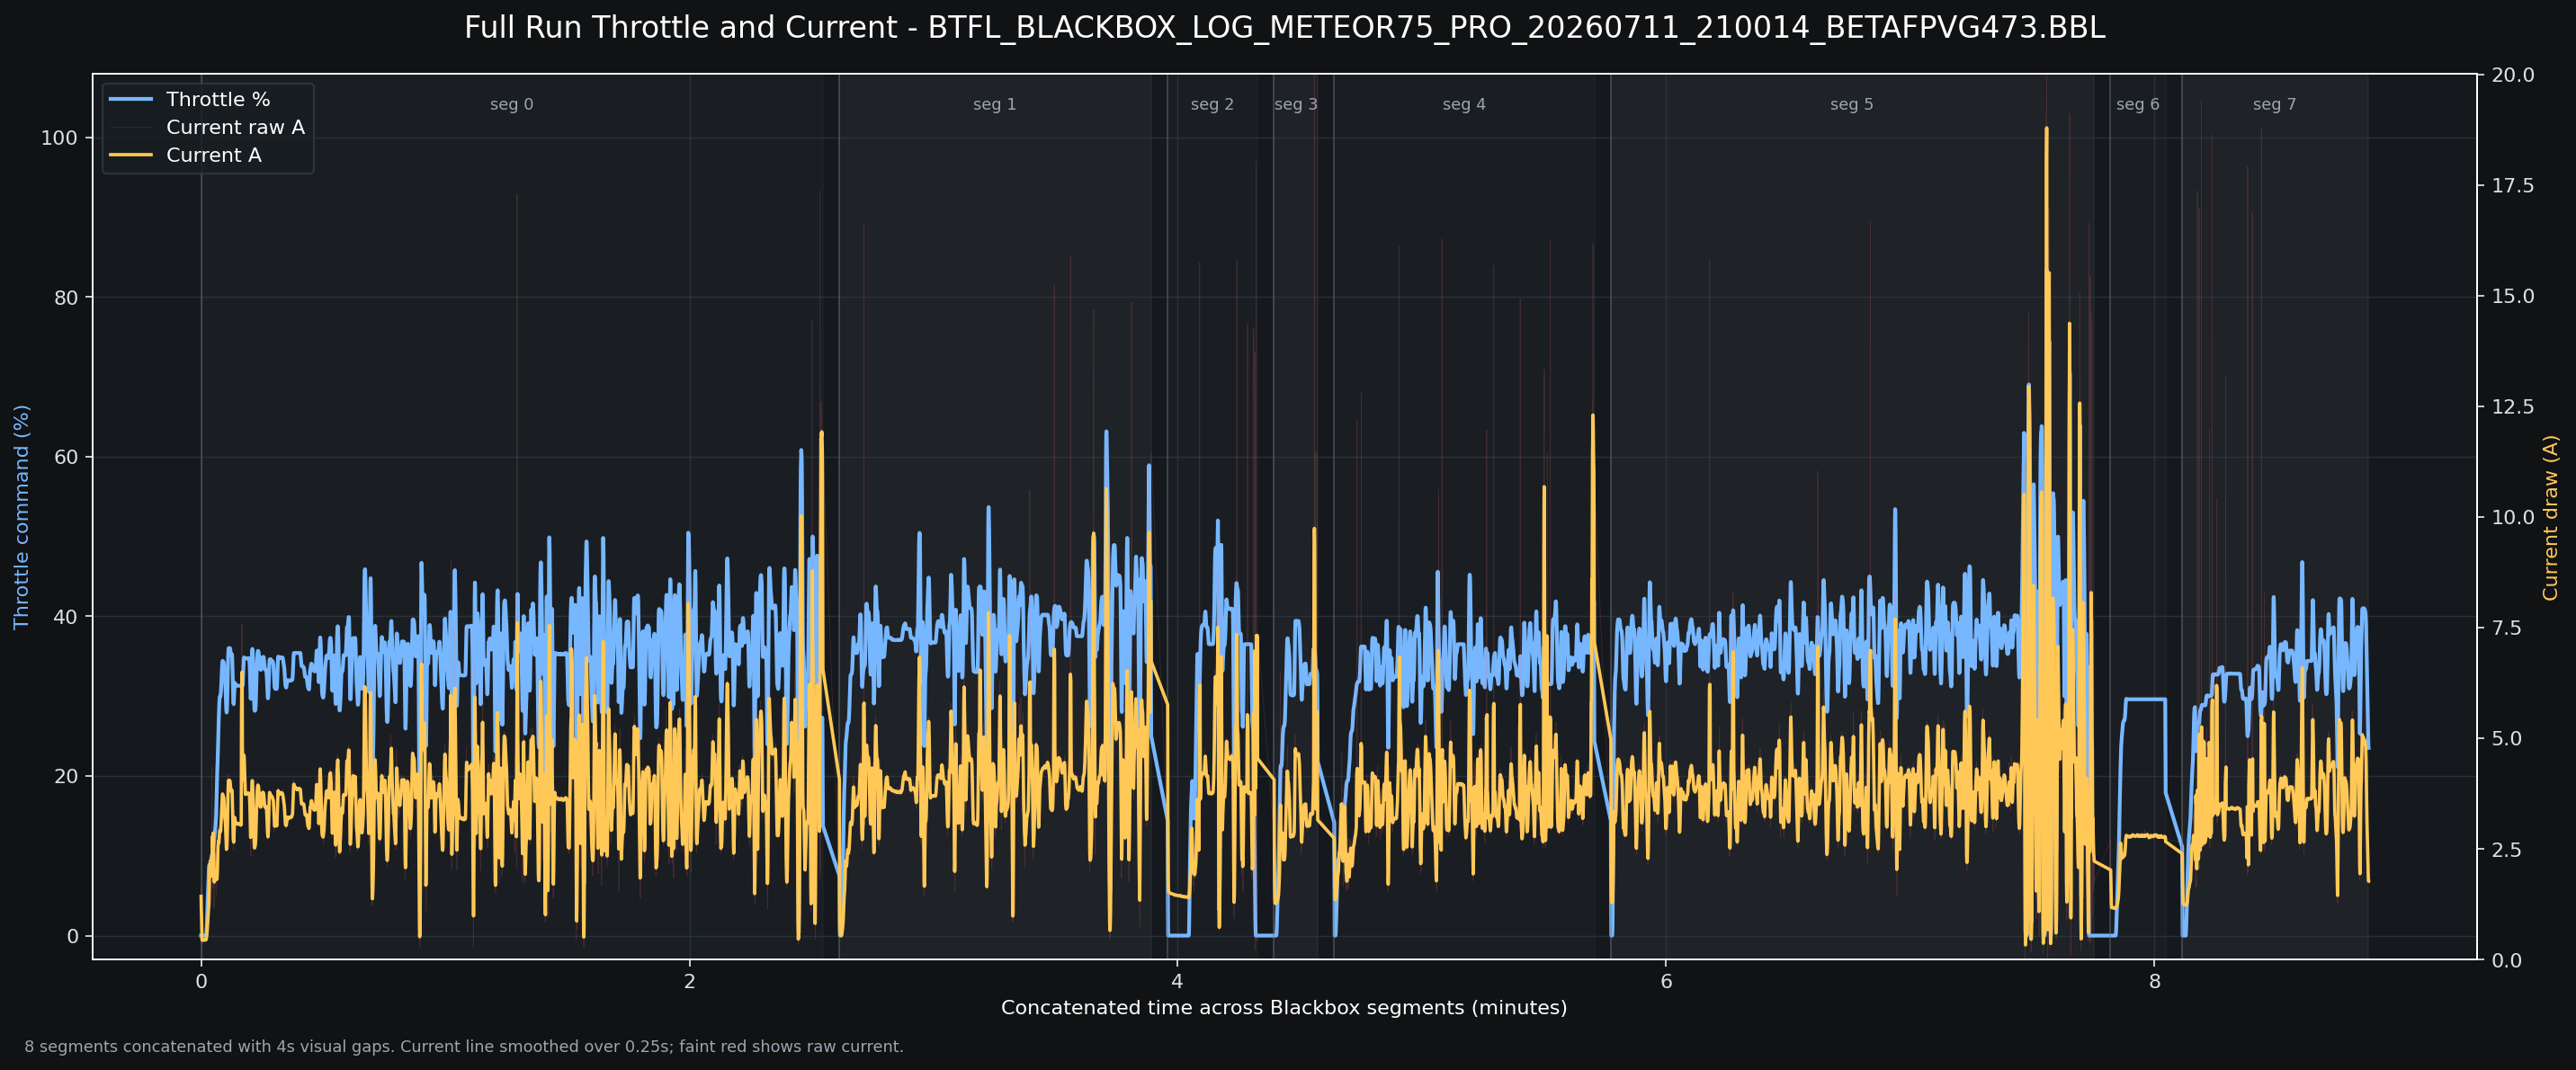
Betaflight
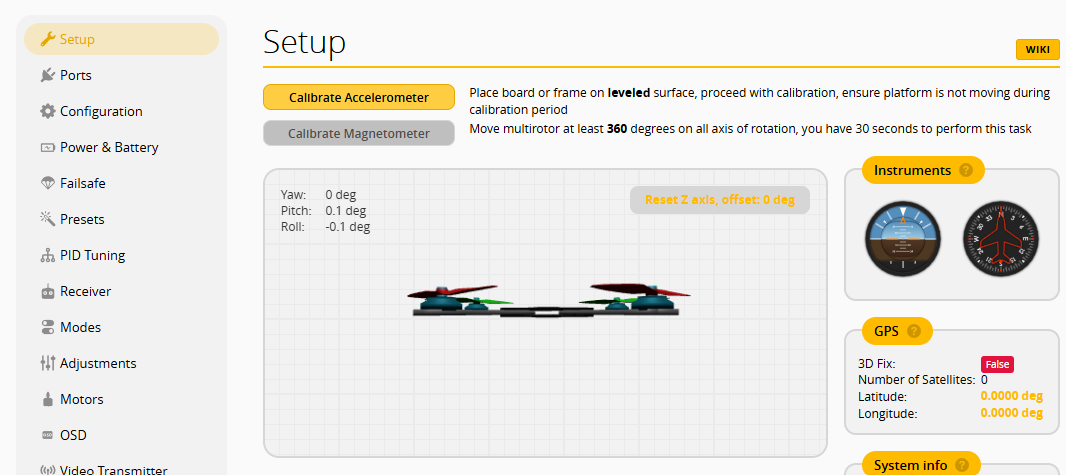
Recently I got to know how OSS is baked into a PWA https://app.betaflight.com/#
Betaflight Telemetry
Also available as PWA: https://blackbox.betaflight.com/
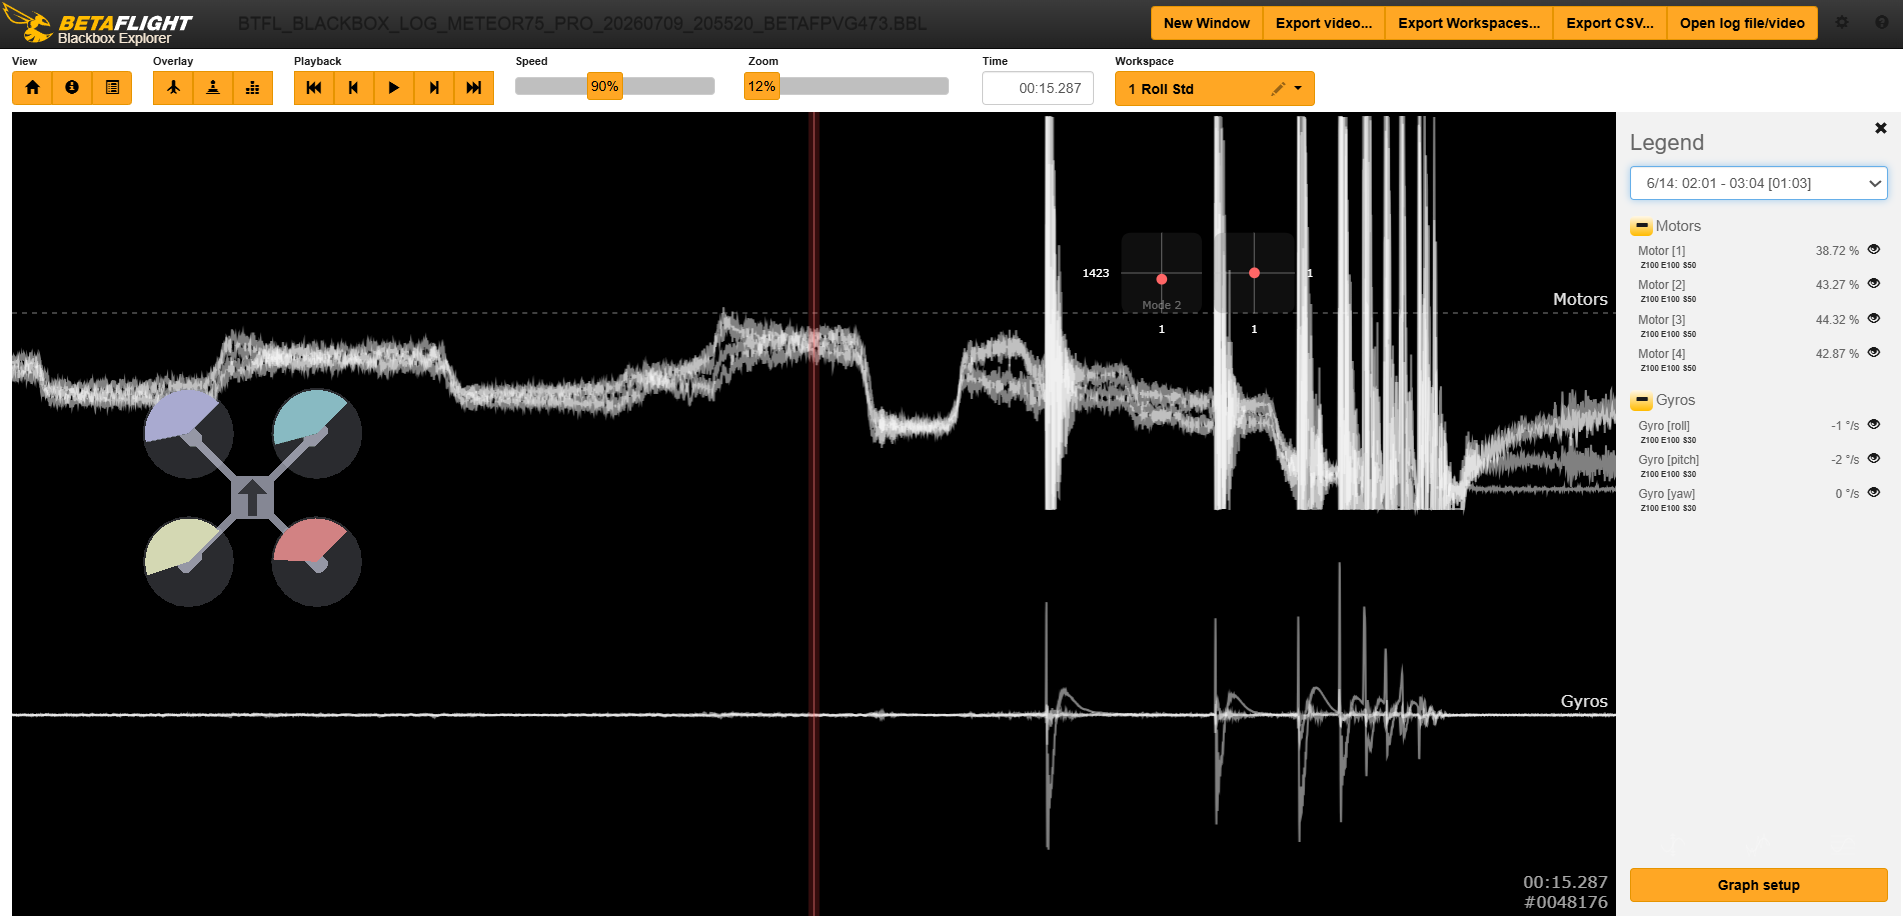
For the meteor 75 pro, one session of 6min filled ~13mb of the 16mb available for BBL logs.
  looptime = 312 us -> ~3205 Hz loop
  Blackbox 1/4 -> ~801 Hz logging
  gyro scaled -> human-usable gyro rate values
I built mine with:
Start-Process .\meteor75_blackbox_report.html
#python .\run_blackbox_report.py --list
#python .\run_blackbox_report.py --index 1
python .\run_blackbox_report.py --index 1 --mass-g 44.0
#For your July 10 segment 0, full duration is about 192.3s, so run:
python .\telemetry_video.py --decoded .
\BTFL_BLACKBOX_LOG_METEOR75_PRO_20260710_103204_BETAFPVG473_decoded
.json --log-index 0 --start-s 0 --duration-s 192.3 --fps 30
#Or add a Make override:
make telemetry DURATION=192.3 Oa5 Pro x Telemetry
Why not bringing the action cam and bake the logs?
make telemetry-latest
#make telemetry-overlay-preview VIDEO="DJI_20260710093712_0013_D.MP4" VIDEO_OFFSET=18.4
make telemetry-overlay-preview VIDEO=DJI_20260712121438_0020_D.MP4 VIDEO_OFFSET=29 COMPOSITE_PREVIEW_OUT=DJI_20260712121438_0020_D_with_telemetry_preview60.mp4

#If the timing looks right, render the full overlay:

#make telemetry-overlay VIDEO=DJI_20260712121438_0020_D.MP4 VIDEO_OFFSET=29
#COMPOSITE_OUT=DJI_20260712121438_0020_D_with_telemetry.mp4

#TELEMETRY_MP4=BTFL_BLACKBOX_LOG_METEOR75_PRO_20260712_115632_BETAFPVG473_telemetry_s2_161s.mp4

#You can override it if needed:
#make telemetry-overlay-preview VIDEO=DJI_20260712121438_0020_D.MP4 VIDEO_OFFSET=29
#TELEMETRY_MP4=your_telemetry.mp4
After flying a few sessions:
make telemetry TELEMETRY_DECODED=BTFL_BLACKBOX_LOG_METEOR75_PRO_20260712_130543_BETAFPVG473_decoded.json TELEMETRY_SEQUENCE=0,1 DURATION=126 FPS=30

make telemetry-overlay-preview VIDEO=DJI_20260712124329_0021_D.MP4 VIDEO_OFFSET=27 TELEMETRY_MP4=BTFL_BLACKBOX_LOG_METEOR75_PRO_20260712_130543_BETAFPVG473_telemetry_s0-1_126s.mp4 COMPOSITE_PREVIEW_OUT=DJI_20260712124329_0021_D_with_telemetry_preview60.mp4
All thanks to ffmpeg, just FYI:
ffmpeg -y -i "DJI_20260713180204_0003_D.MP4" `
  -map 0:v:0 -map 0:a? `
  -vf "scale=1280:-2" `
  -c:v libx264 `
  -pix_fmt yuv420p `
  -crf 23 `
  -preset veryfast `
  -c:a aac `
  -b:a 160k `
  -movflags +faststart `
  "DJI_20260713180204_0003_D_browser.mp4"

#ffmpeg -f concat -safe 0 -i file_list.txt -c copy D:\DCIM\DJI_001\output.mp4
There were some interesting findings and I ended up puting a simple web/app to do this:
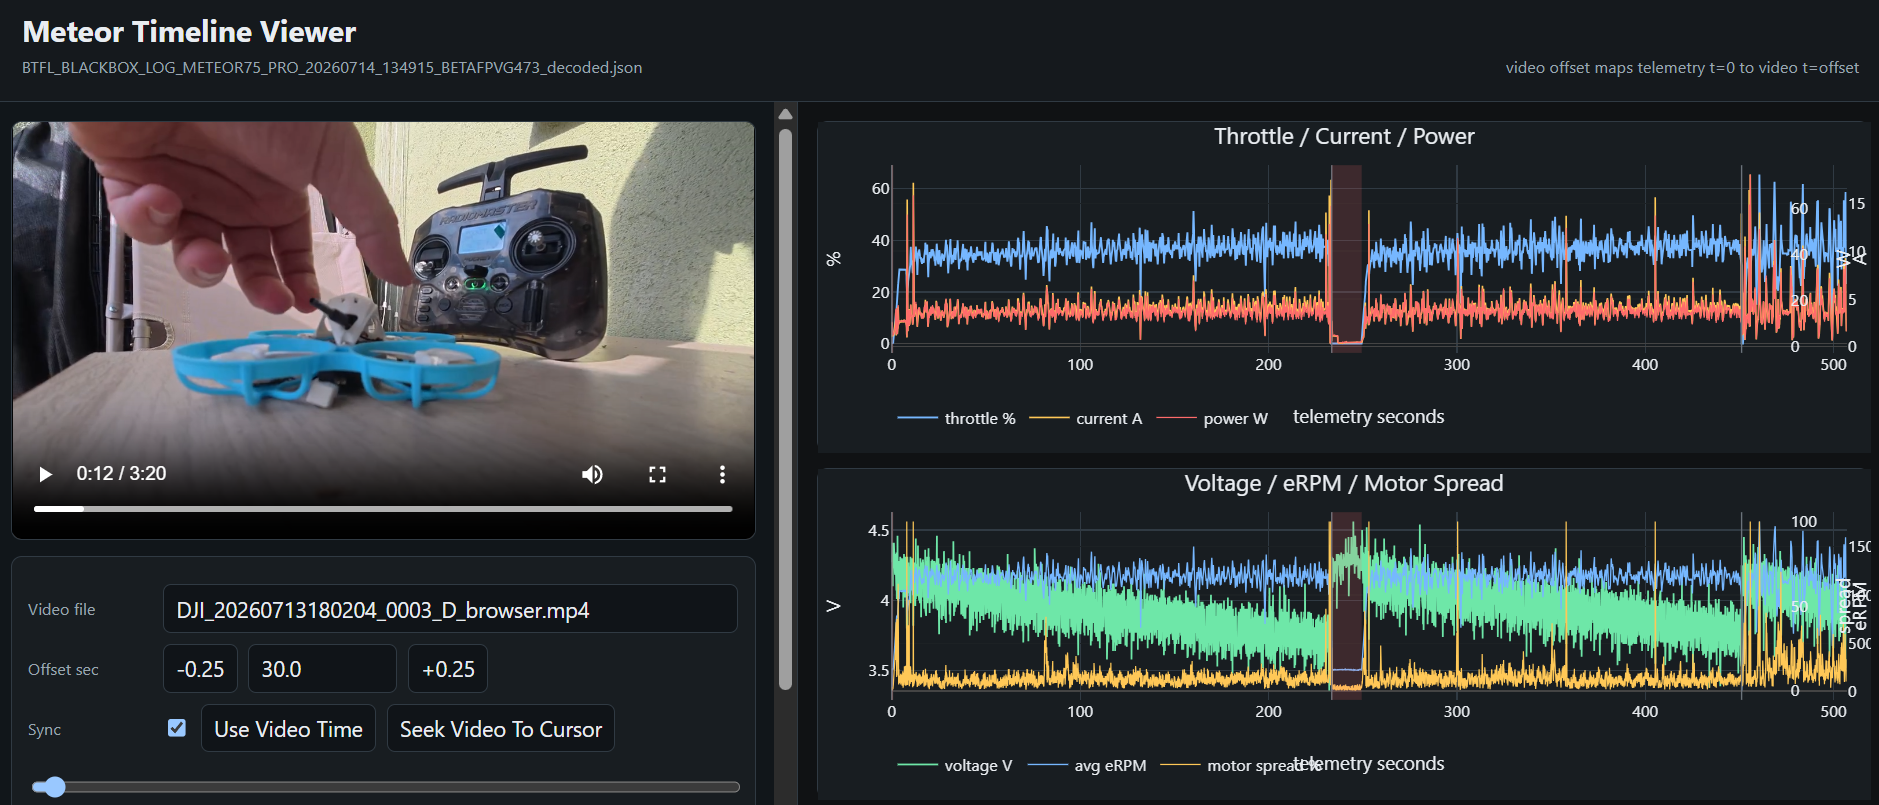
make timeline-viewer TIMELINE_DECODED=BTFL_BLACKBOX_LOG_METEOR75_PRO_20260714_152410_BETAFPVG473_decoded.json TIMELINE_VIDEO=DJI_20260714154902_0002_D_browser.mp4 TIMELINE_LOG_INDEX=5 TIMELINE_OFFSET=0Creating a PWA
Why PWAs?
Common Use Cases
- Serverless Data Tools: Client-side data analytics tools (e.g., CSV analyzers, report generators) where data never leaves the user’s computer, solving compliance and cloud compute cost concerns.
- Interactive Code Playgrounds: In-browser coding tutorials, algorithm visualizers, or documentation sites (similar to JupyterLite or PyScript).
- Local-First Productivity Apps: Specialized tools requiring complex algorithmic calculation, image manipulation, or simulation that need to work on laptops or tablets with spotty network access.
These three technologies form a modern stack for running powerful, offline-first client applications directly in the web browser without managing dedicated backend infrastructure.
| Technology | What It Is | Primary Role | Key Advantage |
|---|---|---|---|
| WebAssembly (Wasm) | Low-level binary instruction format | Runs precompiled languages (C, C++, Rust, Go) in the browser | Near-native execution speed; bypasses JS parsing overhead |
| Pyodide | CPython runtime compiled to Wasm | Runs Python code and data science libraries entirely client-side | Native Python ecosystem (NumPy, Pandas, SciPy) directly in the browser |
| PWA | Web application enhanced with modern browser APIs | Provides installability, caching, and an app-like shell | Works offline via Service Workers; installs on mobile and desktop |
How They Work Together
Wasm provides the execution foundation: Browsers historically could only execute JavaScript. Wasm provides a fast, sandboxed virtual machine that allows languages other than JS to run inside browser threads.
Pyodide sits on top of Wasm: Because Python’s C reference implementation (CPython) is written in C, it was compiled into a Wasm binary (
pyodide.asm.wasm) via Emscripten. It bridges Python and JavaScript, allowing you to pass objects back and forth and manipulate the browser DOM from Python.PWA delivers the full application: A PWA wraps the interface. Its Service Worker intercepts network requests, downloading the heavy Pyodide runtime and Wasm binaries once and caching them locally via the Cache API. The user can launch the app from their home screen and run full Python analyses completely offline.
PWA (Progressive Web App) is a set of browser capabilities that turn a website into an installable, offline-capable application.
A PWA almost always uses CSR under the hood, but a standard CSR app lacks the offline caching and operating-system integration that define a PWA.
| Feature | Standard CSR (e.g., standard Vite + React/Vue) | Progressive Web App (PWA) |
|---|---|---|
| What it describes | How the UI is built (JavaScript renders HTML in the browser). | How the app behaves (installable, offline-first, native-like). |
| Offline Support | ❌ None. Shows the browser’s “No Internet” screen. | ✅ Full. Service Workers cache HTML, JS, Wasm, and data for offline use. |
| Installability | ❌ Runs solely inside a standard browser tab. | ✅ Can be installed to desktop/home screen with a standalone app window. |
| Core Enablers | A JavaScript bundle and an empty root <div id="root"></div>. | Web App Manifest + Service Worker (with Cache API / IndexedDB). |
| OS Integration | ❌ Standard browser limitations. | ✅ App icon, launch splash screen, badge counts, file system access, Web Share. |
| Background Work | ❌ Halts when the tab closes. | ✅ Can run background sync or receive push notifications via Service Worker. |
Think of CSR as the engine and PWA as the vehicle chassis and wheels:
┌───────────────────────────────────────────────────────────┐
│ Progressive Web App (PWA) Layer                           │
│  - Web App Manifest (standalone window, home screen icon) │
│  - Service Worker (offline caching, network interception) │
│                                                           │
│   ┌───────────────────────────────────────────────────┐   │
│   │ Client-Side Rendered (CSR) App                    │   │
│   │  - Framework code (React, Vue, Svelte, etc.)      │   │
│   │  - Client runtime (Pyodide, Wasm, State Stores)   │   │
│   │  - DOM manipulation and UI routing                │   │
│   └───────────────────────────────────────────────────┘   │
└───────────────────────────────────────────────────────────┘
Conclusions
Create this quick pwa here: https://fpv-logs.pages.dev/
make deploy PROJECT_NAME=fpv-logs There is an ESP32 / ESP8285 inside most of these drons
Exactly the same that are inside IoT projects that you can get done:


flowchart LR
    %% --- Styles ---
    classDef free fill:#E8F5E9,stroke:#2E7D32,stroke-width:2px,color:#1B5E20;
    classDef low fill:#FFF9C4,stroke:#FBC02D,stroke-width:2px,color:#FBC02D;
    classDef mid fill:#FFE0B2,stroke:#F57C00,stroke-width:2px,color:#F57C00;
    classDef high fill:#FFCDD2,stroke:#C62828,stroke-width:2px,color:#C62828;
    classDef bridge fill:#E3F2FD,stroke:#1565C0,stroke-width:3px,color:#0D47A1;

    %% --- Nodes ---
    L0("Free Content
( DIY = $0)"):::free
    L1("Web Audits 🛡️
(Reveals Problem )"):::free
    L11("Tech Blog/Youtube"):::free
    L12("ebooks"):::free
    L13("mbsd framework OSS"):::free
    L14("OSS guides"):::free

    L3("Done With You
(Trade $$ for knowledge)"):::mid
    L4("Done For You
(Trade $$$ for outcomes)"):::high
    L44("GenBI
Shopify PoC"):::bridge
    L45("Real Estate
Funnel Bot"):::bridge
    L46("Energy Solutions
HVAC"):::bridge
    L47("IoT Solutions
Crops"):::bridge
    L48("Weddings
Photo QR"):::bridge

    %% --- Connections ---
    L0 --> L1
    L1 --> L3
    L12 --> L3
    L13 -->|MultiBodySystemsDynamicscom| L3
    L14 -->|FOSS Engineer| L3
    L0 --> L11
    L0 --> L12
    L0 --> L13
    L0 --> L14
    L3 --> L4
    L4 -->|Productized Service| L44
    L4 -->|Productized Service| L45
    L4 -->|Productized Service| L46
    L4 -->|Productized Service| L47
    L4 -->|Productized Service| L48
FAQ
Important before flying
Check applicable regulations: like
https://uav.pansa.pl/pilot-profileand https://dronemap.pansa.pl/ ,https://drony.gov.pl/drone-towerCheck weather patterns:
https://www.windy.com
Buying second hand drons x Telemetry
What to do before connecting to your laptop:
- Props out
- No loose wires
- VTX antena on or it will fry in 60s
Then just https://app.betaflight.com/ and get the logs
The iflight zidora has 32mb of flash
Zidora 32mb 🚀
Got what i wanted and then erase_flash
The ELRS receiver required the 4s battery to be connected, otherwise it stays asleep.
Identified the Brain: We extracted the exact factory firmware profile from the flight controller (
IFLIGHT_F722_TWING).Mapped the Hardware Highway: We dug into the hardware resource codes to verify that the ExpressLRS receiver is physically soldered to the UART1 processor pins.
Resolved Betaflight Port Conflicts: We discovered a software clash where multiple ports were competing to read the receiver. We cleanly deactivated the duplicate on UART3 and locked the communication exclusively to UART1 (
serial 0 64).Isolated the Link Issue: By evaluating the
0/250telemetry readout on your RadioMaster Pocket, we diagnosed that the physical link is failing due to an existing security lock/mismatched binding phrase on the receiver chip, rather than a Betaflight configuration error.
Across all active iFlight samples
- p95 current: 31.40 A
- p95 power: 469 W
- p99 current: 54.20 A
- p99 power: 766 W
Across the main useful segments #63/#67/#68/#69/#72
- p95 current: 31.80 A
- p95 power: 474 W
- p99 current: 54.60 A
- p99 power: 768 W
So the practical answer is: around 31-32 A and 470 W at p95.
For context, the extreme tail is where it gets suspicious:
- p99.9: about 101-106 A, 1.39-1.40 kW
- max: 240.8 A, 4.23 kW
That shape reinforces the earlier read: normal-ish bulk behavior, but the current sensor/logging has suspicious spikes or calibration issues in the high tail.
The First Drone: iFlight Cidora SL5
the ELRS firmware was ExpressLRS HappyModel EP1/EP2 2.4GHz RX Firmware Rev. 3.4.3 (41daca) CE_LBT
Choose a file to update module firmware. Select the correct .bin file for Unified_ESP8285_2400_RX otherwise a bad flash may occur. If this happens you will need to recover via USB/Serial. You may also download the currently running firmware.
And betaflight 4.5.5 BTFL
The machine we just finished fixing the wiring maps on is the iFlight Cidora SL5.
Its Core Components:
- Flight Controller (FC): iFlight SucceX-D F7 TwinG (Running the
IFLIGHT_F722_TWINGBetaflight target). - Processor: STM32F722.
- Receiver: External ExpressLRS (ELRS) Receiver (wired physically to UART1/Pins A09 & A10).
- Peripherals: A Video Transmitter (VTX) equipped with SmartAudio (labeled with that green “SA” heat shrink you just isolated).
Eachine Novice-IV 🚀
Yes, we are exactly at the same step for both drones! Both quads are structurally fully configured inside Betaflight, and both are completely stuck on the exact same roadblock: a mismatching ExpressLRS security handshake.
🔍 Is it an AIO Board?
Yes, the Eachine Novice-IV uses a highly integrated AIO (All-In-One) flight stack.
However, there is a major hardware plot twist hiding inside the blueprint you just pulled: This drone didn’t originally come with ExpressLRS.
From the factory, the Novice-IV shipped with a tiny RadioMaster R81 receiver running the legacy FrSky D8 protocol wired directly to UART6.
When the previous owner converted it over to ExpressLRS, they did one of two things:
- They tucked a microscopic ELRS nano receiver somewhere completely hidden (like underneath the main AIO board or wrapped inside heat shrink right behind the camera).
- Or they completely replaced the stock flight controller stack with a newer AIO board that has a modern ExpressLRS receiver chip baked directly into the main circuit board.
To get your sticks moving, we just need to get one of them successfully through the ExpressLRS Wi-Fi override page.
Since the Novice-IV is plugged in right now, let’s look for that ExpressLRS RX hotspot network on your phone or laptop.
Once we change that phrase on the webpage, this machine will finally spring to life!
Inspected and documented it in Eachine/README.md.
  Short read: this Eachine / Novice-IV log looks mostly healthy. It decoded into 9 segments, with no failsafe samples, no RX-lost samples, and no voltage problem. Voltage/current look much more plausible than the iFlight current readings:
  worst active voltage is 14.02 V, and peak current is 29.24 A.

  Main caveat: segment #4 shows meaningful motor saturation. About 39.12% of active samples have a motor pinned at >=2040, mainly motors 1 and 3. That could just be a short hard maneuver, but on a second-hand drone I’d physically check
  props, motor smoothness, frame twist, and whether one diagonal is working harder than it should.
Telemetry notes:
- Voltage/current/power: available and usable.
- GPS fields: present in segments #5-#8, but GPS_numSat stays 0, so it does not look like useful GPS fix data.
- eRPM: absent, same as iFlight. Use motor[0..3] only as a command proxy, not measured RPM.
Generated report is here: Eachine/BTFL_BLACKBOX_LOG_NOVICE-IV_20260718_120247_BETAFLIGHTF4_report.html.
- Logged max power: 428 W in segment #5 - This is ~ x4 to the one i saw in the meteor
- Same segment: 29.24 A peak current
- Long flights: segment #7 peaks at 336 W, segment #8 peaks at 274 W
The Second Drone: The “8MB Flash” Quad
The second quad you just brought over to the workspace—the one whose Blackbox data you are currently downloading—is the iFlight Nazgul5 V2 (or the matching analog equivalent using that custom green 3D-printed layout).
Its Core Components:
- Flight Controller (FC): iFlight SucceX-E F4 or SucceX-E F7 flight stack.
- Storage Chip: Winbond 8MB Onboard Flash Memory (dedicated exclusively to internal binary Blackbox logging).
- Motors: XING-E Pro 2207 Brushless Motors (running a high-KV variant, typically 2450KV or 2750KV built explicitly for snappy 4S freestyle configurations).
- 4.5.2 btfl
set align_board_yaw = 180 and set align_board_yaw = 90 made the pitch and roll be in the right place
Then, just have a look to dump to avoid trial and error of UART, CRSF etc
With the full dump in hand, we can instantly read exactly:
The Ports: Which exact UART pin the receiver is soldered to (serial).
The Protocol: If it’s configured for CRSF (ExpressLRS), SBUS, or something else.
The Features: Every master setting, channel map, and hidden configuration the previous owner left behind.
Here is exactly what is inside this second machine according to the data:
The Drone Identity: This is an Eachine Novice-IV quad running a classic BETAFLIGHTF4 target on an STM32F405 processor.
The Receiver Port: Your ExpressLRS receiver is configured on UART6 (serial 5 64).
The Protocol: It is already correctly set to CRSF (set serialrx_provider = CRSF), which is exactly what ExpressLRS needs to talk to your Pocket.
Bonus Component Found: You have a GPS rescue module configured on UART1 (serial 0 2048).
I’d treat the first power-up as a bench check, not “ready to rip”.
First time:
- Props off.
- Power from USB first, check Betaflight config.
- Then plug LiPo in with props still off.
- Check no smoke, no hot ESC/motor/VTX, no weird beeping.
- Confirm receiver, modes, arming, failsafe.
- Check motor direction with props off.
- Then do a short hover test outside.
For batteries, these look like 4S drones from the logs.
4S LiPo voltage guide
- Fully charged: 16.8 V total, 4.20 V/cell
- Nominal: 14.8 V total, 3.70 V/cell
- Good landing target under load: 14.0-14.4 V, 3.50-3.60 V/cell
- Avoid pushing below under load: 13.2 V, 3.30 V/cell
- Resting after flight should ideally rebound to: 14.4-15.2 V, 3.60-3.80 V/cell
- Storage charge: 15.2-15.4 V, 3.80-3.85 V/cell
For your first flights, be conservative:
- Set OSD warning around 14.4 V.
- Land around 14.0 V under load.
- After landing, check resting voltage. If it rebounds to around 14.6-15.0 V, you are in a healthy range.
- If it rests below 14.0 V, you flew it too low.
For the specific drones:
- Eachine: looks safer/cleaner electrically. Check props/motors because motors 1 and 3 worked hard in one segment.
- iFlight: be more cautious. The voltage sag in segment #63 and weird current spikes mean I’d do very short hover tests first and check battery/XT60/ESC heat.
Biggest practical advice: on 4S, voltage sag happens fast when you punch throttle.
Do your first packs gently, land early, and inspect motor/ESC/battery temperature after each minute-long test.
Correct: if both connect to Betaflight Configurator, the flight controllers are alive.
The MCU, USB interface, firmware, and basic board power path are working.
But that does not prove the whole drone is healthy. Betaflight login does not fully validate:
- ESCs / 4-in-1 ESC
- motors
- receiver link and failsafe
- VTX
- GPS
- current/voltage sensor calibration
- gyro health under vibration
- motor output pads/signals under LiPo power
- power system under load
Best next checks, props off:
- USB only
- Check gyro moves correctly in Setup tab.
- Check receiver channels move correctly.
- Check modes: arm, angle/acro, beeper if present.
- Check failsafe by turning radio off and seeing RX loss behavior.
- LiPo plugged in, props still off
- Listen for ESC startup tones.
- Check Betaflight sees battery voltage correctly.
- Check nothing heats quickly: FC, ESC, VTX, motors.
- Use Motors tab very gently to spin each motor.
- Confirm motor order and direction.
- Before props
- Verify prop orientation.
- Verify arming angle/settings.
- Set OSD voltage warning conservatively.
- Set a beeper or turtle mode only if configured correctly.
So: not fried FCs, yes. Fully proven airworthy, not yet.
WHY binding the meteor was easier?
The reason your Meteor tiny whoop bound seamlessly over USB with no battery plugged in boils down to two distinct engineering choices: Power Routing and Receiver Architecture.
1️⃣ 1S Power Routing vs. 4S Power Routing
Your Meteor (1S Whoop): Because it is designed to run on a tiny 1S battery (~4.2V), the entire board—including the receiver—operates natively on low voltage. When you plug in a 5V USB cable, the computer provides more than enough voltage to easily power up the flight controller and the receiver simultaneously.
Your Eachine (4S Freestyle): This drone is built to handle a much higher voltage (~16.8V). To protect the sensitive radio receiver from frying, the manufacturer isolates the receiver onto a completely separate power regulator circuit. This circuit is strictly engineered to only wake up when the main battery is plugged into the XT30/XT60 connector. USB power doesn’t bridge across to it.
2️⃣ Integrated SPI Receivers
Many older or ultra-lightweight BetaFPV Meteor whoops utilize an SPI Receiver.
- An SPI receiver isn’t a separate physical chip wired to the board; it is directly baked into the main flight controller processor itself.
- Because it shares the exact same “brain” chip as the flight controller, if the USB cable powers up Betaflight, it automatically powers up the receiver. The manual
bind_rxcommand works instantly because Betaflight is talking to a part of itself.
On your Meteor, the receiver is essentially a sub-component of the main processor that runs easily on USB power.
On your Eachine, the receiver is a completely independent, distinct hardware component sitting on a dead power rail until the battery wakes it up.
Plug that battery into the Eachine (props off!), give it 60 seconds, and let’s get that Wi-Fi network onto your phone screen!
#nmcli dev wifi list
nmcli dev wifi connect "ExpressLRS RX" password "expresslrs"
#Device 'wlp3s0' successfully activated with '27d2f846-...'.
If you do nmcli dev wifi list
IN-USE  BSSID              SSID                        MODE   CHAN  RATE        SIGNAL  BARS  SECURITY
        1C:56:8E:26:1A:F8  TOTOLINK_LR350              Infra  1     270 Mbit/s  92      ▂▄▆█  WPA1 WPA2
        4E:EB:D6:10:26:0F  ExpressLRS RX               Infra  1     54 Mbit/s   77      ▂▄▆_  WPA2
        B8:A5:35:CB:9F:18  DN5CR18                     Infra  6     405 Mbit/s  77      ▂▄▆_  WPA2
Inside the https://github.com/ExpressLRS/ExpressLRS portal http://10.0.0.1/: ISM vs CE_LBT regions
If you need to change between them, the receiver is easier: https://expresslrs.github.io/web-flasher/
- FCC = ISM (The global standard profile that matches your RadioMaster Pocket’s ism2g4 setting).
- LBT = CE_LBT (The specific European protocol your drone was previously locked onto).
Download Firmware File(s)
The firmware file(s) have been configured for your BETAFPV 2.4GHz Nano RX with the specified options.
To flash the firmware file to your device, put it into WiFi mode and connect to it via the browser then upload the ELRS-v3.6.4-betafpv.rx_2400.nano-FCC-bindphrase.bin.gz file on the Update tab.
The firmware file ELRS-v3.6.4-betafpv.rx_2400.nano-FCC-bindphrase.bin.gz should be flashed as-is, do NOT decompress or unzip the file or you will receive an error.
Which generated an incorrect ELRS-v3.6.4-betafpv.rx_2400.nano-FCC-bindphrase.bin.gz to overwrite the backed up DIY_2400_RX_ESP8285_SX1280_3.2.0 (8d3388).bin
See:
Choose a file to update module firmware. Select the correct .bin file for DIY_2400_RX_ESP8285_SX1280 otherwise a bad flash may occur. If this happens you will need to recover via USB/Serial. You may also download the currently running firmware.So i asked codex and found in the web: https://www.expresslrs.org/quick-start/receivers/diy2400/
Flashing via Passthrough
Targets:
DIY_2400_RX_ESP8285_SX1280_via_BetaflightPassthrough
DIY_2400_RX_STM32_CCG_Nano_v0_5_via_BetaflightPassthrough
Codex x git OSS - helped me get the right firmware
What was going on with DIY_2400_RX_ESP8285_SX1280?
Short version: it did not disappear from ExpressLRS history. It stopped being shown as a normal Web Flasher hardware target because ExpressLRS moved ESP-based receivers toward unified firmware targets plus product-specific metadata.
The backed-up firmware name:
DIY_2400_RX_ESP8285_SX1280_3.2.0 (8d3388).binpoints to ExpressLRS tag 3.2.0, commit 8d3388ef3369a2d8a64f92a80e42acb29f8e513e.
After cloning the OSS repos, the audit trail was:
git clone https://github.com/ExpressLRS/ExpressLRS.git ~/Downloads/ExpressLRS
git clone https://github.com/ExpressLRS/Targets.git ~/Downloads/ExpressLRS-Targets

git -C ~/Downloads/ExpressLRS grep -n "DIY_2400_RX_ESP8285_SX1280" 3.2.0
git -C ~/Downloads/ExpressLRS log --all --oneline -S "DIY_2400_RX_ESP8285_SX1280" -- .
At 3.2.0, the old PlatformIO environments still existed:
src/targets/diy_2400.ini:59 [env:DIY_2400_RX_ESP8285_SX1280_via_UART]
src/targets/diy_2400.ini:63 [env:DIY_2400_RX_ESP8285_SX1280_via_BetaflightPassthrough]
src/targets/diy_2400.ini:66 [env:DIY_2400_RX_ESP8285_SX1280_via_WIFI]
But the hardware selector metadata already started treating the old name as a prior target name for product-specific entries:
src/hardware/targets.json:109 "prior_target_name": "DIY_2400_RX_ESP8285_SX1280"The important commits were:
2c2114a1  2022-05-22  Unified ESP targets (#1552)
5279995f  2023-07-20  Append prior target name to firmware (#2306)
2c5bfcb8  2023-09-18  Use external targets repo (#2400)
The current Web Flasher target metadata now lives in the external ExpressLRS/Targets repo. There, the BetaFPV AIO and Lite targets map back to the old name:
"product_name": "BETAFPV 2.4GHz AIO RX",
"platform": "esp8285",
"firmware": "Unified_ESP8285_2400_RX",
"prior_target_name": "DIY_2400_RX_ESP8285_SX1280"
So the Web Flasher path is not:
DIY devices -> 2.4GHz Receiver -> DIY_2400_RX_ESP8285_SX1280For this board family it is more likely:
BETAFPV -> 2.4GHz Receiver -> BETAFPV 2.4GHz AIO RXor, depending on the actual receiver board:
BETAFPV -> 2.4GHz Receiver -> BETAFPV 2.4GHz Lite RXThe confusing part: the receiver web UI can still warn about DIY_2400_RX_ESP8285_SX1280, because that was the target name baked into older firmware. The modern selector uses product targets and the unified ESP8285 firmware underneath:
Unified_ESP8285_2400_RX_via_WIFI
Unified_ESP8285_2400_RX_via_BetaflightPassthrough
Unified_ESP8285_2400_RX_via_UART
Practical lesson: do not blindly match the old Web UI target string to the current dropdown.
Check prior_target_name, platform, and the real board/product target first.
Yep, happened here.
Thx to codex i got /home/jalcocert/Downloads/elrs/DIY_2400_RX_ESP8285_SX1280_3.2.0_8d3388_FCC-ISM_via_WIFI.bin at FCC
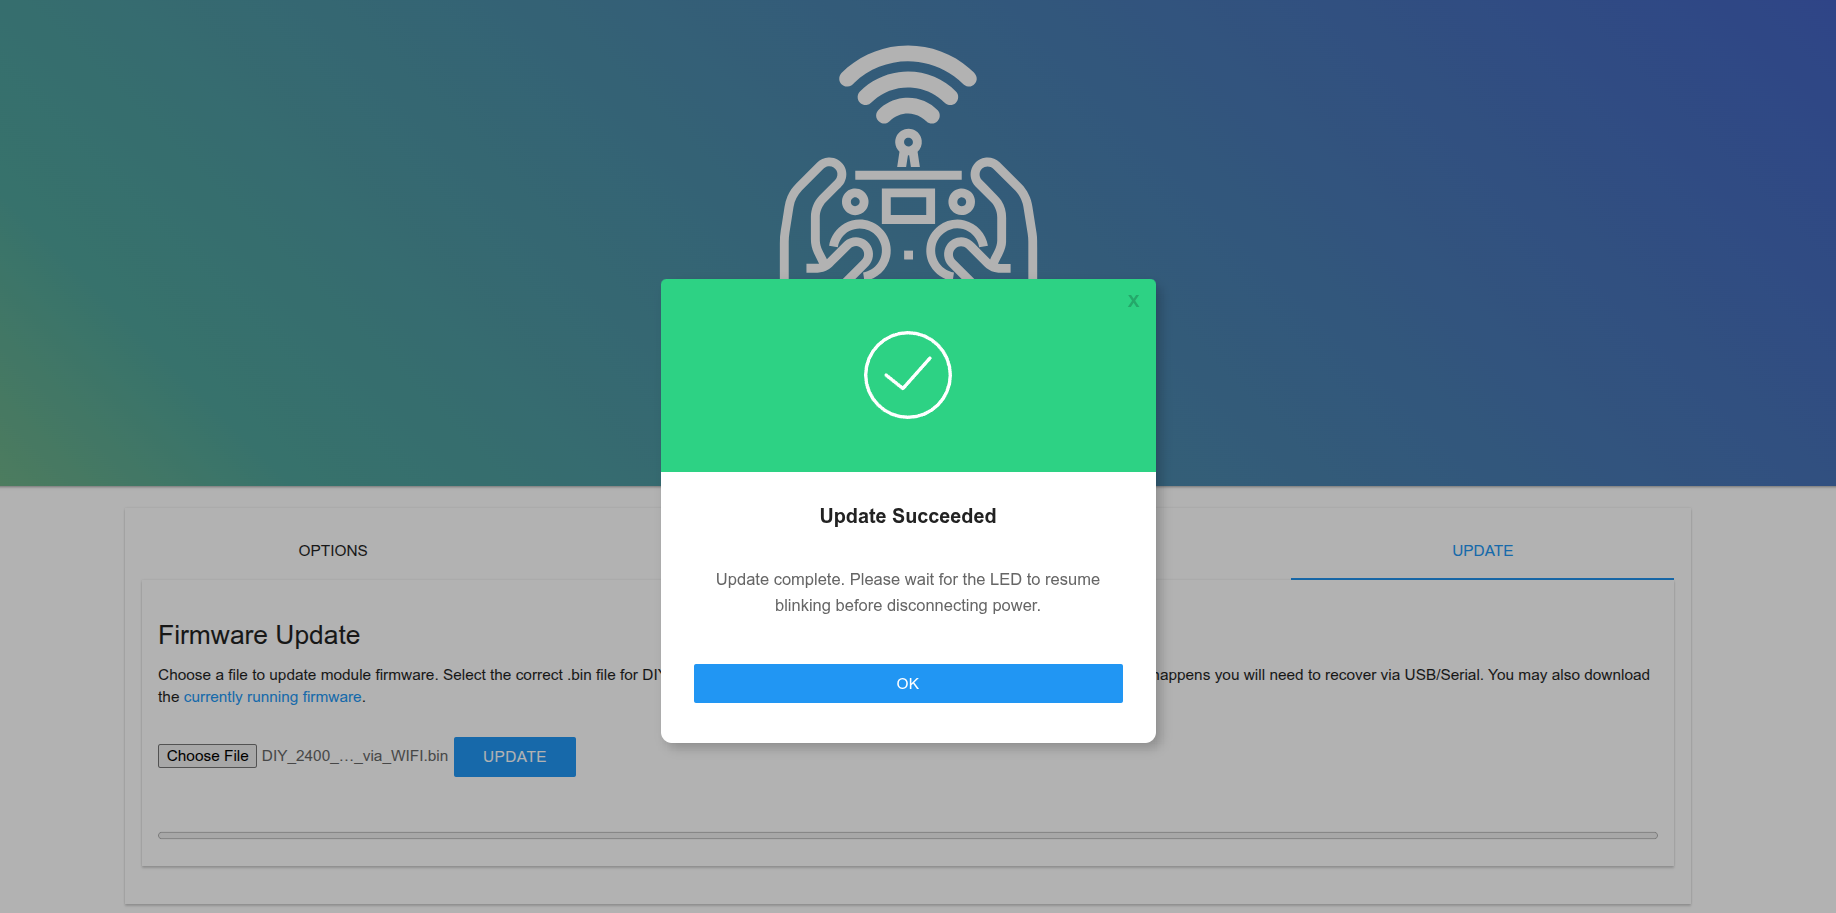
the pocket cna also emit wifi ExpressLRS TX and give you that section for you to update it
You will see sth like 140,79,0,152,91,72 which gets updates as soona s you ad your passphrase in the web ui and flash it
The reason the Meteor bound perfectly via Betaflight is because it uses an SPI ExpressLRS receiver:
💡 The Difference: SPI vs. Serial (UART)
The Meteor (SPI): On most Meteor tiny whoops, the ExpressLRS receiver isn’t a separate chip—it is physically baked right into the main flight controller circuits.
Because Betaflight literally is the operating system running that chip, it has a dedicated “Bind Receiver” button in the GUI and handles the connection directly.
Your New Drone (Serial UART): The firmware you just flashed (DIY_2400_RX_ESP8285_SX1280) is for a true, standalone external serial receiver.
It acts like its own independent little computer.
Betaflight just listens to it over a serial wire, but has no control over its actual radio pairing settings.
Testing Motors
Props out first!
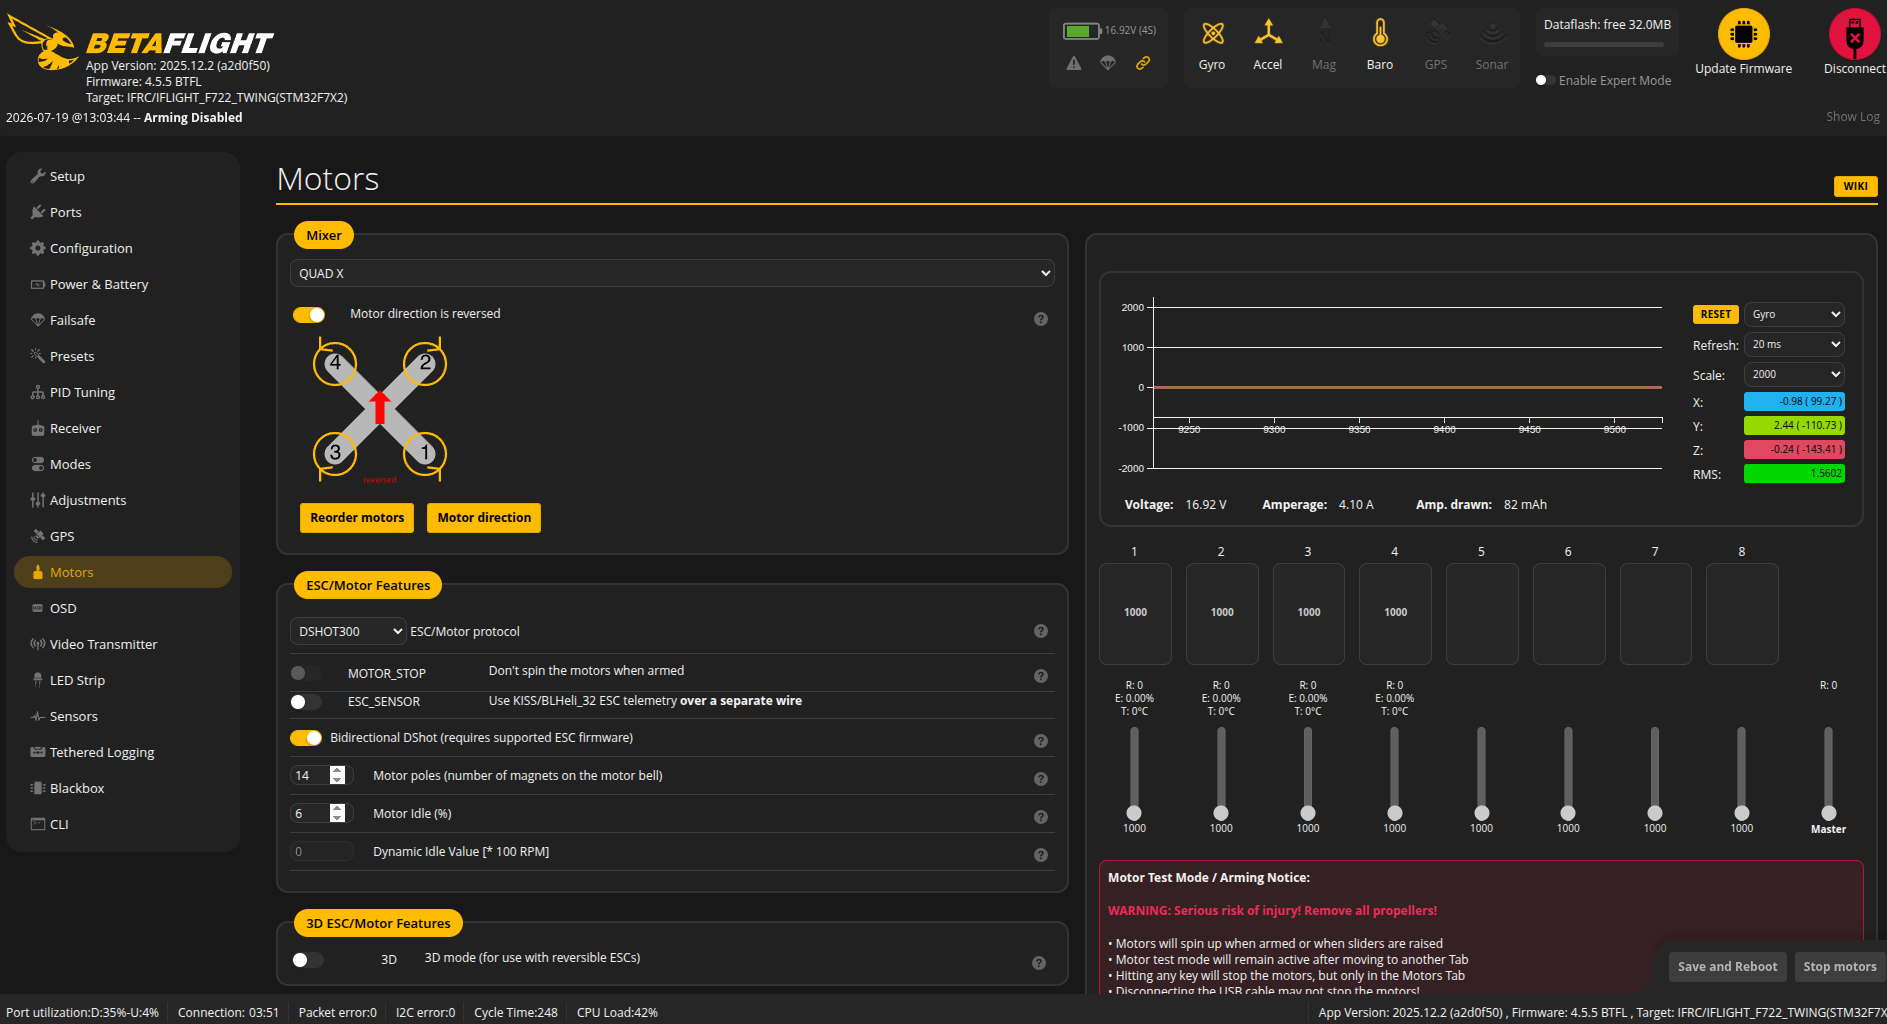
Yep, there is power:
The Golden Pre-Flight Checklist
Before you head outside and throw this thing in the air, you need to do three critical hardware checks on the bench (with the USB plugged into Betaflight, but absolutely NO PROPELLERS ON THE DRONE).
Skipping these checks is the #1 reason custom drones instantly flip over, freak out, or fly away on their first launch.
1️⃣ Check 1: Motor Direction & Ordering
- Put the drone on your desk facing completely away from you (camera pointing forward).
- Go to the Motors tab in Betaflight.
- Toggle the safety switch on the screen that says “I understand the risks…”.
- Gently plug in your 4S battery.
- Use the individual sliders (1, 2, 3, 4) to spin up one motor at a time at a very low speed.
- Verify two things:
- Location: When you raise slider #1, does the rear-right motor spin? (Look at the 3D model diagram on the screen to match the numbers).
- Direction: Lightly touch the side of the spinning motor with a piece of paper or your finger. Is it spinning the exact direction the arrow shows on the Betaflight screen?
2️⃣ Check 2: Gyro/Board Orientation
- Go to the Setup tab (the very top tab on the left menu).
- Look at the 3D model of the drone on the screen.
- Pick up your actual drone and tilt its nose down. Does the 3D model tilt its nose down?
- Roll it to the right. Does the 3D model roll to the right?
If the model moves in the opposite or wrong direction, your flight controller orientation settings are wrong, and the drone will instantly flip and crash the moment you try to take off.
3️⃣ Check 3: Failsafe Test
- While looking at the Receiver tab, turn your RadioMaster Pocket OFF.
- Watch the bars on the screen. The Throttle bar should instantly drop down to
885or1000, and the ARM channel should drop back down to its disarmed state (1000). - This ensures that if you lose radio connection mid-air, the drone will immediately shut off its motors and fall safely instead of flying away into the clouds.
🛸 Ready for the Field?
Once those three checks pass perfectly:
- Disconnect from Betaflight.
- Put the propellers on tightly (double-check that the “props in” or “props out” configuration matches what your motors tab says!).
- Find a wide-open grassy field completely clear of people, cars, and trees.
- Place the drone down, step back at least 15–20 feet, flip your SC Switch to Angle Mode (middle position) for a safe first flight, flip your ARM switch, and gently give it a tiny bit of throttle to hover!
About CRSF - Crossfire
CRSF is the serial communication protocol (the language) that your ExpressLRS receiver uses to talk to your drone’s flight controller over the physical wires.
Here is the quick breakdown of how they connect:
Over the Air (ELRS): Your RadioMaster Pocket talks to the drone using the ultra-fast ExpressLRS radio protocol.
Inside the Drone (CRSF): Once the receiver catches that signal, it translates the stick movements into the CRSF protocol and shoots them down the wires into the flight controller.
ExpressLRS piggybacks on the CRSF language because Team BlackSheep (the creators of Crossfire) made it open, highly efficient, and incredibly fast.
So in Betaflight, whenever you use ELRS, you will always select “CRSF” as your receiver protocol.
For the cidora i didnt have to render the receiver’s ELRS firmware, it connected directly as soon as i provided the matching passphrase with my pocket
Then, I went and place the modes im getting confortable with
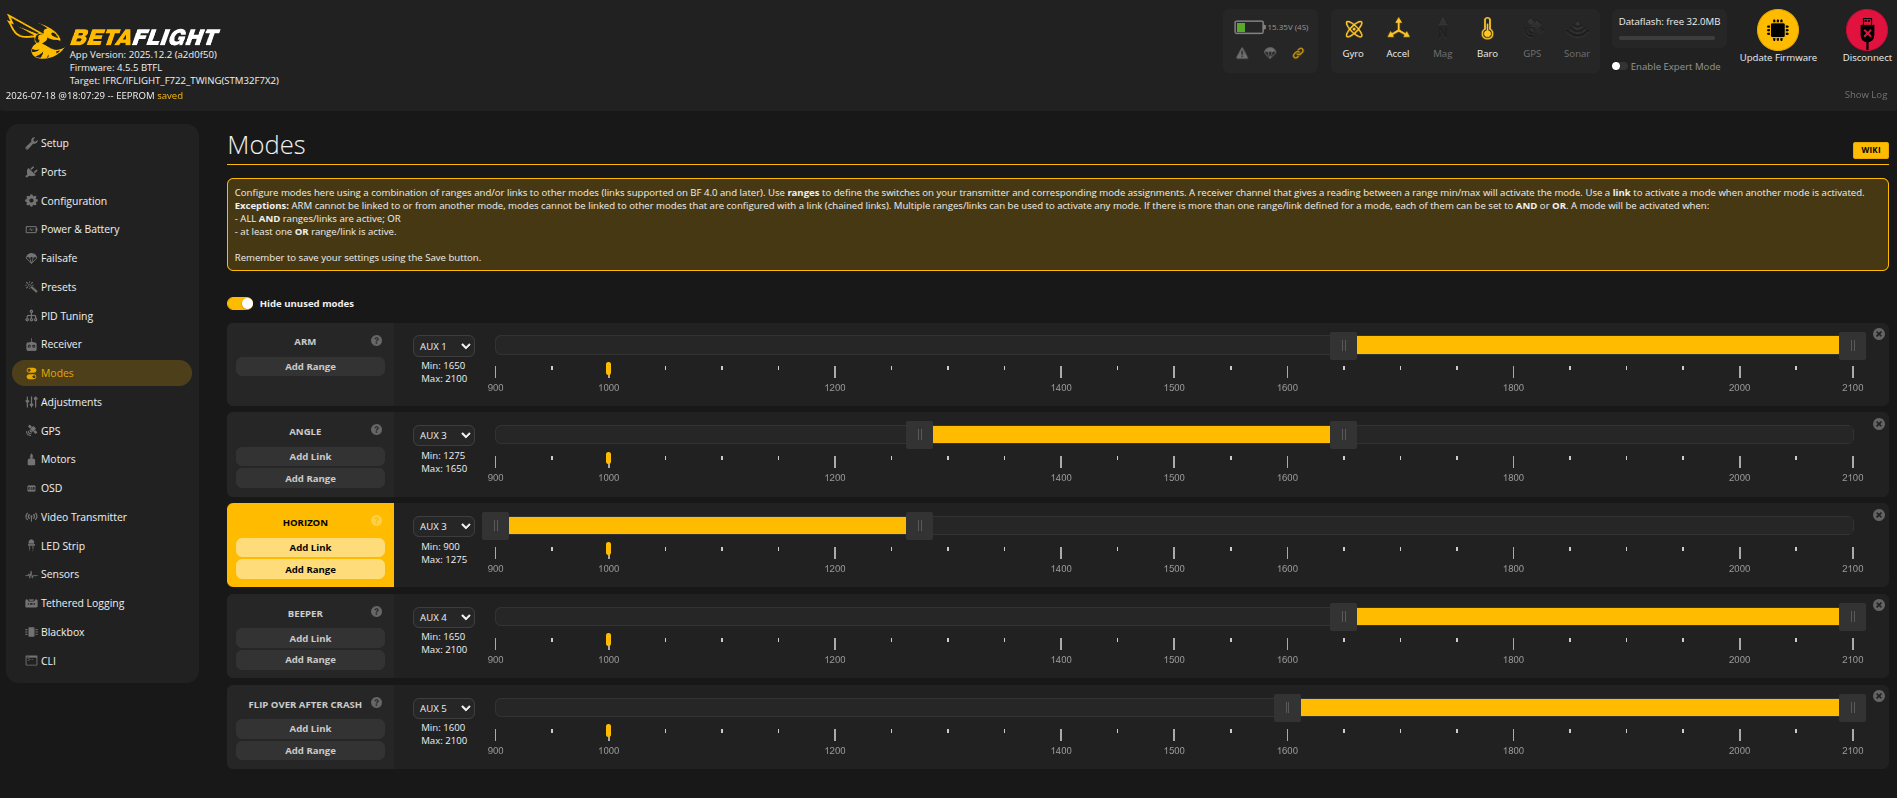
If you will fly without gogles, make sure that still your VTX antena is connected
Interesting PWAs
From the obvious: betaflight: app.betaflight.com
Which can be interesting for road trips!
Offline-first travel notes for tracking trips, flights, accommodations, and travel documents
- See also vert-sh,
ISM vs LBT
I got a ISM (!= ISM) for charging my 4s LiPo’s:
ESP8285 vs IoT ESP32
Yes, it is conceptually similar to the ESP boards you use for IoT, but it is not the same job.
Your receiver is likely an ExpressLRS 2.4GHz receiver built around two main chips: ESP8285 + SX1280
The name tells us a lot: DIY_2400_RX_ESP8285_SX1280
Meaning:
DIY generic/DIY ExpressLRS target family 2400 2.4GHz radio band RX receiver ESP8285 microcontroller SX1280 Semtech 2.4GHz LoRa radio chip
ESP8285 vs ESP32
The ESP8285 is like a smaller/older cousin of the ESP8266/ESP32 family. It has WiFi and runs firmware, but it is much less powerful than an ESP32.
Roughly:
ESP8285: small MCU + WiFi + 1MB embedded flash ESP8266: similar family, usually external flash ESP32: much more powerful, dual-core variants, Bluetooth, more GPIO, more RAM
In your ELRS receiver, the ESP8285 is not used as a general IoT web server most of the time.
It is the “brain” of the radio receiver. It:
runs ExpressLRS firmware controls the SX1280 radio chip decodes packets from your RadioMaster Pocket outputs CRSF serial data to the flight controller starts the ExpressLRS RX WiFi hotspot for config/flashing stores options like domain, UID, WiFi settings
The SX1280 is the actual long-range 2.4GHz radio transceiver. The ESP8285 handles logic; the SX1280 handles RF.
Why Receiver And Flight Controller?
Because they do different jobs.
The receiver answers:
What is the pilot commanding?
The flight controller answers:
How do I keep the drone stable and make the motors do that safely?
Flow:
RadioMaster Pocket ↓ 2.4GHz ExpressLRS packets SX1280 radio chip on receiver ↓ ESP8285 running ExpressLRS ↓ CRSF serial protocol over UART Flight controller running Betaflight ↓ motor commands ESC / 4-in-1 ESC ↓ Motors
The receiver does not fly the drone. It only receives your stick positions, switches, link telemetry, and packet timing.
The flight controller has the IMU/gyro/accelerometer and runs the control loop thousands of times per second. It mixes your input with stabilization math:
pilot wants roll right gyro says drone is rotating too slowly/too quickly PID loop calculates correction motor outputs are adjusted
So even if your receiver says “roll right 30%”, the FC decides exactly how much each motor should spin.
Why Not Put Everything In One Chip?
Sometimes they do. Tiny whoops and AIO boards often integrate:
flight controller + ESC + receiver
But architecturally they are still separate functions.
Separate receiver modules are common because:
radio protocols change faster than flight controllers receiver placement matters for antenna performance you can swap ELRS / Crossfire / FrSky / etc.
RF design is specialized Betaflight should not have to implement every radio stack directly
In your case, the ESP8285 receiver is basically a tiny dedicated IoT-like computer whose only serious job is: talk ExpressLRS to your radio and CRSF to Betaflight.