SelfHosting Updates - Oct 2025
TL;DR
For a strong homelab, we need backups and proper file management…
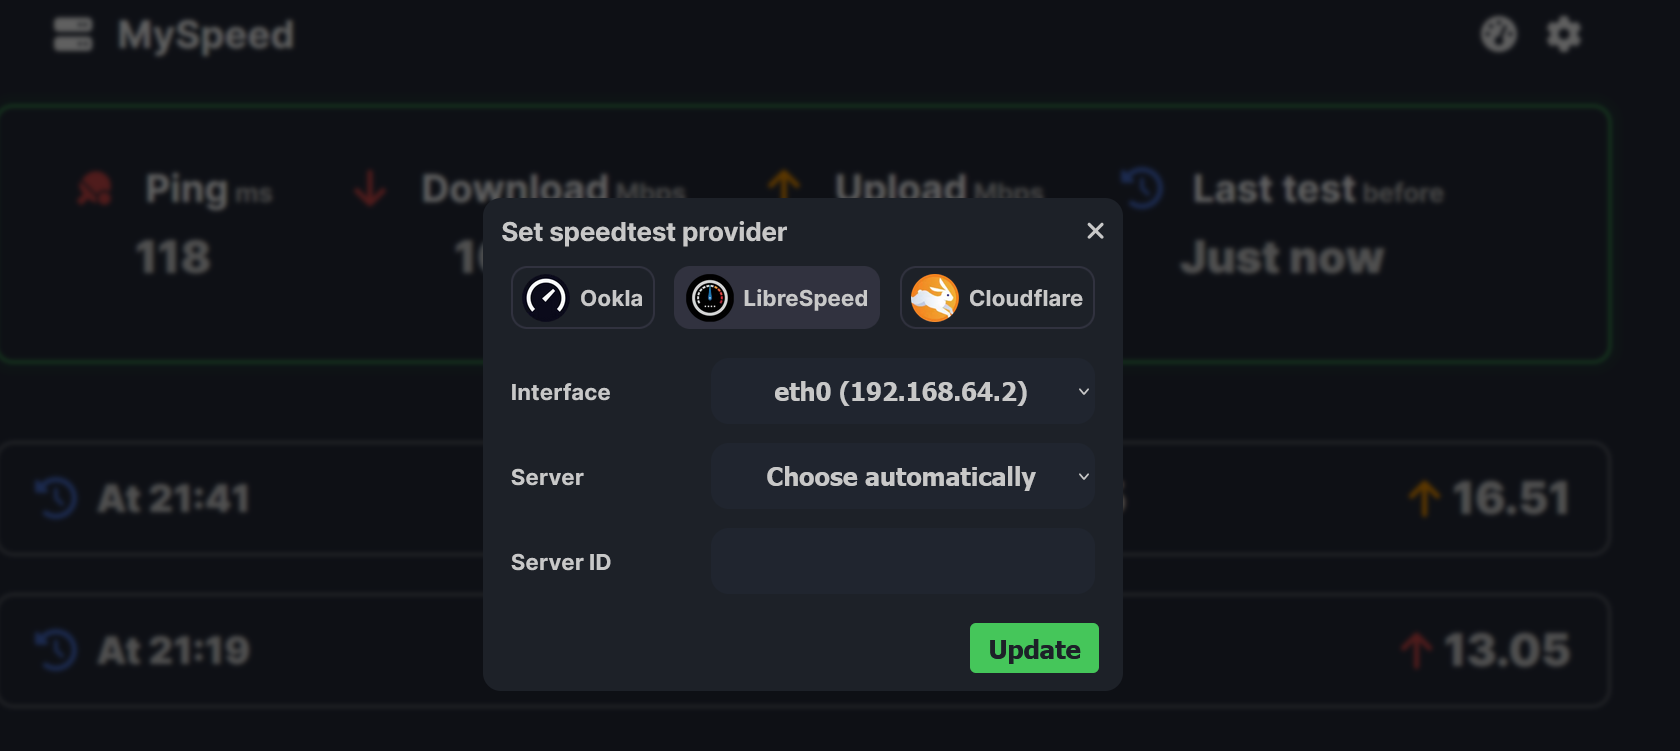
+++ Internet Speed Test & Web Analytics with MySpeed and Lunalytics here
Intro
During mar25 we saw how to get running few sync tools.
Later on June, I expanded Traefik https knowledge, and separaredly Nextcloud.
In Sept25: I combined NC + Traefik https + Tailscale - which is a lovely setup.
But just in case you dont want to mess with databases, lets see some other Filebrowser alternatives and FTPs:
Yea, im kind of alergic to DBs for HomeLab setups
Files Files Files
The unexpected happens.
So lets make sure that we take care of our files.
And I saw few projects lately to see files, like we saw here:
Web based File Explorer
🌴 Palmr. is an open-source file-sharing platform focused on privacy and security. It enables users to upload, manage, and share files with features like password protection, custom links, and access control without tracking or limitations. Designed for seamless and secure sharing.
Sync-in Server · Secure, open-source platform for file storage, sharing, collaboration, and syncing.
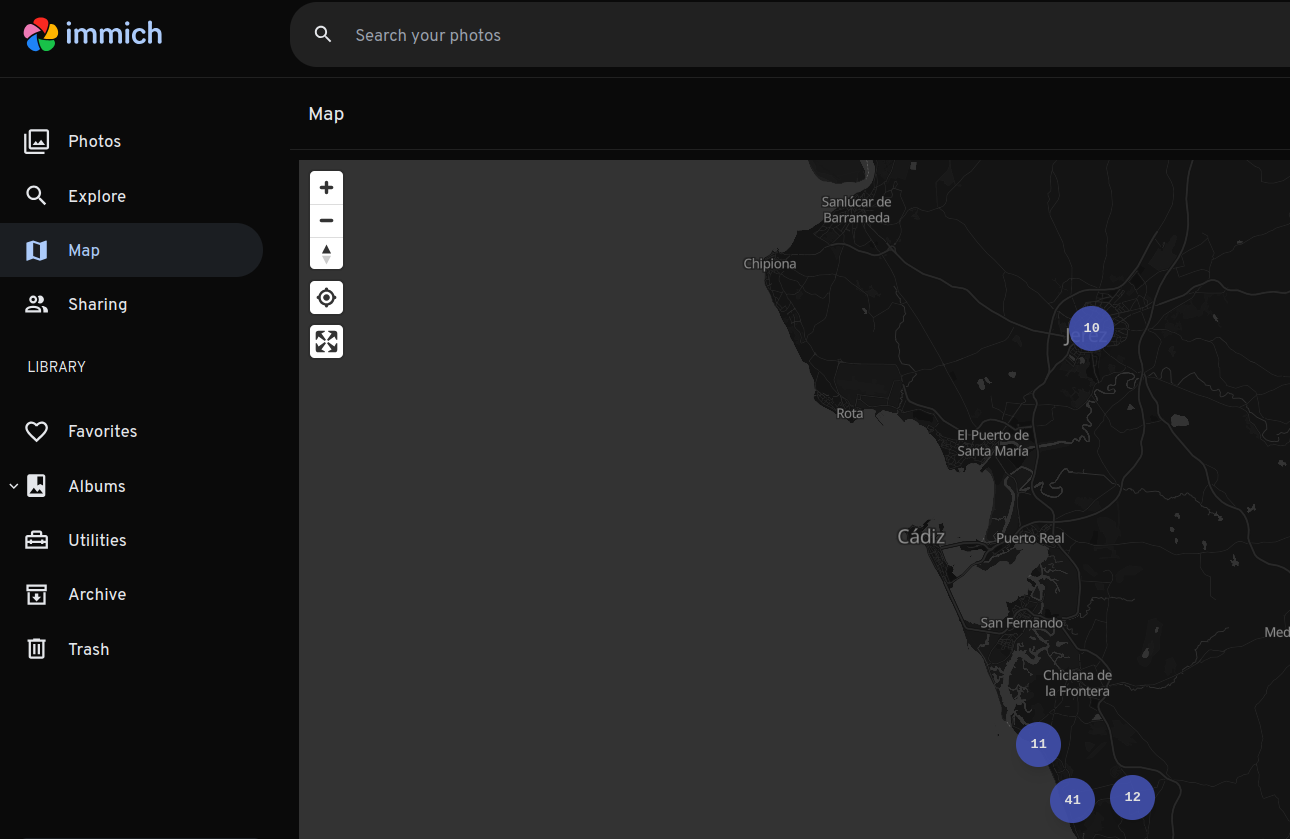
- Nextcloud or Immich:
Just in case that you got that interesting Standard Google offer 200 GB for ~40$/year or your Google AI Pro with 2TB trial has just ended…
docker exec -it <your-nextcloud-container-name> rm /var/www/html/config/config.php
# Then, exit and restart the container
docker exec -u www-data <your-nextcloud-container-name> php /var/www/html/occ config:list system | grep trusted_domains -A 10
docker exec -u www-data nextcloud php /var/www/html/occ config:system:get trusted_domains
#docker exec -u www-data nextcloud php /var/www/html/occ config:system:set trusted_domains 4 --value="mynewdomain.example.com"
docker exec -u www-data nextcloud php /var/www/html/occ config:system:get trusted_domains
Immich has been recently updated: https://github.com/immich-app/immich/releases/tag/v2.2.0
And If you dont want Nextcloud (despite having a photo feature) nor Immich…for your latest photo/video workflows…
Neither pay for google photos: https://github.com/TheLastGimbus/GooglePhotosTakeoutHelper
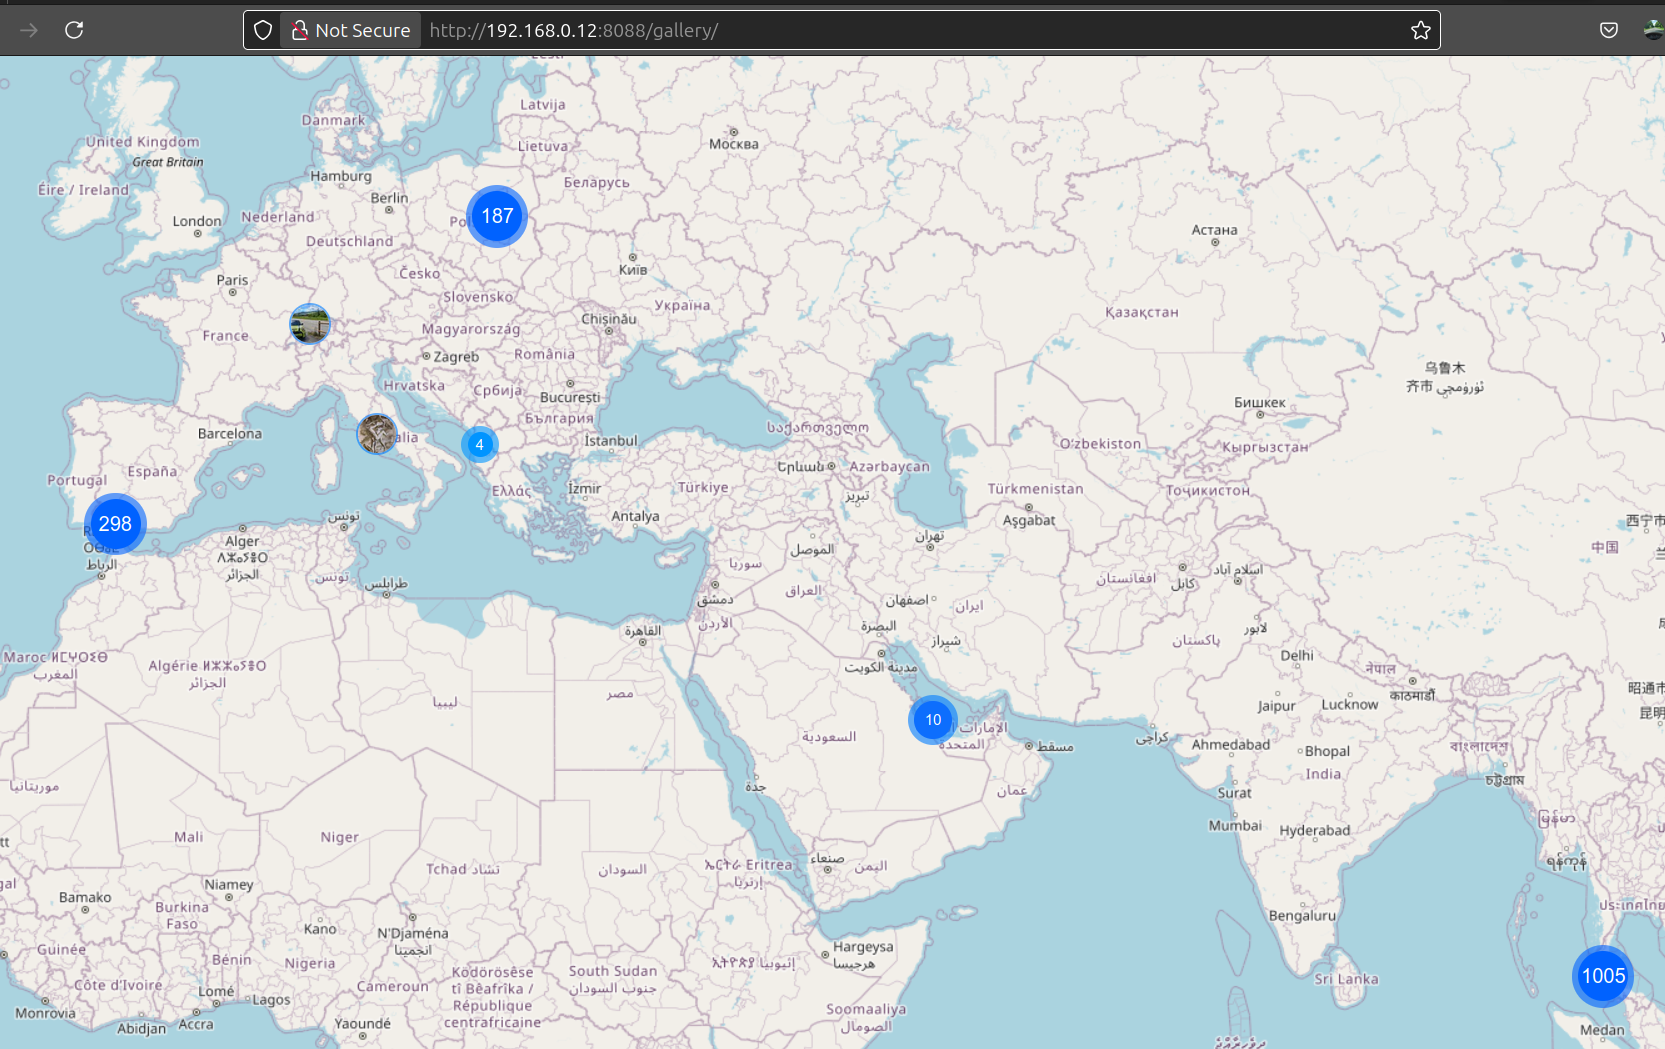
You can get away with Immich respecting your files structure, or you could just use PiGallery.
Which has also been recently upgraded: https://github.com/bpatrik/pigallery2/releases/tag/3.0.0
Read-only access is recommended for both.
Whats cool about Immich is that it has some projects around https://github.com/Nasogaa/immich-drop
I covered those in previous posts
- With Local Send I got ~4MB/s transfer speed from an iphone to a tablet.
flatpak install flathub org.localsend.localsend_app
##ps aux --sort=-%mem | grep localsend- We also have Pairdrop: https://github.com/schlagmichdoch/PairDrop
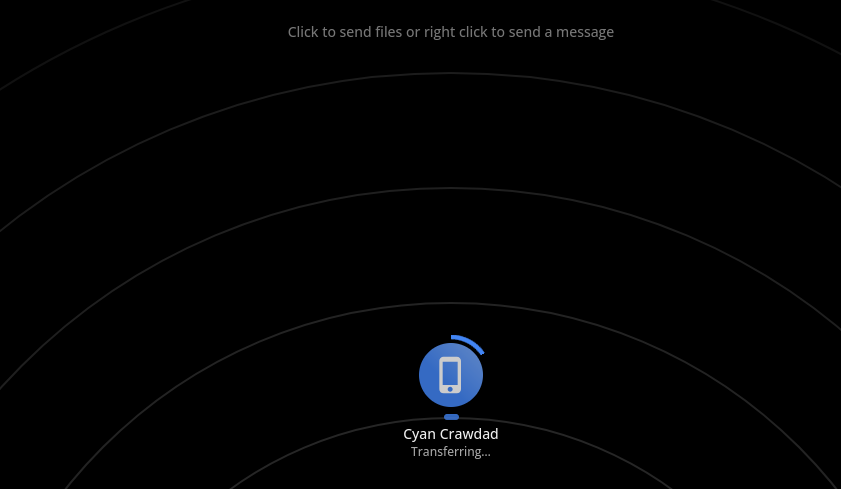
PairDrop: Transfer Files Cross-Platform. No Setup, No Signup.
Another open PWA to do similar job via WebRTC and WS was Snapdrop
- Would SCP or FTP be faster instead?
With SCP I got ~9mb/s:

I got up to 4mb/s with Wifi:

Syncthing x SFTPGo
You can get creative with rsync, cron and so on.
But…
A combination of Syncthing and SFTPGo can be used together to achieve automated file exchange, leveraging the strengths of each tool, although they are fundamentally different.
Syncthing is a decentralized, peer-to-peer (P2P) continuous file synchronization tool.
Whereas SFTPGo is a centralized SFTP server (that also supports other protocols like FTP/S and WebDAV) with powerful file management and automation features.
More about the Syncthing and SFTPGo Setup… 📌
The primary way to use them together is to set up Syncthing to sync files to a local directory that SFTPGo uses as a storage backend (a “virtual folder”).
Syncthing handles synchronization: Syncthing runs on your client devices (laptops, desktops, phones) and continuously syncs files in real-time to a dedicated folder on your central server. This uses Syncthing’s efficient P2P protocol, which is excellent for real-time syncing between devices that are all running the Syncthing software.
SFTPGo provides access: SFTPGo runs on the central server, using the same local Syncthing folder as a data source for its users. This allows external users or systems to access those synchronized files using a standard, secure protocol like SFTP (or FTP/S, WebDAV, HTTPS via its WebClient).
This setup solves a common Syncthing limitation: providing access to files via a standard server protocol to clients that are not running Syncthing.
It’s important to understand the different purposes of each tool:
| Feature | Syncthing (Continuous Sync) | SFTPGo (Secure File Server) |
|---|---|---|
| Core Function | Continuous, real-time file synchronization between multiple trusted devices (P2P). | Secure file access and transfer using standard protocols (SFTP, FTP/S, etc.) to a central server. |
| Architecture | Decentralized (no central server required for P2P sync). | Centralized server architecture. |
| Protocol | Custom, secure, encrypted P2P protocol (not SFTP). | Standard protocols: SFTP, FTP/S, HTTPS, WebDAV. |
| File Management | Focuses on keeping folders identical across peers. | Provides advanced user management, access controls, quotas, and automation (Event Manager, webhooks). |
| Primary Use | Keeping your own set of devices in sync, or collaborating with a defined set of trusted peers. | Providing secure file exchange for multiple external users/partners, often with granular permissions. |
Syncthing doesn’t natively support SFTP as a sync destination.
SFTPGo is what brings the SFTP server capability to the shared folder.
Make sure to have the data drive mounted properly, like: /mnt/data2tb/testftp
Remember to create an user (after you created the admin via ): http://jalcocert-x300-1:8011/web/admin/users
sftp -P 2022 jalcocert@192.168.1.2GNOME Files → Connect to Server:
#SFTP: sftp://<user>[localhost:2022](cci:4://file://localhost:2022:0:0-0:0)
sftp://<username>@192.168.1.2:2022 #sftp://jalcocert@192.168.1.2:2022
If you want a WebDAV connection, you can use the Nextcloud setup seen last summer:
dav://reisikei@192.168.1.11:8080/remote.php/webdav
davs://your_nc_user@nextcloud.yourdomain.duckdns.org/remote.php/webdav
davs://your_nc_user@nextcloud.jalcocertech.com/remote.php/webdav
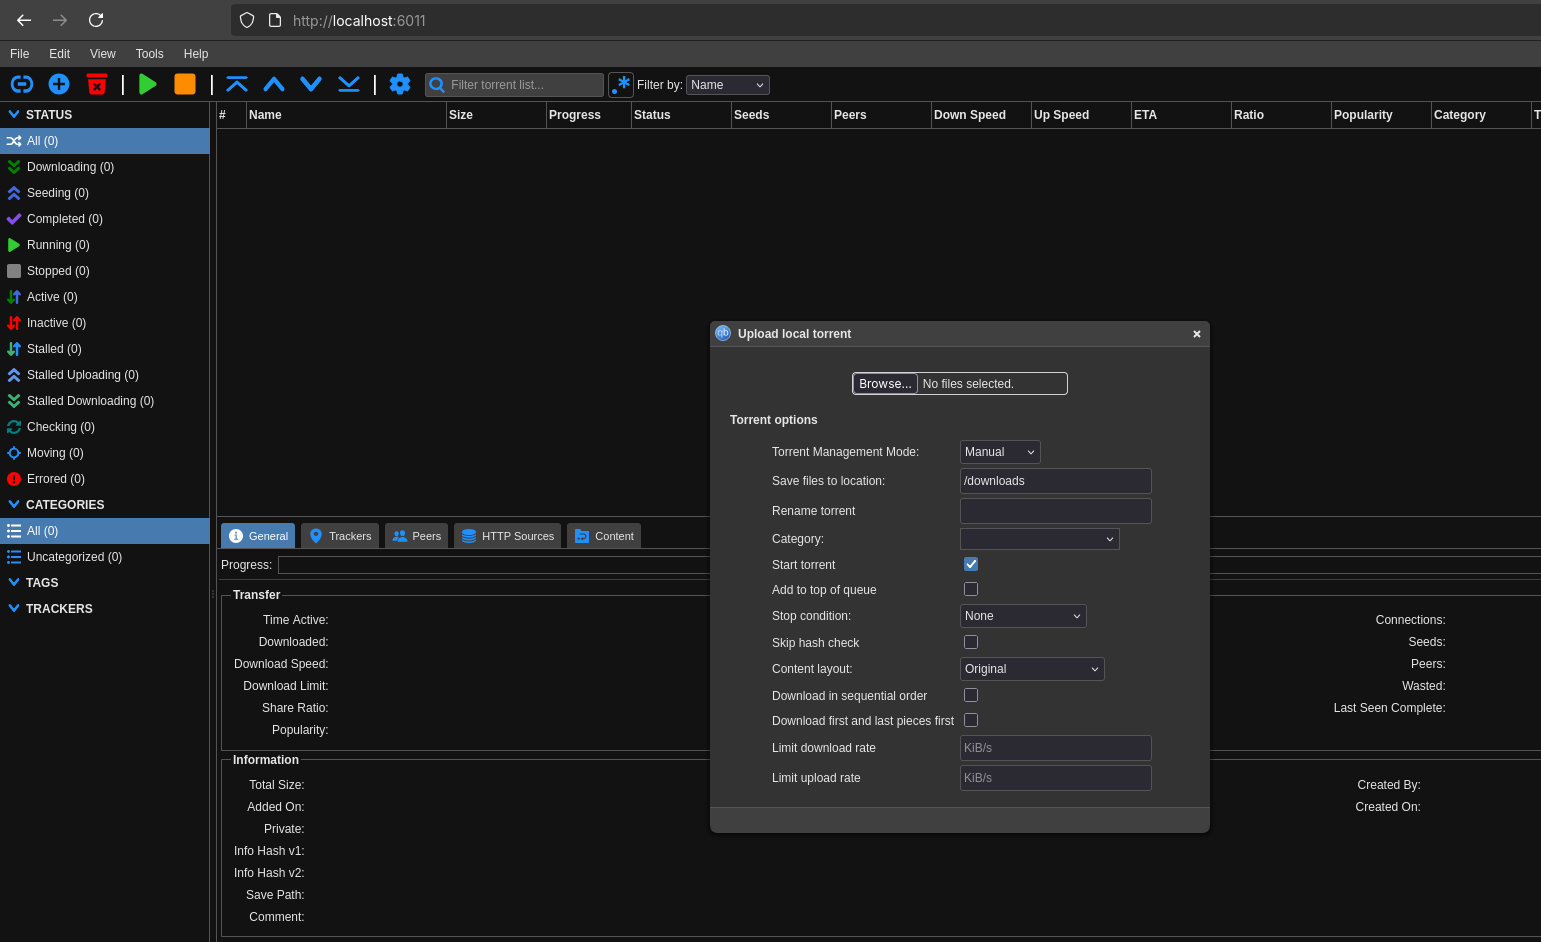
Transmission vs QBittorrent… 📌
Choosing between Transmission and qBittorrent for P2P depends on your priorities, as both are popular, free, open-source, and cross-platform (Windows, macOS, Linux) BitTorrent clients.
- User Interface and Simplicity
| Client | Characteristics | Best For |
|---|---|---|
| Transmission | Minimalist and sleek. Designed to be lightweight and blend in well with the native operating system environment, especially on macOS and Linux (like Ubuntu, where it’s often the default). It has fewer features on the main interface, prioritizing simplicity. | Users who prefer a simple, clean interface and just want a client that “just works” with minimal fuss or advanced options. |
| qBittorrent | Feature-rich and traditional. Often compared to the older versions of uTorrent (before it became ad-heavy). Its interface is more reminiscent of a classic torrent client, offering a comprehensive view of settings and torrent statistics. | Users who prefer a more traditional, functional, and detailed interface with many options visible. |
Features and Functionality
Feature Transmission qBittorrent Built-in Search Engine No (Relies on external tools/plugins) Yes (Integrated search engine with installable Python plugins) RSS Feed Support No (Relies on third-party tools/scripts) Yes (Built-in RSS feed reader and downloader) Advanced Control Good for basic control, but advanced options are often hidden or require the web interface/third-party apps. Excellent—offers more granular control over torrents, trackers, and peers (e.g., advanced content prioritization). Lightweight/Resource Usage Very lightweight and has a low memory/CPU footprint, making it ideal for low-power devices like a Raspberry Pi or NAS. Lightweight, but generally uses more memory and CPU than Transmission, especially when handling a large number of torrents. Daemon/Headless Use Excellent. Designed for running as a background service (daemon) and easy remote control via a Web UI or remote apps. Good, includes a Web UI for remote access but is not as inherently built for headless use as Transmission. Performance and Stability
Performance: Performance is generally competitive. Some users report slightly faster speeds with qBittorrent, particularly with complex or multiple simultaneous downloads, but others find Transmission equally fast for basic needs.
Stability: Both are generally stable. Transmission has had historical security incidents (though resolved), and its design means it tends to use fewer resources, which can aid stability on weaker hardware. qBittorrent is well-regarded for its stability, even under a heavy load of thousands of torrents.
| Choose Transmission If… | Choose qBittorrent If… |
|---|---|
| You value a minimalist, simple, and native-feeling UI (especially on Mac/Linux). | You need advanced features like a built-in search engine or RSS downloader. |
| You are running the client on a low-power device (e.g., NAS, Raspberry Pi) or need a very low resource footprint. | You want fine-grained control and more detailed statistics over your torrents. |
| You primarily want a client that is easy to set up for basic downloading and seeding. | You are accustomed to a traditional torrent client layout (like older uTorrent). |
Choosing between Transmission and qBittorrent depends on your priorities, as both are popular, free, open-source, and cross-platform (Windows, macOS, Linux) BitTorrent clients.
- User Interface and Simplicity
| Client | Characteristics | Best For |
|---|---|---|
| Transmission | Minimalist and sleek. Designed to be lightweight and blend in well with the native operating system environment, especially on macOS and Linux (like Ubuntu, where it’s often the default). It has fewer features on the main interface, prioritizing simplicity. | Users who prefer a simple, clean interface and just want a client that “just works” with minimal fuss or advanced options. |
| qBittorrent | Feature-rich and traditional. Often compared to the older versions of uTorrent (before it became ad-heavy). Its interface is more reminiscent of a classic torrent client, offering a comprehensive view of settings and torrent statistics. | Users who prefer a more traditional, functional, and detailed interface with many options visible. |
- Features and Functionality
| Feature | Transmission | qBittorrent |
|---|---|---|
| Built-in Search Engine | No (Relies on external tools/plugins) | Yes (Integrated search engine with installable Python plugins) |
| RSS Feed Support | No (Relies on third-party tools/scripts) | Yes (Built-in RSS feed reader and downloader) |
| Advanced Control | Good for basic control, but advanced options are often hidden or require the web interface/third-party apps. | Excellent—offers more granular control over torrents, trackers, and peers (e.g., advanced content prioritization). |
| Lightweight/Resource Usage | Very lightweight and has a low memory/CPU footprint, making it ideal for low-power devices like a Raspberry Pi or NAS. | Lightweight, but generally uses more memory and CPU than Transmission, especially when handling a large number of torrents. |
| Daemon/Headless Use | Excellent. Designed for running as a background service (daemon) and easy remote control via a Web UI or remote apps. | Good, includes a Web UI for remote access but is not as inherently built for headless use as Transmission. |
- Performance and Stability
- Performance: Performance is generally competitive. Some users report slightly faster speeds with qBittorrent, particularly with complex or multiple simultaneous downloads, but others find Transmission equally fast for basic needs.
- Stability: Both are generally stable. Transmission has had historical security incidents (though resolved), and its design means it tends to use fewer resources, which can aid stability on weaker hardware. qBittorrent is well-regarded for its stability, even under a heavy load of thousands of torrents.
| Choose Transmission If… | Choose qBittorrent If… |
|---|---|
| You value a minimalist, simple, and native-feeling UI (especially on Mac/Linux). | You need advanced features like a built-in search engine or RSS downloader. |
| You are running the client on a low-power device (e.g., NAS, Raspberry Pi) or need a very low resource footprint. | You want fine-grained control and more detailed statistics over your torrents. |
| You primarily want a client that is easy to set up for basic downloading and seeding. | You are accustomed to a traditional torrent client layout (like older uTorrent). |
RClone x ProtonDrive
If you got running your Nextcloud and want to backup your data folder, you could try with rclone sync towards ProtonDrive:
Backup websites
If you like some post, you can always do some quick script to get a copy, like this.
Also there are some projects to backup websites, like:
MIT | 🗃 Open source self-hosted web archiving. Takes URLs/browser history/bookmarks/Pocket/Pinboard/etc., saves HTML, JS, PDFs, media, and more…
- You could also use https://github.com/dvcoolarun/web2pdf
git clone https://github.com/dvcoolarun/web2pdf.git
cd web2pdf && docker build -t web2pdf .
docker run -it --rm -v $(pwd):/app web2pdf
🔄 CLI to convert Webpages to PDFs 🚀
Conclusions
I have added here: https://github.com/JAlcocerT/Docker/tree/main/SelfH
The docker stack im using right now :)
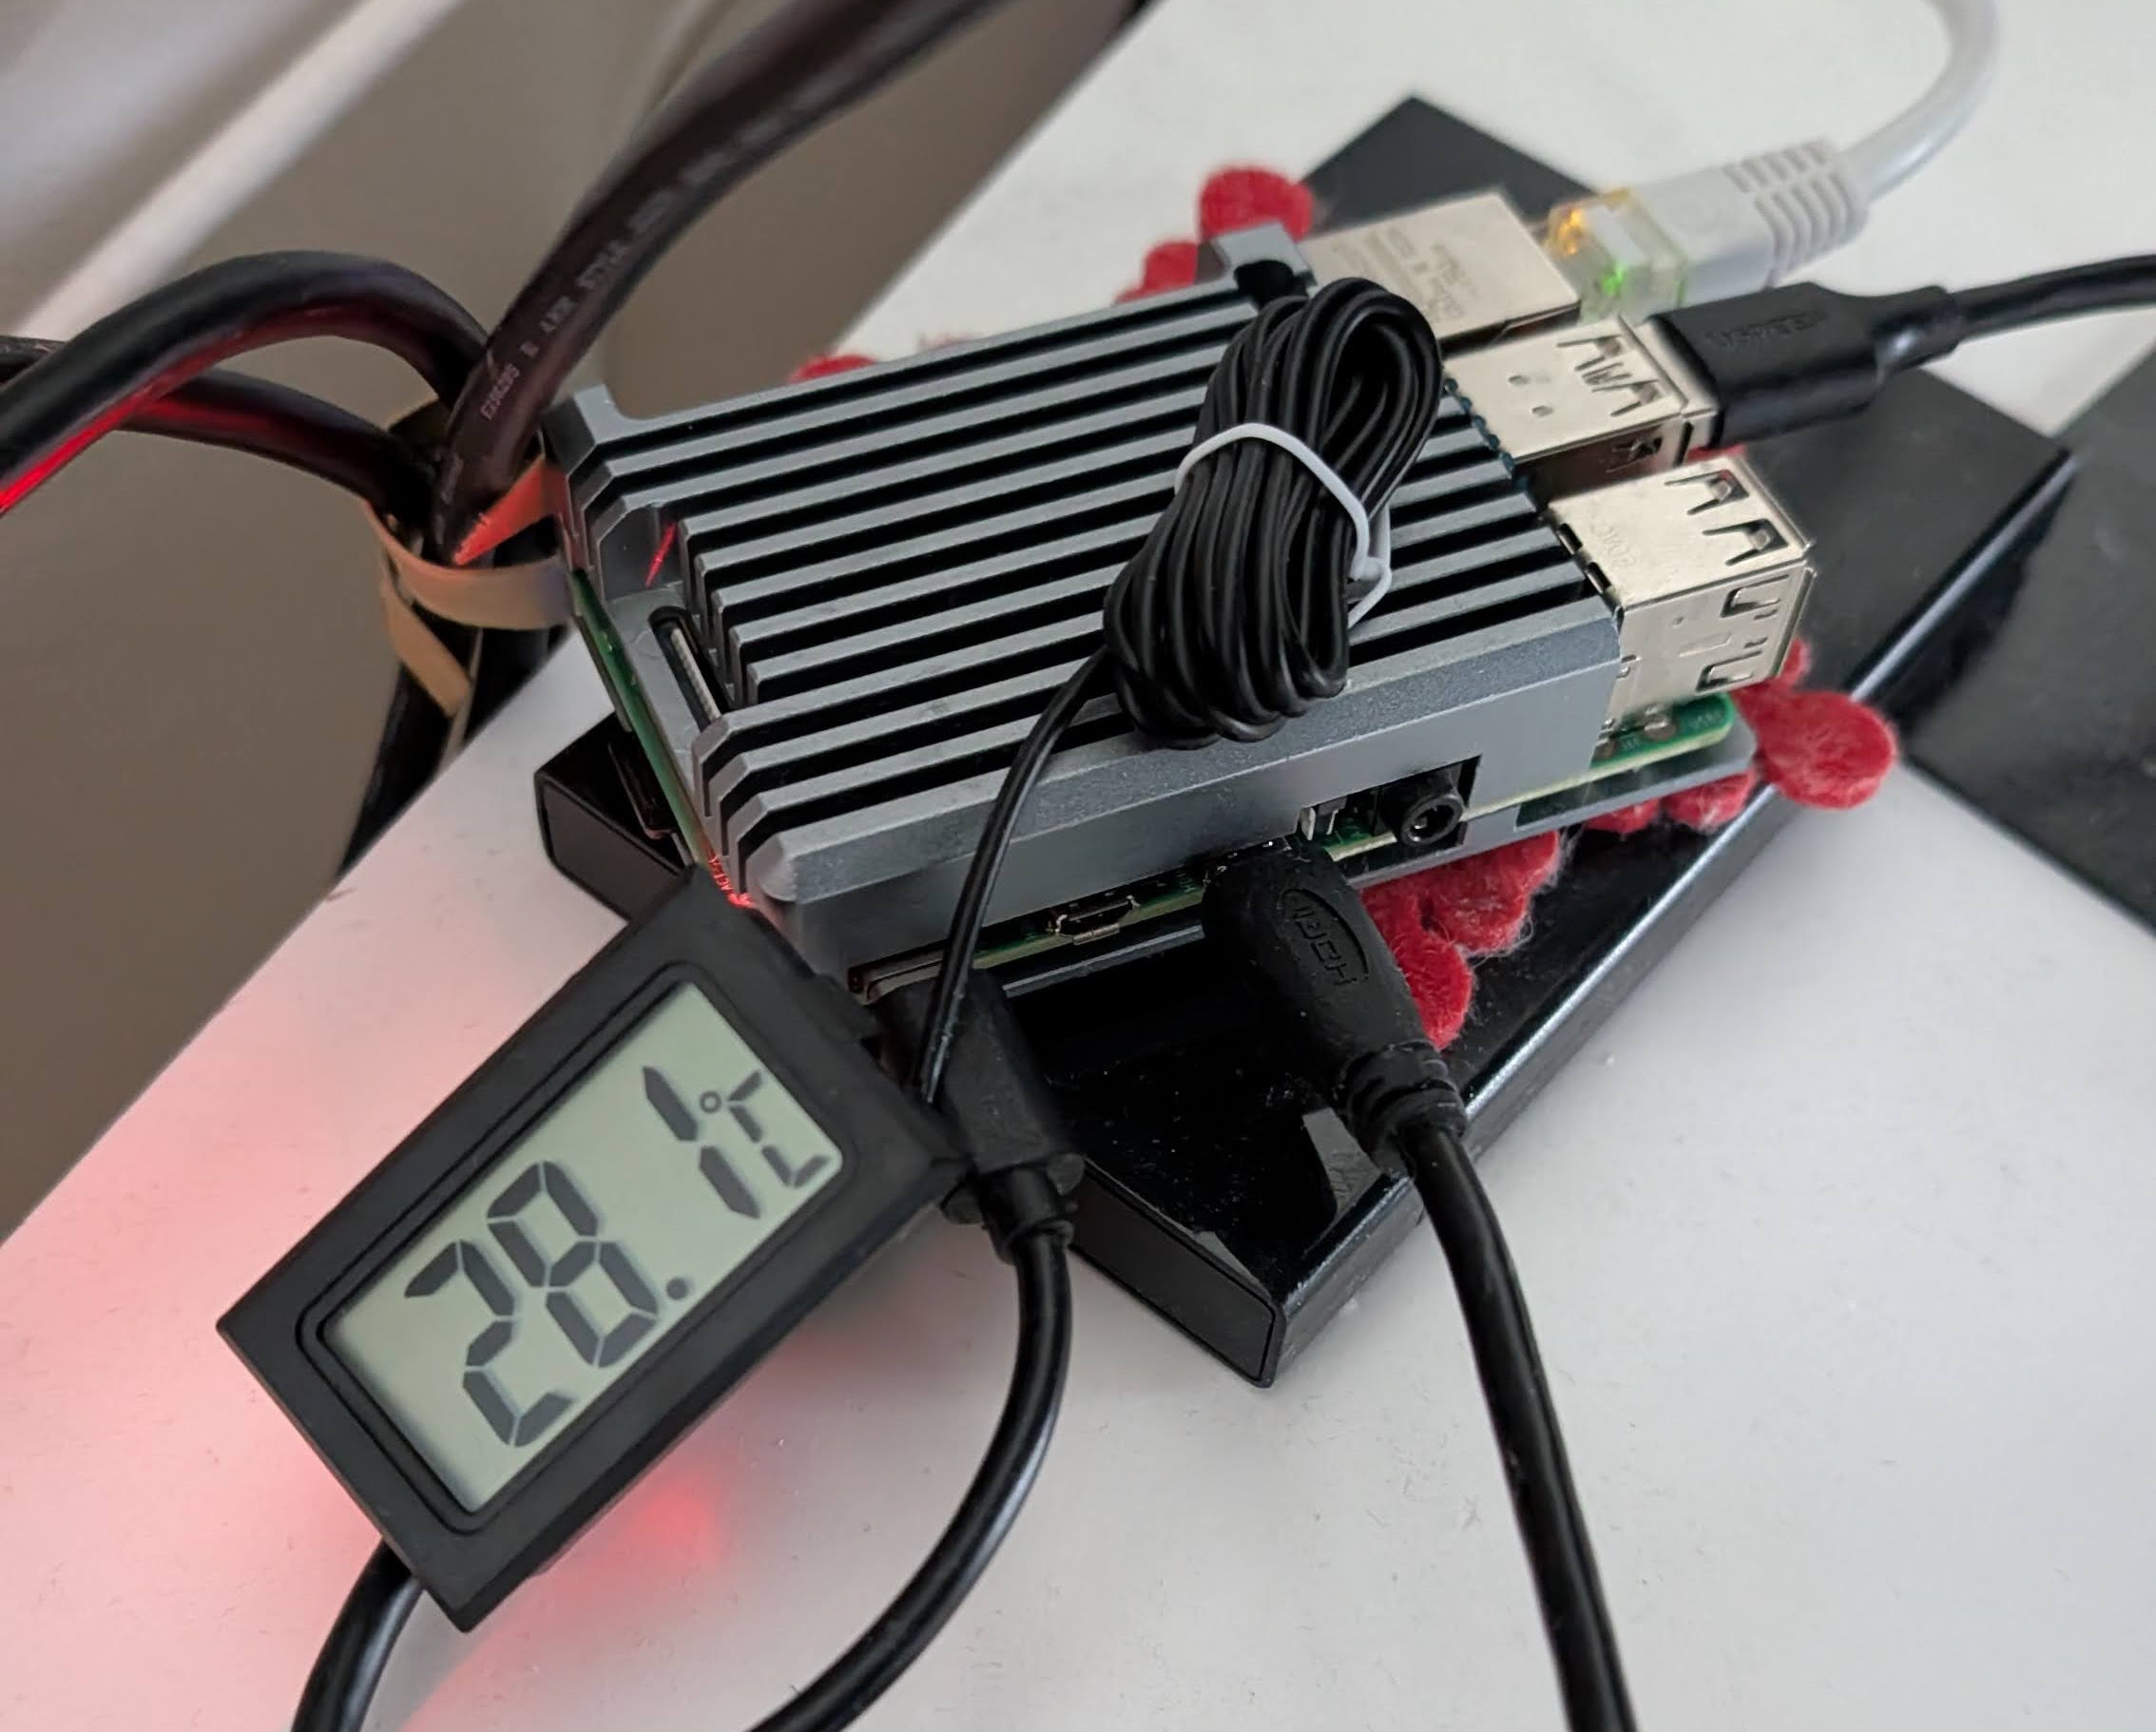
You can start with just a Pi SBC and a SSD drive:
To backup your emails, you could always try a Gmail -> Protonmail Sync: https://proton.me/support/switch-from-gmail-to-proton
And later continue with any of these tools:
If you’ve got recently a miniPC, you can do some benchmarks to the performance.
#htop
sudo apt install btop
btop
#lazydocker
#sudo docker stats
#docker stats --no-stream --format "{{.Name}}\t{{.CPUPerc}}" | head -n -1 | sort -nrk 2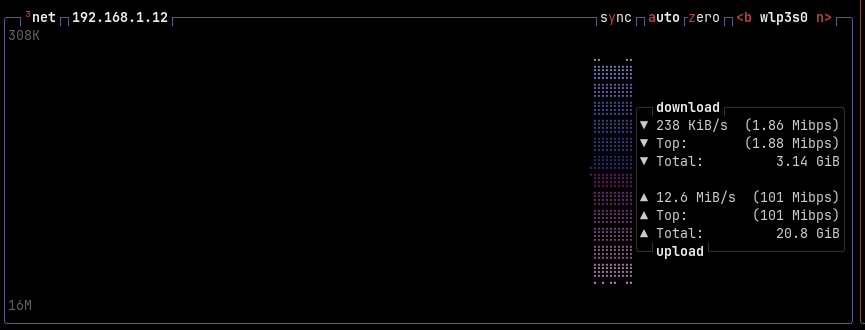
sudo apt update && sudo apt install -y speedtest-cli
speedtest --simple
#speedtest --list
And if you have read the recent Crypto with AI post, you can see how people get creative and benchmark based on crypto mining performance: https://xmrig.com/benchmark
Some people also use it for mining.
But it wont pay off when taking into cosideration the electricity costs.
Anyways, you can do a quick XMR benchmark on your mini PC:
RandomX, KawPow, CryptoNight and GhostRider unified CPU/GPU miner and RandomX benchmark
Its an interesting project anyways, configurable via JSON for that alternative CPU benchmark
I also got to know a new browser, Helium: The Chromium-based web browser made for people, with love. Best privacy by default, unbiased ad-blocking, no bloat and no noise.
wget -P ~/Applications https://github.com/imputnet/helium-linux/releases/download/0.5.7.1/Helium-0.5.7.1-x86_64.AppImage

#With `CTRL+ALT+C` it gets really compact!
#With `CTRL+H`, it opens your synced tab
#flatpak install flathub app.zen_browser.zen
Private, fast, and honest web browser
I think it can be a good companion to Neko Browser or Zen Browser
I Almost forgot: Privacy won, for now.
More stuff Lately
If you are experiencing router restarts, make sure that your homelab will have a static local ip.
Identify the vendor of the macs connected like ASRock Incorporation, then make an IP reservation on your router.
It should be among your CableModem settings, near the advanced ones like
NAT Forwarding
You can also use duckdns or the traefik+tailscale IP way
- Spinning Traefik is easier than ever: see how to do it for any VPS
#git clone https://github.com/JAlcocerT/Home-Lab.git
#cd traefik
#sudo docker compose up -d
cd ./traefik
chmod +x setup-traefik.sh
#cp .env.sample .env
./setup-traefik.sh
Was it easy right?
Say thanks to the power of repetition, as I made it recently for the x300, a Pi4 and the Firebat
- Termix has a desktop app now:
#wget -P ~/Applications
#wget https://github.com/Termix-SSH/Termix/releases/download/release-1.7.3-tag/Termix-Linux-Portable-1.7.3.zip
unzip Termix-Linux-Portable-1.7.3.zip
unzip Termix-Linux-Portable.zip -d Termix-App
#cd- FreshRSS and Matrix: If you are also tired of big tech infra failing…
# sudo apt update
# sudo apt install liferea

# sudo apt update
# sudo apt install quiterss
An RSS is always good to be uptodate with outages, like the recent AWS one:
Also, apps like signal might be secure by design, at least for now.
But that does not mean that they are not still centralized ans subject to fail when their infrastructure is not in place:
Pretty weird that an AWS outage caused Signal to fail … https://t.co/MzAtJPjAla
— Elon Musk (@elonmusk) October 20, 2025
With thunderbird you can connect to both: plus have a local mail client
sudo apt update
sudo apt install thunderbird

# wget https://proton.me/download/mail/linux/1.9.0/ProtonMail-desktop-beta.deb
# sudo dpkg -i ProtonMail-desktop-beta.deb
# sudo apt-get install -f- Talking about desktops apps see this youtube and social media downloader: https://github.com/aandrew-me/ytDownloader
GPL 3/0 | Desktop App for downloading Videos and Audios from hundreds of sites
#choco install ytdownloader
sudo snap install ytdownloaderAccess it
http://jalcocert-x300-1:8081/
Or if you have traefik setup
https://tube.x300.jalcocert.com
- Jellyfin and Gonic are great companios for a media server stack:
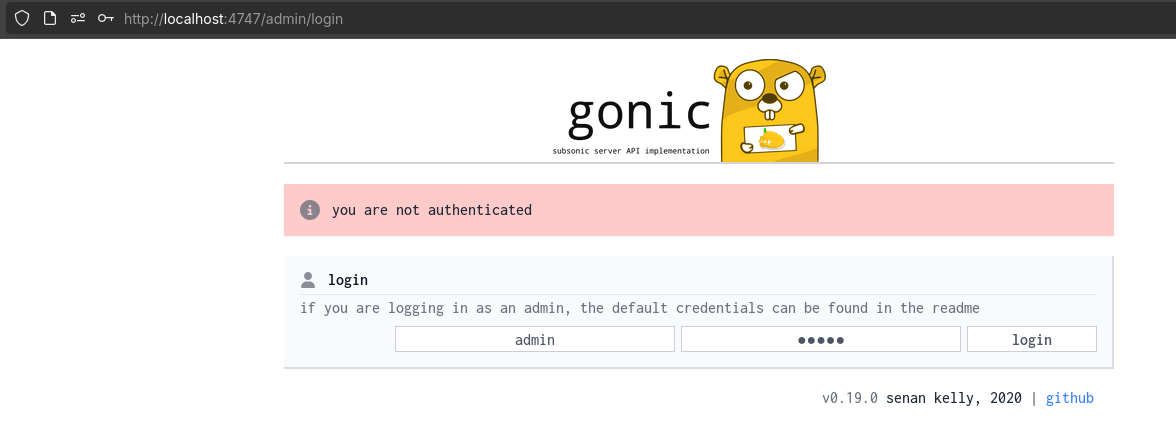
Go visit them at
http://jalcocert-x300-1:4747/andhttp://jalcocert-x300-1:8096
Notice that with Gonic you can also add podcasts via their RSS feed.
Like in the astropod theme that provides: https://getastropod.netlify.app/rss.xml
You have cool desktop clients: Sonixd

And even a newer: https://github.com/jeffvli/feishin
GPL 3.0 | A modern self-hosted music player.
Which can be used via AppImageLauncher:
#winget install sonixd
wget -P ~/Applications https://github.com/jeffvli/sonixd/releases/download/v0.15.5/Sonixd-0.15.5-linux-x86_64.AppImage
#sonixd

#See also Euphonica: https://github.com/htkhiem/euphonica
#flatpak install https://dl.flathub.org/repo/appstream/io.github.htkhiem.Euphonica.flatpakref- I have added the programmatic DNS updater from waiting to landing, benchmarks and quick setup scripts to HomeLab repo.
And have brought them to the Home-Lab repo for proper maintenance:
I was also exploring these file tools
For event photo galleries, I was also having a look…
Whats required for photos for events?
- Filebrowser and Filebrowser Quantum
https://github.com/filebrowser/filebrowser: This one is tested in production as seen here
I was interested into the custom branding for the Wedding project and tinkered with it https://filebrowser.org/configuration/custom-branding
Apache v2 | 📂 Web File Browser


- PicPeak
MIT | 🚀 Self-hosted photo sharing platform for photographers & events. Open-source alternative to PicDrop/Scrapbook with time-limited galleries, password protection, custom branding & no monthly fees. Built with React + Node.js 📸
Which can be deployed as per: https://github.com/the-luap/picpeak/blob/main/DEPLOYMENT_GUIDE.md
- How about some wetransfer alternative? See transferzip https://github.com/robinkarlberg/transfer.zip-web
agpl 3.0 | A self-hostable complete file-sharing solution that focuses on reliability, security and ease of use.
Cloudreve can help you build a self-hosted file management service that is both suitable for private and public use, with support for multiple storage providers and virtual file systems to provide a flexible file management experience.
GPL3/0 | 🌩 Self-hosted file management and sharing system, supports multiple storage providers
Self-hosted cloud file storage with offline-first web and native clients
🌴 Palmr. is an open-source file-sharing platform focused on privacy and security. It enables users to upload, manage, and share files with features like password protection, custom links, and access control without tracking or limitations. Designed for seamless and secure sharing, Palmr. is completely free.
Traefik x Rpi4 x x300
Remember that for backups on an external drive reliably to /mnt/data2tb:
df -h | egrep '^Filesystem|^/dev/sda2|^/dev/nvme'
#sudo apt install -y exfatprogs exfat-fuse
sudo mkdir -p /mnt/data2tb
sudo mount -t exfat -o uid=$(id -u),gid=$(id -g),umask=022 /dev/nvme0n1p1 /mnt/data2tb
df -h | grep data2tb
#Persist across reboots (fstab)
#UUID=C000-03BC /mnt/data2tb exfat defaults,uid=1000,gid=1000,umask=022,nofail,x-systemd.device-timeout=5 0 0
#/dev/disk/by-uuid/abcd-4567-1234-abcd-abcd / ext4 defaults 0 1
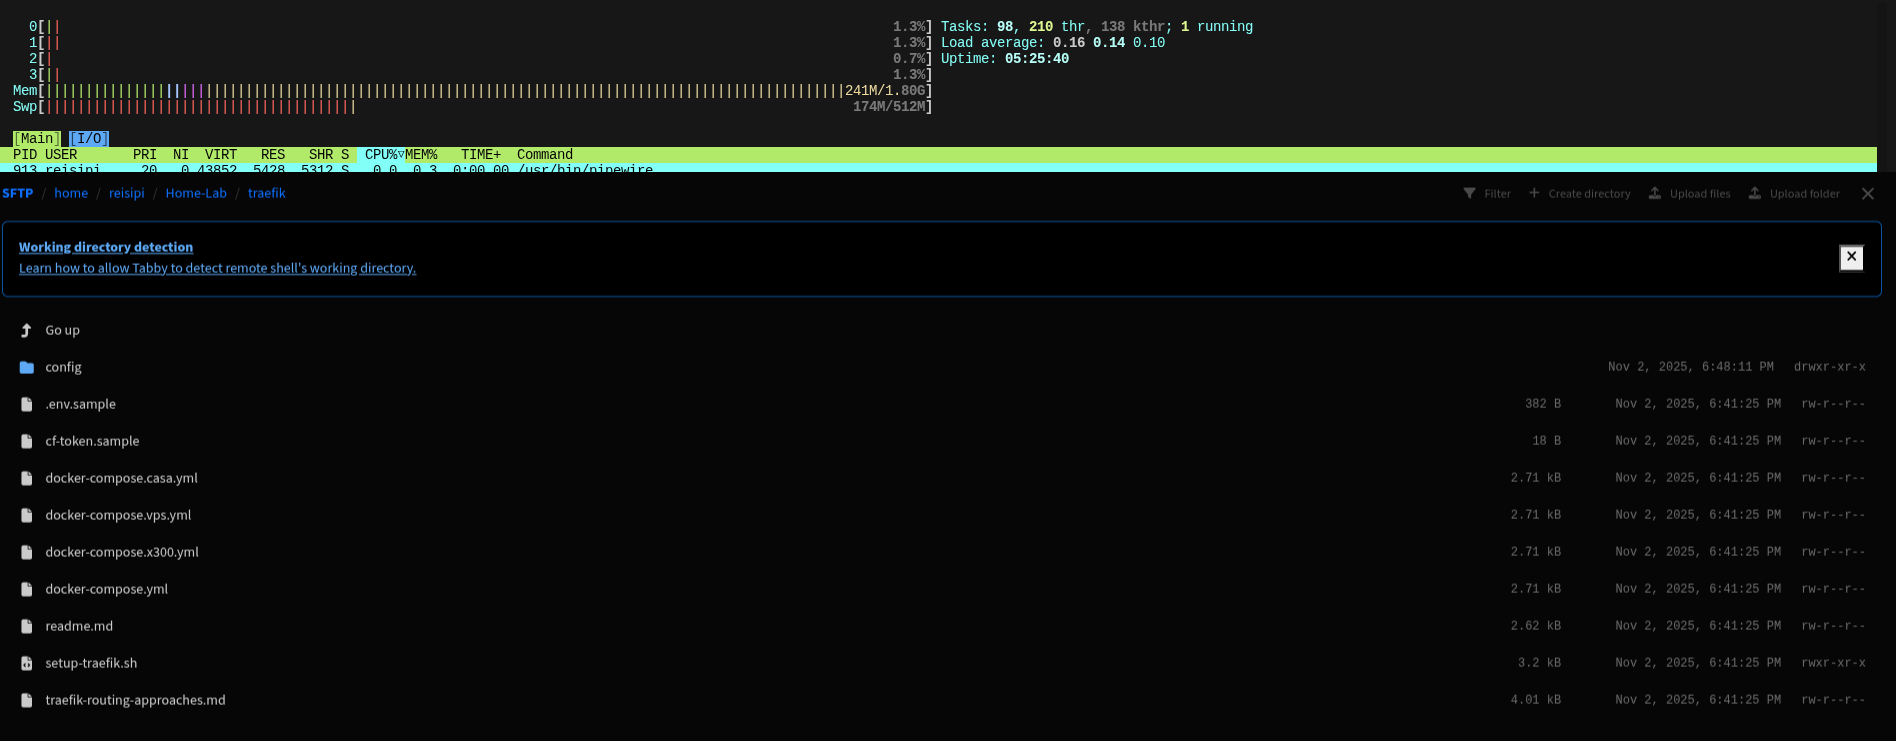
sudo mount -aMedia x Traefik: https://github.com/JAlcocerT/Home-Lab/blob/main/z-homelab-setup/evolution/1025media_docker-compose.yml
Traefik x x300 Homelab
Get your API Token (key) with edit zone DNS permissions: https://dash.cloudflare.com/profile/api-tokens
#git clone https://github.com/JAlcocerT/Home-Lab.git


#cd traefik
cp .env.sample .env #add your cloudflare token there and your email, optionally the zoneID for programmatic DNS updates
cp cf-token.sample cf-token ###add JUST your cloudflare token there

source .env #https://dash.cloudflare.com/profile/api-tokens #with edit zone DNS permissions
#verify the token
curl "https://api.cloudflare.com/client/v4/user/tokens/verify" \
     -H "Authorization: Bearer $cf_token"

# Get zone ID via CLI instead of UI (OPTIONAL - only required for programmatic DNS updates)
curl -s -X GET "https://api.cloudflare.com/client/v4/zones?name=jalcocertech.com" \
  -H "Authorization: Bearer $cf_token" \
  -H "Content-Type: application/json" | jq -r '.result[0].id'
Remember that this is how the directory should look:
- acme.json
- config.yml - Automatically created
- traefik.yml
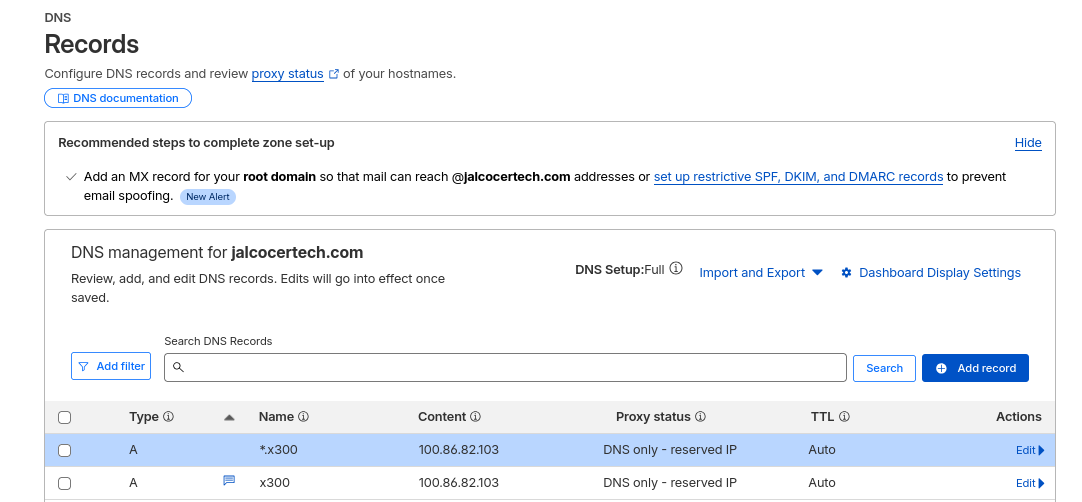
So I added these A type DNS (only) records: x300.jalcocertech.com and *.x300.jalcocertech.com to point to my x300 private IP address.
#python3 cf-dns-updater.py
dig +short x300.jalcocertech.com A
ping x300.jalcocertech.com
nslookup x300.jalcocertech.com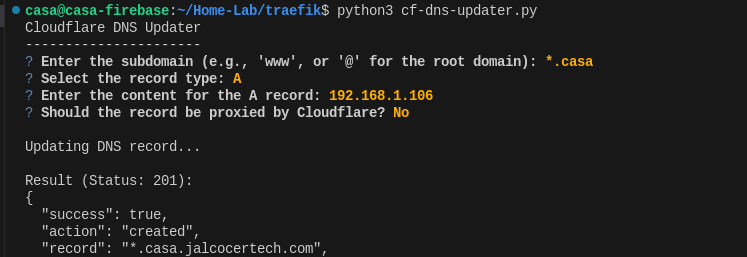
Then just spin Traefik:
docker compose -f docker-compose.x300.yml up -d
#sudo docker logs traefik ###No log line matching the '' filter ✅
#docker-compose -f docker-compose.x300.yml stop
And here it is: https://x300.jalcocertech.com/dashboard/#/
DONT do
Connect portainer to traefik network:
docker network connect traefik_traefik-proxy portainer
#docker exec -it traefik wget -qO- http://portainer:9000/api/system/status
Do Remember that there are 2 ways to bring services to works with Traefik and https:
- Tweak the compose files for traefik like so: see Termix example
Each line has to be tweaked: "traefik.http.routers.CHANGETHISNAME!!!.middlewares=termix-https-redirect"
services:
  termix:
    ports:
      - "8090:8080"
    networks:
      - traefik_traefik-proxy
    labels:
      - "traefik.enable=true"
      - "traefik.docker.network=proxy"
      - "traefik.http.routers.termix.entrypoints=http"
      - "traefik.http.routers.termix.rule=Host(`termix.x300.jalcocertech.com`)" #Tweak this with your subdomain
      - "traefik.http.middlewares.termix-https-redirect.redirectscheme.scheme=https"
      - "traefik.http.routers.termix.middlewares=termix-https-redirect"
      - "traefik.http.routers.termix-secure.entrypoints=https"
      - "traefik.http.routers.termix-secure.rule=Host(`termix.x300.jalcocertech.com`)" #Tweak this with your subdomain
      - "traefik.http.routers.termix-secure.tls=true"
      - "traefik.http.routers.termix-secure.tls.certresolver=cloudflare"
      - "traefik.http.routers.termix-secure.service=termix" #change this to your service name
      - "traefik.http.services.termix.loadbalancer.server.port=8080" #it has to be the container port!!!
networks:
  traefik_traefik-proxy:
external: true- Tweak the config files for traefik like so: see FreshRSS example
https://github.com/JAlcocerT/Home-Lab/blob/main/traefik/config/config.x300sample.yaml#L31
#....
  routers: #for external services (outside the traefik network)
    portainer:
      entryPoints:
        - "https"
      rule: "Host(`portainer.x300.jalcocertech.com`)"
      middlewares:
        - default-security-headers
        - https-redirectscheme
      tls: {}
      service: portainer

  services:
    portainer:
      loadBalancer:
        servers:
          - url: "http://portainer:9000" #or simply using the container name plus host port
passHostHeader: true- Example with Traefik network, Termix: This one doesnt need any tweak to
./config/config.yaml✅
https://github.com/JAlcocerT/Home-Lab/blob/main/termix/docker-compose.traefik.yml
#cd to homelab root
sudo docker compose -f ./termix/docker-compose.traefik.yml up -d
#docker inspect termix --format '{{json .NetworkSettings.Networks}}' | jq #
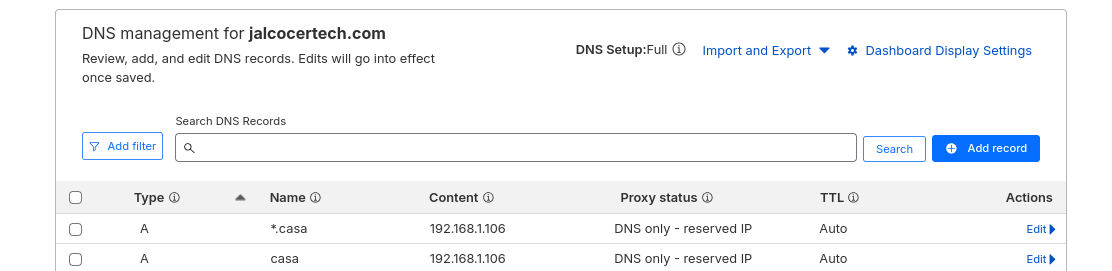
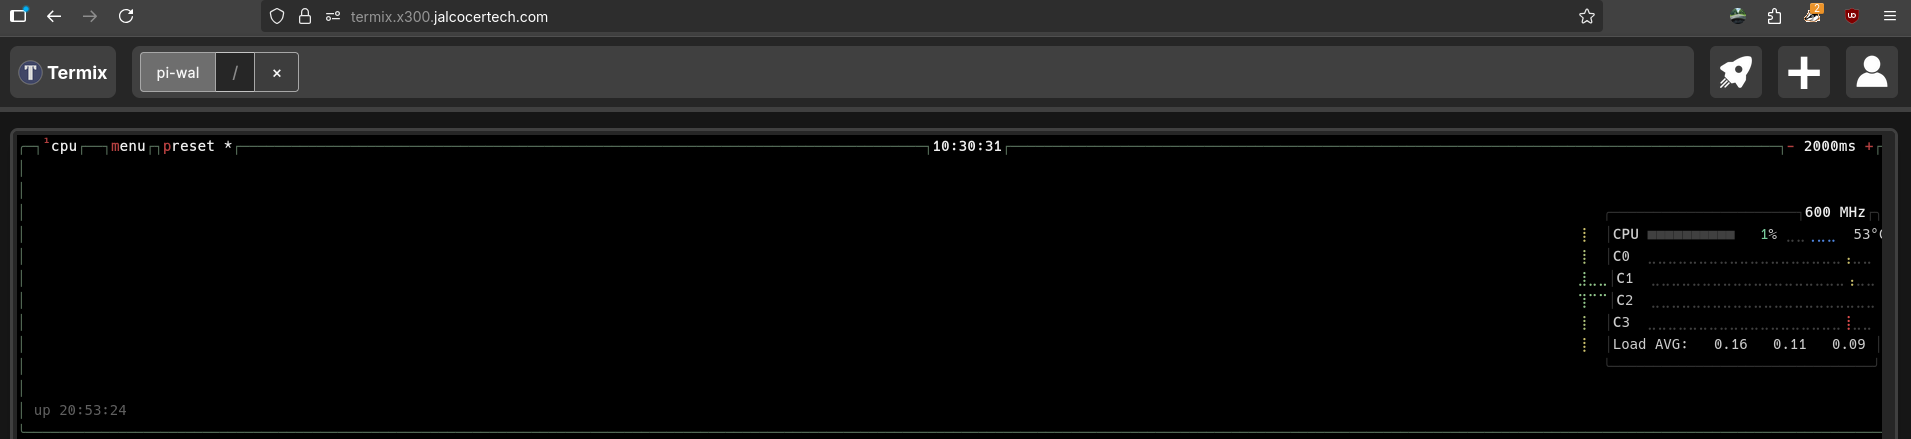
#ping termix.x300.jalcocertech.comSee how these DNS have been edited by Traefik automatically:
#dig +short traefik-docker.jimsgarage.co.uk A
dig +short termix.x300.jalcocertech.com A
ping termix.x300.jalcocertech.com
nslookup termix.x300.jalcocertech.com- Example without Traefik network, Portainer/FreshRSS: these will work with the original compose plus the config and a Traefik restart ✅
https://github.com/JAlcocerT/Home-Lab/blob/main/fresh-rss/docker-compose.yml https://github.com/JAlcocerT/Home-Lab/blob/main/traefik/config/config.x300sample.yaml#L31
#docker inspect freshrss --format '{{json .NetworkSettings.Networks}}' | jq #
#docker inspect portainer --format '{{json .NetworkSettings.Networks}}' | jq #
dig +short freshrss.x300.jalcocertech.com A
dig +short portainer.x300.jalcocertech.com A
#sudo docker restart traefik
These records were also set automatically by Traefik!
Traefik x Pi4
Connect to the same wifi with your laptop:
ip route | grep default
nmap -sn 192.168.0.0/24
arp -a #
#ip neighbor
Then try Ips randomly, or use: https://it-tools.tech/mac-address-lookup
And get the vendor info:
Raspberry Pi Trading Ltd
Maurice Wilkes Building, Cowley Road
Cambridge CB4 0DS
United Kingdom
Then just login via SSH: as you are connected to the same Cable Modem, with the Home-private IP
ssh reisipi@192.168.0.233Once again, remember to set proper tailscale expiry not to loose access when you are far from home!
tailscale status
#ping jalcocert-x300-1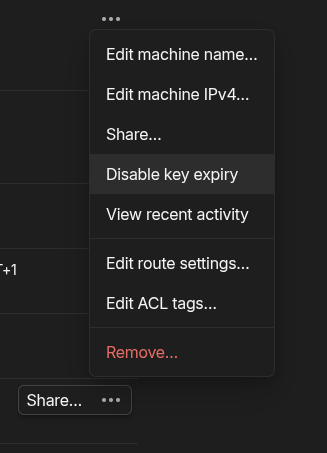
Optionally: activate back your pi as a possible exit node
echo 'net.ipv4.ip_forward = 1' | sudo tee -a /etc/sysctl.conf
echo 'net.ipv6.conf.all.forwarding = 1' | sudo tee -a /etc/sysctl.conf
sudo sysctl -p /etc/sysctl.conf
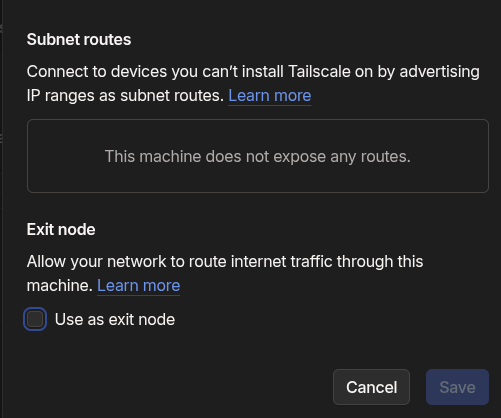
sudo tailscale up --advertise-exit-node And via tailscale UI just configure:
And check that everything is working:
#df -h
#btop
sudo apt update && sudo apt install -y speedtest-cli
You should be able to connect via your https://termix.x300.jalcocertech.com/ now!
Make these network tests if you want:
speedtest-cli
speedtest --simple
As everything is working, you can just get Traefik to do htps quickly for Nextcloud.
But first, get tabby terminal on your laptop:
wget -P ~/Applications https://github.com/Eugeny/tabby/releases/download/v1.0.228/tabby-1.0.228-linux-x64.AppImage
#tabby
Then just:
#nano ~/.ssh/config
#Host Pi4
#  HostName 100.100.100.7
#  User reisipi
You can optionally make sure that your Pi accepts vscode/windsurf connection:
#rm -rf ~/.vscode-server
#rm -rf ~/.windsurf-server
curl -fsSL https://deb.nodesource.com/setup_20.x | sudo -E bash -
sudo apt-get install -y nodejs
Anyways:
git clone https://github.com/JAlcocerT/Home-Lab.git

#python3 cf-dns-updater.py #Point the DNS for Traefik first!
dig +short wal.jalcocertech.com A
ping wal.jalcocertech.com
nslookup wal.jalcocertech.com

cp docker-compose.x300.yml docker-compose.wal.yml
#nano docker-compose.wal.yml #place the correct subdomains

##echo $(htpasswd -nB admin) | sed -e s/\\$/\\$\\$/g
#cp .env.sample .env
#cp cf-token.sample cf-token

#docker compose -f docker-compose.wal.yml up -d
sudo docker logs traefik
sudo docker network ls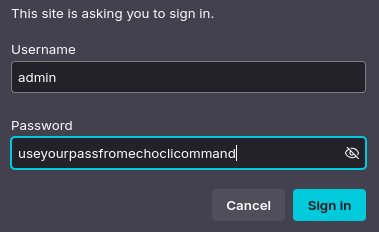
As simple as that! https://wal.jalcocertech.com/dashboard/#/
#sudo docker stats traefik
CONTAINER ID   NAME      CPU %     MEM USAGE / LIMIT   MEM %     NET I/O          BLOCK I/O     PIDS
1234abcd   traefik   0.00%     0B / 0B             0.00%     128kB / 1.37MB   16.4kB / 0B   10
As i was having Nextcloud running already, I decided to go with the config way of adding it to Traefik:
cd config
nano config.yaml
sudo docker restart traefik
ping portainer.wal.jalcocertech.com

docker network connect traefik_traefik-proxy portainer
#docker exec -it traefik wget -qO- http://portainer:9000/api/system/status
#docker inspect portainer --format '{{json .NetworkSettings.Networks}}' | jq

ping adguardhome.wal.jalcocertech.com
#sudo docker logs adguardhome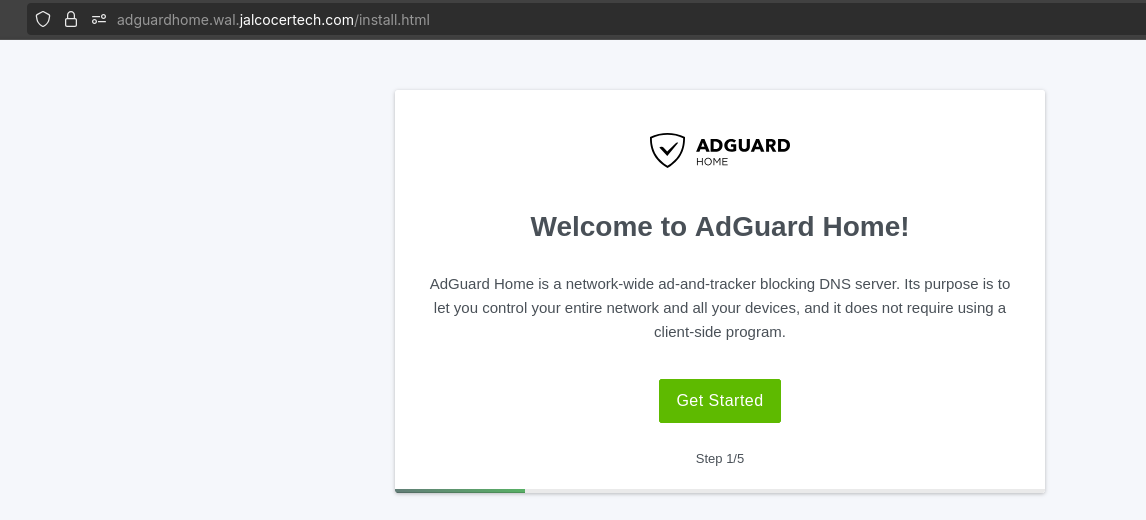
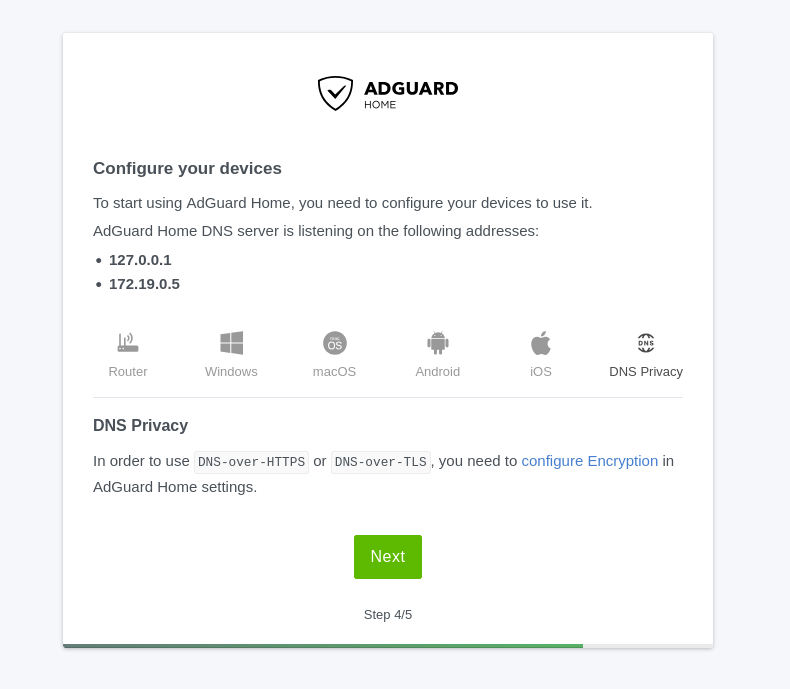
https://github.com/JAlcocerT/Home-Lab/blob/main/adguardhome/docker-compose.traefik.yml https://github.com/JAlcocerT/Home-Lab/blob/main/traefik/docker-compose.wal.yml
FAQ
See if you got some duplicates:
#sudo apt install -y fdupes
fdupes -rS /mnt/data2tb #List duplicates with sizes:
More Selfhosted resources These are new from this post
Self-hosted tunneled reverse proxy server pic.twitter.com/Hx1SSyOeLD
— Tom Dörr (@tom_doerr) October 19, 2025
Selfhosted resources: you should know already
Great yt channels
From the creator of https://github.com/Lissy93/networking-toolbox and https://github.com/Lissy93/portainer-templates
MIT | 🛜 All-in-one offline-first networking tools and utilities
MIT | 🚢 500+ 1-click Portainer app templates
https://github.com/ccbikai/awesome-homelab - This has been great addition to the list!
Monitoring For HomeLab
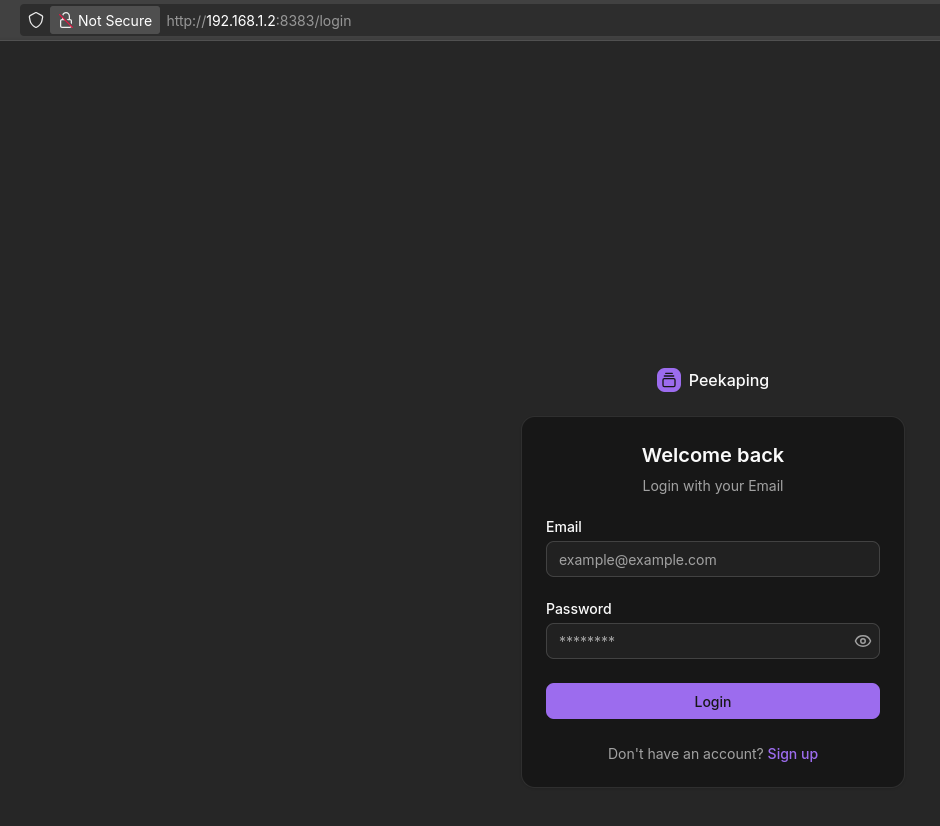
I discovered about Peekaping: https://github.com/0xfurai/peekaping/
MIT | Open Source Uptime Kuma Alternative
Probably a must have for your VPS!
After trying it via containers, could not resist to add it to the monitoring docs:
Provides a very quick monitoring + status pages for your homelab: http://192.168.1.2:8383/status/mora
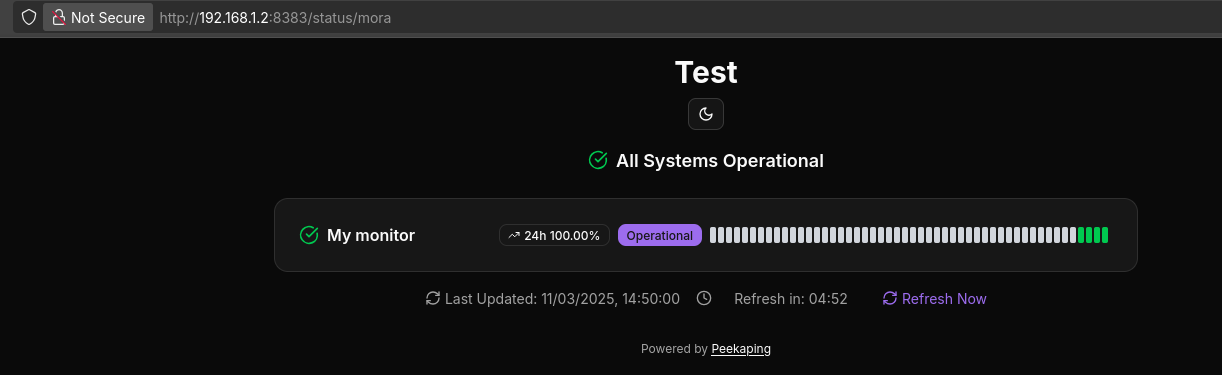
With quickly integrations to your website’s posts: https://docs.peekaping.com/badges
<p>
    <img src="https://your-peekaping-instance.com/api/v1/badge/api-monitor/status" alt="API Status" />
</p>
As I have it running locally: http://192.168.1.2:8383/monitors these are rendered via hugo server
Badge Type,Description,Markdown Code
Uptime (30-day),Shows uptime percentage for the last 720 hours.,
Average Ping,Displays the average response time over the last 24 hours (default).,
Certificate Expiry,Shows how many days until the SSL certificate expires (for HTTPS monitors).,
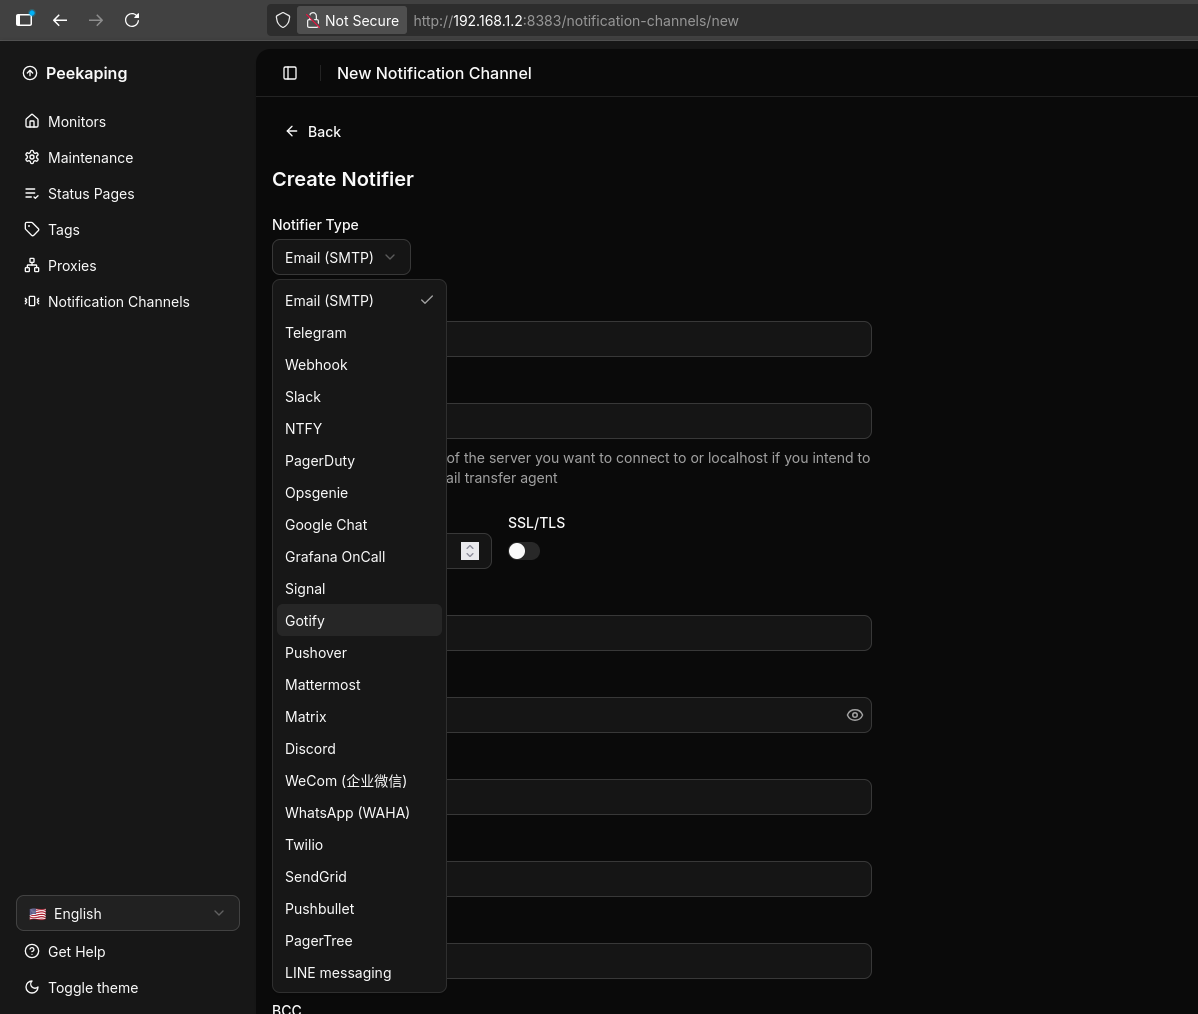
Latest Response,Shows the most recent response time measurement.,I think that it can be good to think how to integrate Peekaping with these notification services: http://192.168.1.2:8383/notification-channels/new
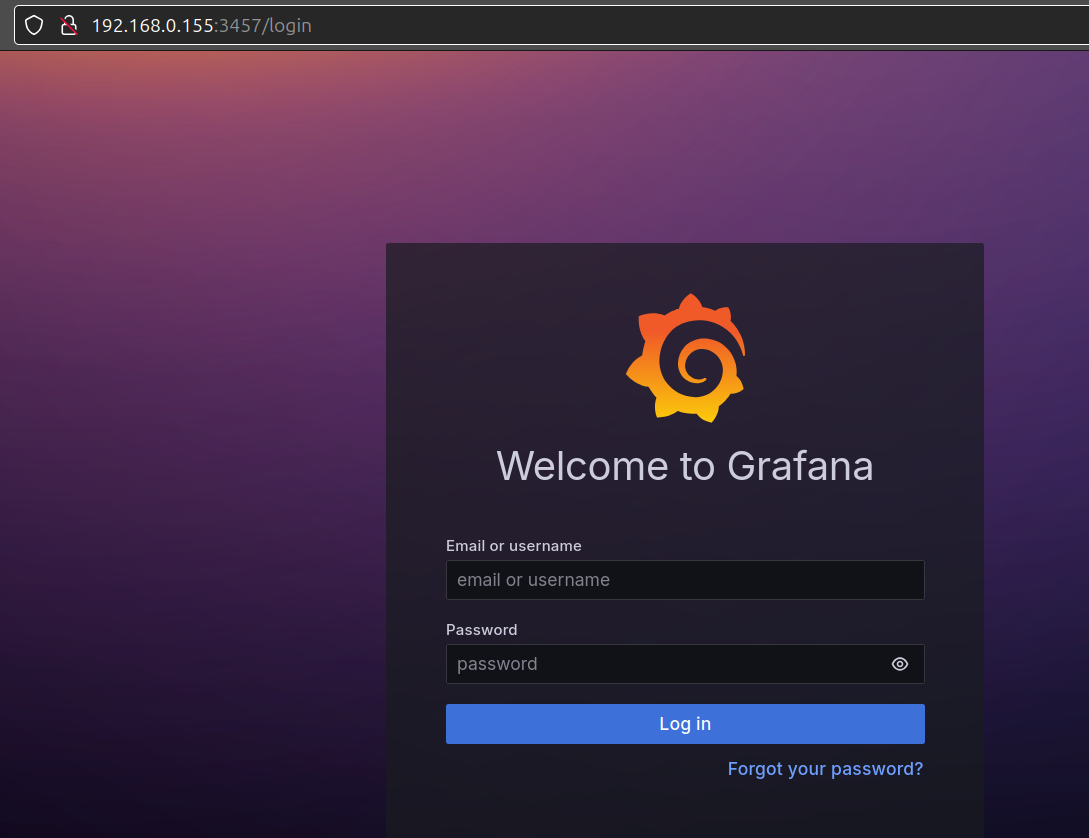
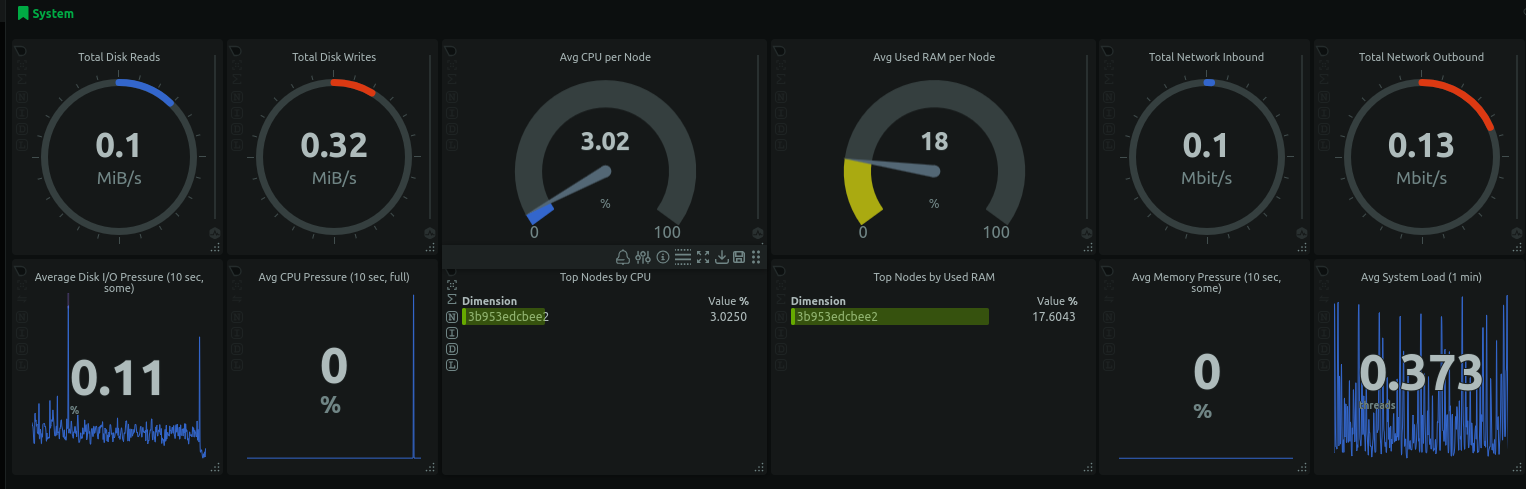
We also have the good old Grafana which can be configured for Monitoring:
Or, a quick monitoring dashboard with NetData: SelfHost NetData with Docker
They remodel recently the netdata dockerhub image: https://hub.docker.com/r/netdata/netdata/
#docker stats
#htop
sudo docker stats multichat
#btop
I Got to know also about: https://github.com/operacle/checkcle/
MIT | CheckCle is a self-hosted, open-source monitoring platform for seamless, real-time full-stack systems, applications, and infrastructure.
It provides real-time uptime monitoring, distributed checks, incident tracking, and alerts. All deployable anywhere.
But we already covered similar tools:
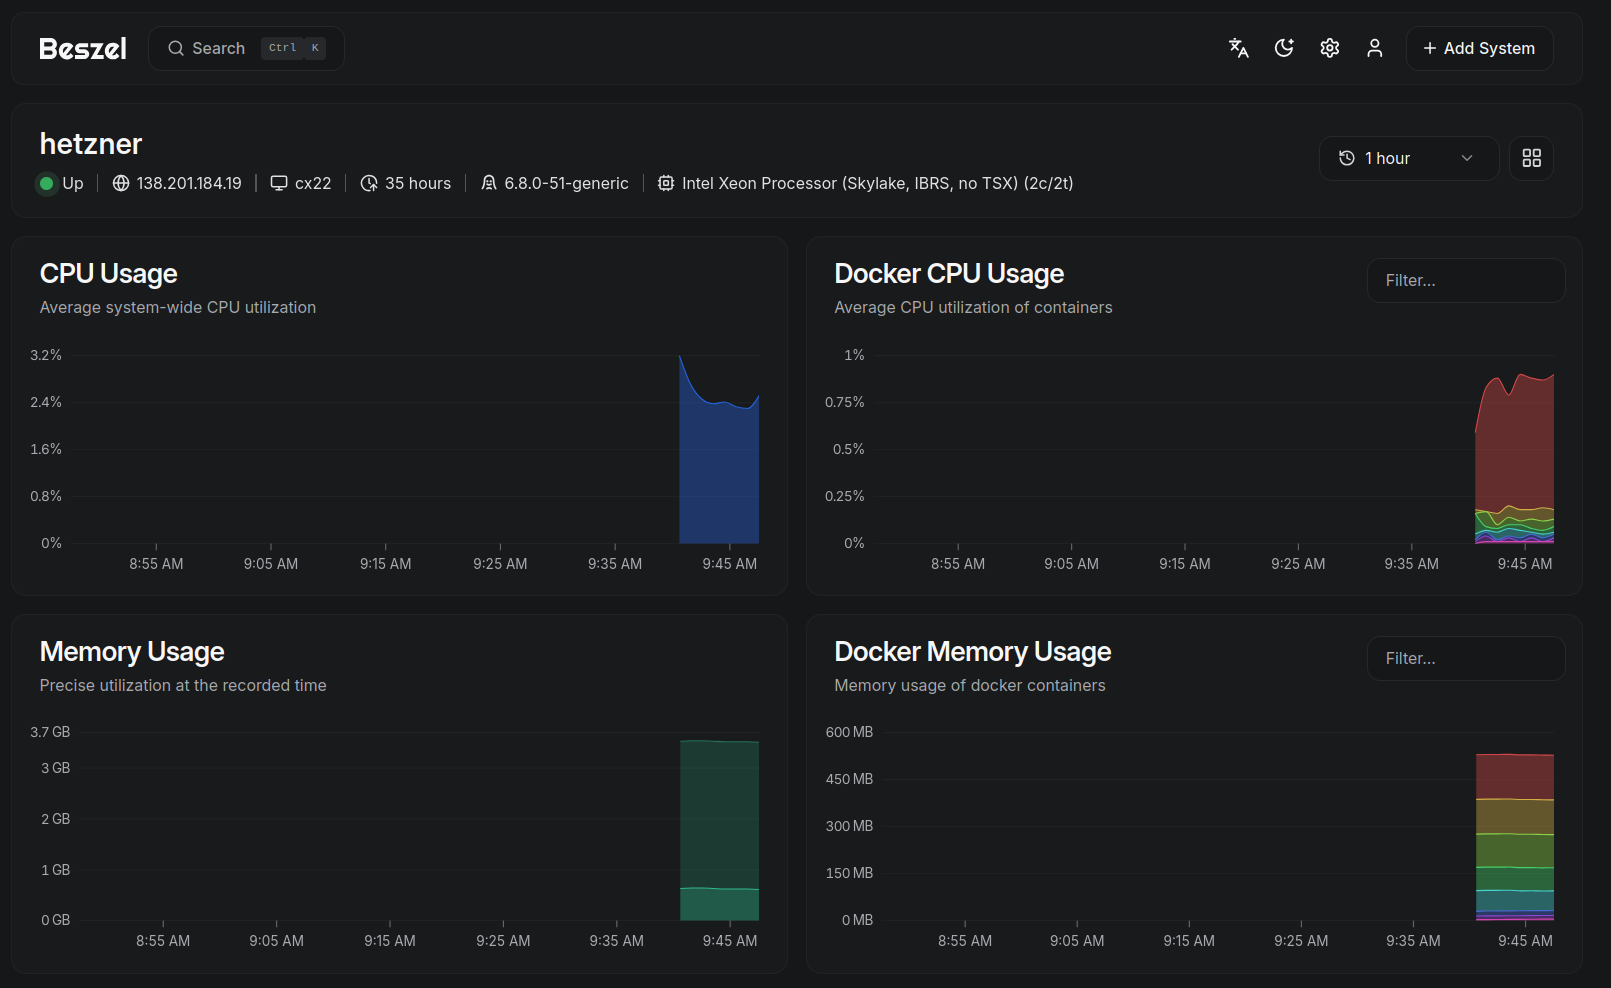
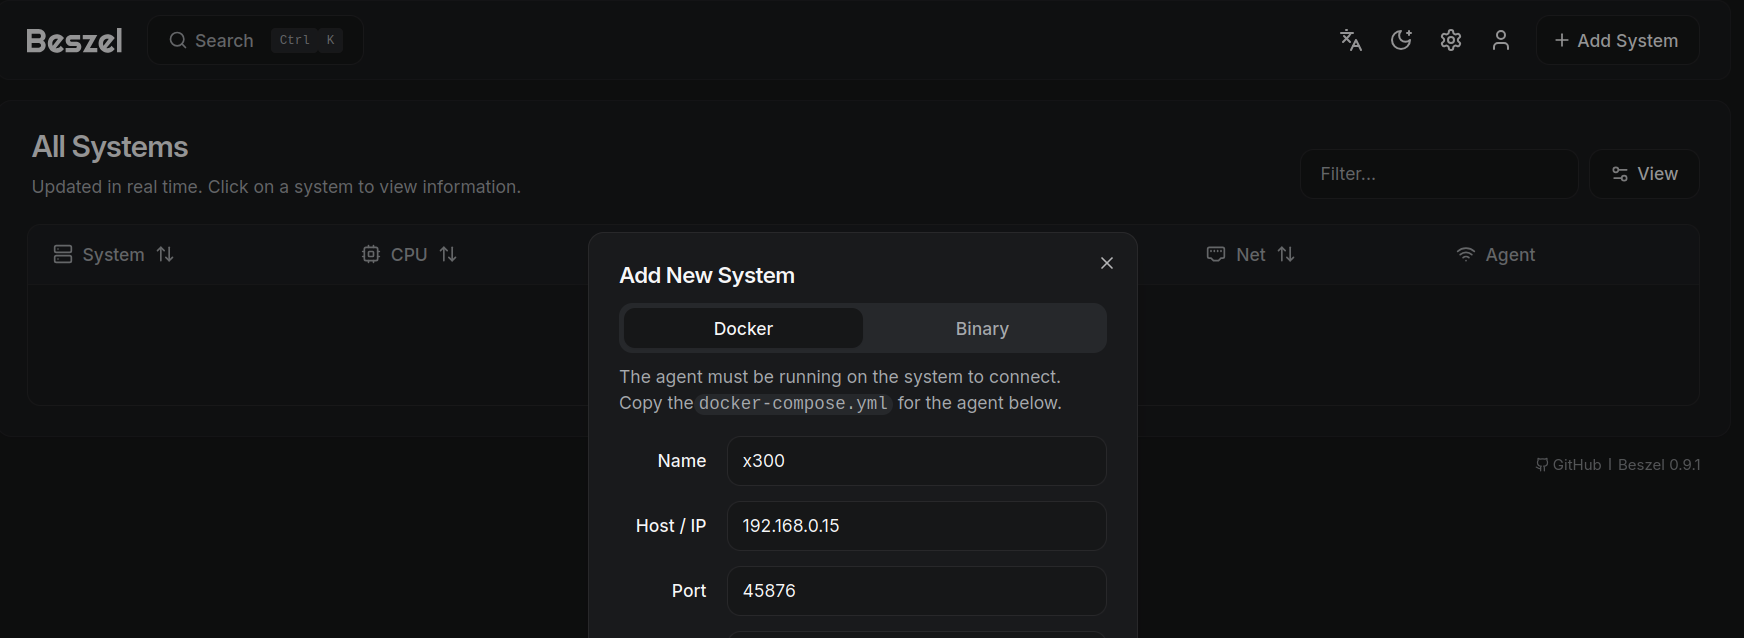
- Beszel: Web Analytics and Monitoring!
- Tianji: which I covered here
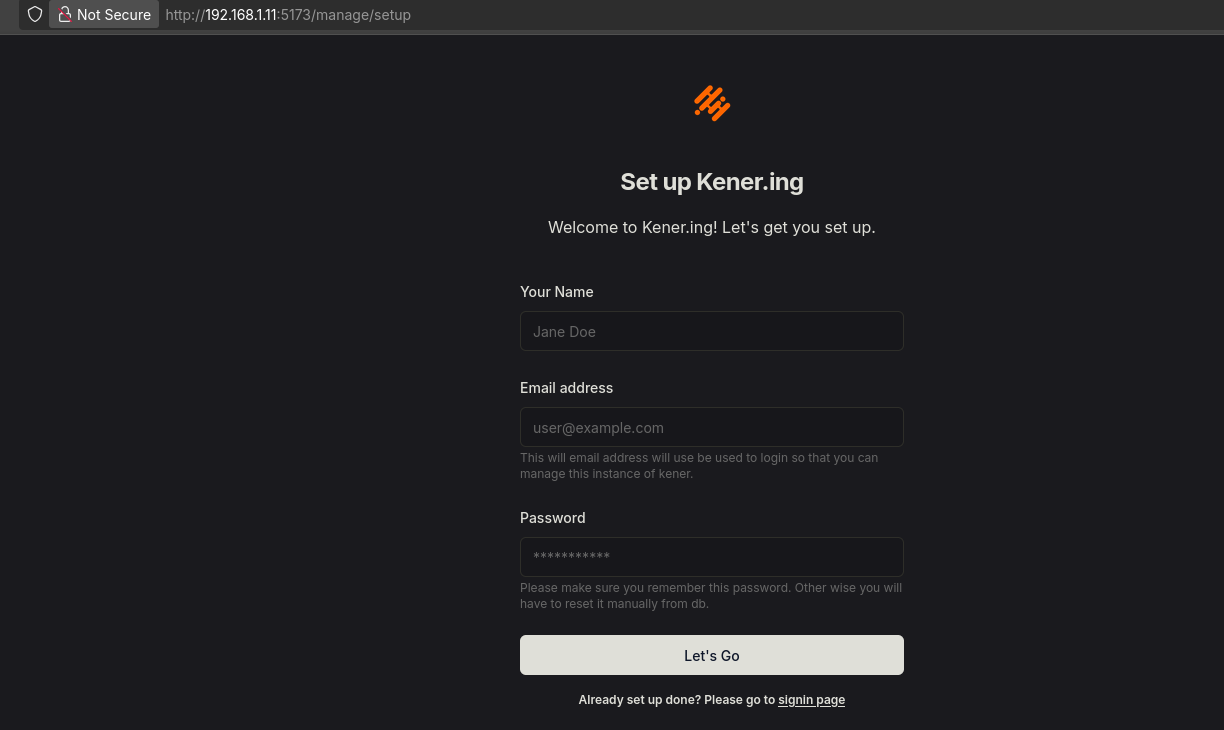
- Uptime Kuma and Kener: bringing status pages to your server
See how uptime Kuma status pages looks:
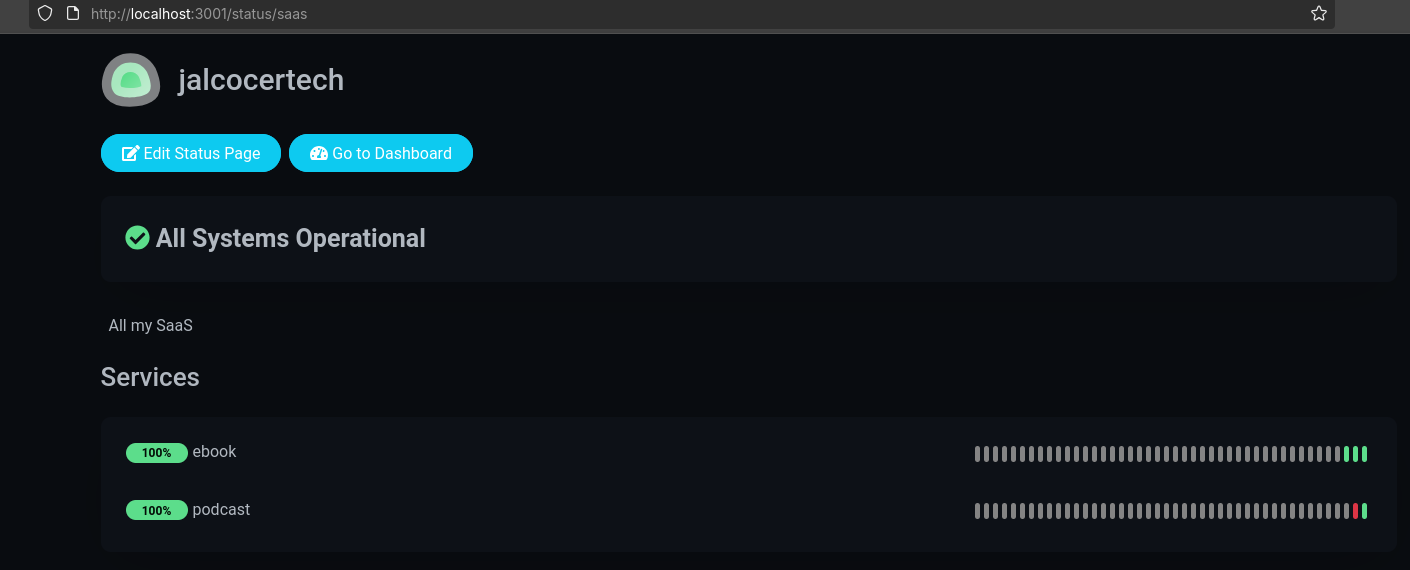
Compared to Kener: