Selfhosted Media
TL;DR
Despite google giving 5TB now: Is there a reliable way not to loose photos for good?
+++ Can I use CLI agents to order my media?
#codex #5.5 made a great job
df -hT
Intro
Time to have a realiable selfhosted cold storage around nextcloud, tailscale and my old 2200G with 4TB HDD :)
git clone https://github.com/JAlcocerT/Home-Lab
cd Home-Lab
Or just…
- Do some space to spin agents like crazy
- Have forgejo going and tmux to see how each project goes by
Forgejo is an alternative to github (and to gitea):
You can try gram to eat less ram: which code is in forgejo/codeberg btw
cd /tmp
curl -fLO https://codeberg.org/GramEditor/gram/releases/download/1.2.1/gram_1.2.1-1_x86_64.deb
#npm install -g opencode-ai
Quick Media Transfers
I know, you might be already familiar with PairDrop
If what you want is sth that can be integrated with WinSCP
Music Media
A native, lightweight music client for Jellyfin and Subsonic. Built with Rust and GTK. 🦀🐧
Podcasts or Transcripts
Not telling you to remember that you can have your own podcast
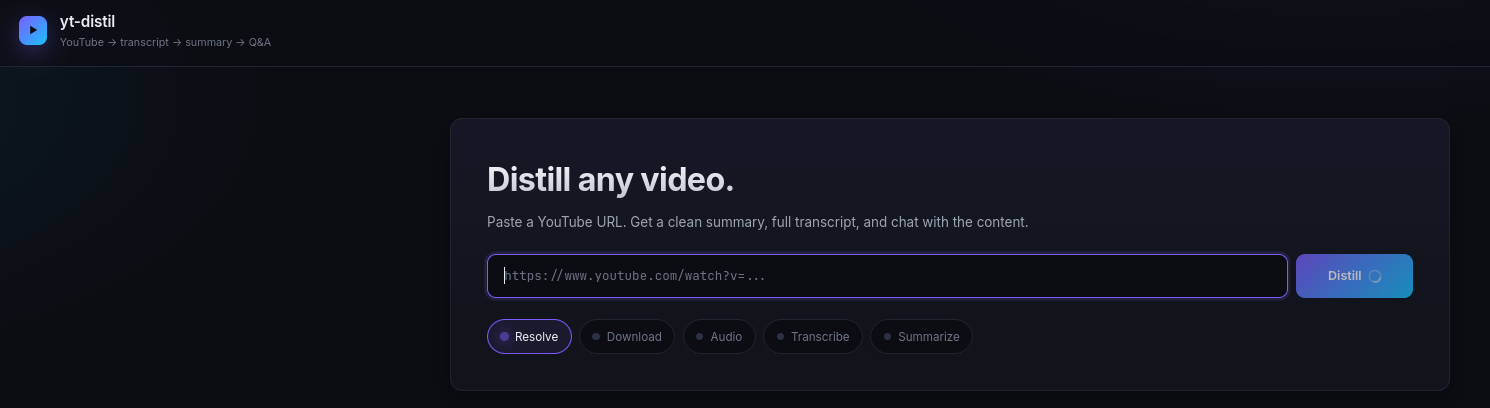
Neither that with some S2T transcripts, ffmpeg and yt-dl you can do sth nice:
cd /poc/yt-distil
#tmux new-session -d -s yt 'cd /home/jalcocert/poc/yt-distil && uv run yt-distil run "https://www.youtube.com/watch?v=qsXxckCbci0" --no-qna -y'
Video Media
Im sure that you are already using qb and prowlarr at 6011 and 9696.
sudo docker compose -f ./z-homelab-setup/evolution/2601_docker-compose.yml up -d qbittorrent
#2601_docker-compose.yml up -d prowlarr
sudo docker compose -f ./z-homelab-setup/evolution/2605_docker-compose.yml up -d prowlarr
#sudo docker compose -f ./z-homelab-setup/evolution/2602_docker-compose.yml up -d prowlarr
And that you know how to quickly join your videos via FFMPEG:
#ffmpeg for oa5!
ls *.MP4 | sed "s/^/file '/; s/$/'/" > file_list.txt #add .mp4 of current folder to a list
ffmpeg -f concat -safe 0 -i file_list.txt -c copy output_video.mp4 #original audio
#Get-ChildItem -Filter "*.MP4" | ForEach-Object { "file '$($_.Name)'" } | Set-Content file_list.txt
#ffmpeg -f concat -safe 0 -i file_list.txt -c copy output.mp4
You can create your own torrent of your joined .MP4 with:
#croc send output-video.mp4Jellyfin and QBit
Because you will want to move those action cam videos:
You have it available at 192.168.1.2:8096 and can serve clients at your smartTV.
#sudo docker compose -f ./z-homelab-setup/evolution/2601_docker-compose.yml up -d jellyfin

docker ps -a | grep -i jellyfin
And share them with your friends :)
Because this it not intended for you to use go to wolfmax4k, nor visiting Anna.
IPTV
A powerful, self-hosted IPTV player with a modern web interface.
Non Video Media
But what if you record yourself doing podcast or audiobooks?
How could you share that?
Well, you got astro themes like this one:
That it has a public RSS and people would get notified.
Also, you can use:
Listenarr automates audiobook collection management similar to Sonarr or Radarr, but for audiobooks. It can search, download, and organize your library automatically using metadata from Audible and other sources.
- Audiobookshelf
Audiobookshelf is the top open-source recommendation for self-hosted audiobook listening and streaming.
It goes beyond basic MP3 players like Navidrome by offering audiobook-specific features such as chapter navigation, per-user progress syncing, and multi-device support.
Code is also Media
With all that its going on around github lately: https://www.githubstatus.com/uptime
Ive decided to get a code sync to my HomeLab: with Forgejo (codeberg) OSS model being > than gitea
#git clone /home-lab
cd home-lab/forgejo
docker compose up -d
Go to forgejoUI at:
http://localhost:3034/user/sign_up
Provide github and forgejo creds to make the one time migration happen: http://192.168.1.2:3034/user/settings/applications
cp .env.sample .env #provide the gh pat (scope=repo) and the one from forgejo!
make list-github-repos #make help
You should see a list of repos already.
Copy some with:
make migrate-repo REPO_OWNER=JAlcocerT REPO_NAME=eda-f1
#make list-repos #this will show one already
Wanna get ready for agents 24/7 in the Pi?
Better provide a separated user for Forgejo so that the agents tinker safely:
# See all existing users forgejo
make list-users
# Create a new non-admin user (will be forced to change password on first login)
make create-user NEW_USER=hermesagent NEW_USER_EMAIL=alice@example.com NEW_USER_PASSWORD=changeme123
# Grant write access to a specific repo (can push, cannot delete or change settings)
make add-collaborator NEW_USER=hermesagent REPO_OWNER=JAlcocerT REPO_NAME=eda-f1
make list-user-repos NEW_USER=hermesagent
The mental model is: password = web UI, SSH key = git over SSH, token = git over HTTPS + API/CLI tools. Three separate auth methods, all tied to the same account.
With that, instead of having agents doing weird stuff with access to your github pwd, they will just tinker with an non admin user of your forgejo instance.
For additional security, you can have foregejo running separately from the Pi, like i did having it at my x300: http://192.168.1.12:3034
Make sure you adjusted this env variable accordingly
With this, you should get an error at the Pi4:
gh status #make sure to be logged off to avoid potential painMake some working copies for agents to work safely:
make migrate-repo REPO_OWNER=JAlcocerT REPO_NAME=electronics-101
make add-collaborator NEW_USER=hermesagent REPO_OWNER=JAlcocerT REPO_NAME=electronics-101
make migrate-repo REPO_OWNER=JAlcocerT REPO_NAME=mbsd
make add-collaborator NEW_USER=hermesagent REPO_OWNER=JAlcocerT REPO_NAME=mbsd
#make list-user-repos NEW_USER=hermesagent #now showing x3!
Do this in the pi4 or wherever you will run agents
ssh-keygen -t ed25519 -C "hermesagent@pi-home" -f ~/.ssh/id_ed25519_forgejo
# This creates two files:
# - ~/.ssh/id_ed25519_forgejo (private — never share)
#- ~/.ssh/id_ed25519_forgejo.pub (public — paste this into Forgejo)
Copy this public to forgejo UI when logged in as hermes: http://192.168.1.2:3034/user/settings/keys
cat ~/.ssh/id_ed25519_forgejo.pubThen this works:
ssh -T forgejo-home
#curl -s -o /dev/null -w "HTTP %{http_code}\n" http://192.168.1.2:3034/api/v1/users/hermesagent
git ls-remote forgejo-home:jalcocert/eda-f1.gitThe “trick” is just telling SSH to connect to a non-standard port — and doing it in a way that hides the ugly detail behind a friendly alias. Let me show you what’s actually happening.
Why the port matters
ssh somewhere.com defaults to port 22. That’s hardcoded into the protocol. Your Pi at 192.168.1.2 already had a regular SSH daemon listening on port 22 (the one you use to get a shell on the box). Forgejo’s git SSH endpoint is a separate service that has to live somewhere else.
In your compose file:
ports: - “2235:22” #SSH
That line means: “inside the container, Forgejo’s SSH listens on port 22. Map that to port 2235 on the host.” So from your LAN, Forgejo’s SSH is reachable at 192.168.1.2:2235, while the host’s own SSH stays on 192.168.1.2:22. Two completely different SSH services on the same machine.
How we tell the SSH client
Three equivalent ways, ascending order of niceness:
Inline flag every time (annoying): ssh -p 2235 git@192.168.1.2 git clone -c core.sshCommand=“ssh -p 2235” git@192.168.1.2:hermesagent/repo.git
URL-encoded port (works for git, not for plain ssh): git clone ssh://git@192.168.1.2:2235/hermesagent/repo.git
~/.ssh/config alias ← what we did: Read 1 file (ctrl+o to expand)
● Each line breakdown:
┌────────────────────────────────────────┬────────────────────────────────────────────────────────────────────────────────────────────────────────────────────────┐ │ Directive │ What it does │ ├────────────────────────────────────────┼────────────────────────────────────────────────────────────────────────────────────────────────────────────────────────┤ │ Host forgejo-home │ The alias. When you type forgejo-home anywhere SSH expects a hostname, the rest of this block kicks in. │ ├────────────────────────────────────────┼────────────────────────────────────────────────────────────────────────────────────────────────────────────────────────┤ │ HostName 192.168.1.2 │ The actual IP/DNS name to dial. │ ├────────────────────────────────────────┼────────────────────────────────────────────────────────────────────────────────────────────────────────────────────────┤ │ Port 2235 │ The key one. Tells SSH “for this host, use 2235 instead of the default 22.” │ ├────────────────────────────────────────┼────────────────────────────────────────────────────────────────────────────────────────────────────────────────────────┤ │ User git │ Always git for Forgejo/Gitea/GitHub/GitLab — saves you typing git@. │ ├────────────────────────────────────────┼────────────────────────────────────────────────────────────────────────────────────────────────────────────────────────┤ │ IdentityFile ~/.ssh/id_ed25519_forgejo │ Which private key to authenticate with. │ ├────────────────────────────────────────┼────────────────────────────────────────────────────────────────────────────────────────────────────────────────────────┤ │ IdentitiesOnly yes │ “Only try this key, ignore any others ssh-agent has loaded.” Prevents weird auth failures when you have multiple keys. │ └────────────────────────────────────────┴────────────────────────────────────────────────────────────────────────────────────────────────────────────────────────┘
After saving this, every git/ssh tool on the system treats forgejo-home as if it were a real hostname with all those settings pre-applied. That’s why a clean URL like forgejo-home:hermesagent/repo.git works — git internally expands it to ssh -p 2235 -i ~/.ssh/id_ed25519_forgejo git@192.168.1.2 hermesagent/repo.git.
File location & permissions
- File: ~/.ssh/config (per-user). System-wide equivalent is /etc/ssh/ssh_config but you almost never want that. - Permissions must be 600 (owner read/write only). SSH refuses to load it otherwise — that’s why I ran chmod 600 after creating it.
- You can have as many Host
blocks as you want — one per server. They stack in the same file.
So the whole “trick” was: figure out the right port from your docker-compose.yml (2235), then express it once in ~/.ssh/config so you never type it again.
You can even go to: http://192.168.1.2:3034/jalcocert/mbsd and make a fork for the agent hermes to take the repo as personal so that the ssh edits go there.
Probably an overkill though.
Lets move on:
git clone forgejo-home:hermesagent/electronics-101.git
git clone forgejo-home:hermesagent/mbsd.git
#git clone forgejo-home:jalcocert/eda-f1.git
#docker system df #just check if you have enough space in the small Pi
Remember to check env vars!
  - GITEA__server__DOMAIN=192.168.1.2
  - GITEA__server__ROOT_URL=http://192.168.1.2:3034/
  - GITEA__server__SSH_DOMAIN=192.168.1.2
  - GITEA__server__SSH_PORT=2235
What we have at this point:
- Github to Forgejo at homelab integration: just migrate whatever repo you want agents to work on
- A forgejo nonadmin user for the agents to make their changes
- Connection of the Pi blocked to github, but available to the agent forgejo account and repositories to work on are visible
git config --global user.name "hermesagent"
git config --global user.email "alice@example.com"
Now you just have to choose which coding agent will be doing this while you plant tomatoes:
#opencode
#codex
claude
And provide some instructions CLAUDE.md at repo root:
  - This repo is `hermesagent/electronics-101` on Forgejo at 192.168.1.2:3034.
  - Only commit + push to this repo's `origin` remote. Never add other remotes, never push elsewhere.
  - Author identity is already configured globally as hermesagent — don't override it.  - Don't touch files outside this repo directory.
  - Don't modify ~/.ssh/, ~/.gitconfig, or any system config.
  - Don't run destructive commands (`rm -rf`, `git push --force`, `git reset --hard origin/...`) without an explicit task asking for them.  - If unsure, stop and ask rather than guess.
  - Make frequent commits and push, ideally one change, one commit
To go yolo:
claude --dangerously-skip-permissionsYOLO is necessary but not sufficient for true unattended work.
It solves one specific problem (the agent stopping to ask “can I run this command?”), but there are 2-3 other pieces depending on what you actually want.
What it doesn’t solve
- Session persistence (don’t lose it when you disconnect)
If you start claude over SSH, then close your laptop, the session dies. Three ways to detach:
#sudo apt update
sudo apt install -y tmux
# Option A: tmux — best for interactive work you might check back on
tmux new -s claude-electronics
cd ~/electronics-101
#claude --dangerously-skip-permissions -p "ive been tinkering with electronics on this repository, what are you thought of it?"
claude --dangerously-skip-permissions
# Detach with Ctrl+B then D. Reattach later with: tmux attach -t claude-electronics
tmux ls
#tmux attach -t claude-electronics #for whenever you want to come back
About electronics 📌
Honest read: this is a really well-structured self-study repo — not just code, but a curriculum. The pattern you’ve locked in (BRD → PySpice sim → curiosities.md → next-steps.md → real build) is the right shape for learning electronics, and the L1–L15 + M1–M2 + 0a–0e progression actually mirrors how an EE textbook is organized, just driven by simulation instead of math.
What stands out as strong:
- sample-pyscipe/ is the anchor — the protected-vs-unprotected MOSFET overlay (101V spike → 12.9V clamped) is exactly the kind of “scared straight” plot that makes a flyback diode unforgettable. Most tutorials just say you need one.
- Per-folder ngspice Flatpak shim copied across L-series is the right call for hermetic, runnable-in-isolation samples, even if it looks redundant.
- z-ideas.md (891 lines) is doing real work as a backlog — and the L/M/0 series are clearly being pulled from it, not invented ad-hoc.
What I’d watch out for:
- The doc-to-code ratio is climbing fast (why.md 745, go-solar.md 1,643, interesting-simulations.md 1,164 in sample-pyscipe/ alone). Risk is that writing about circuits crowds out building them — next-steps.md lists a real build that hasn’t happened yet. The simulations are training wheels; the JT-500 on a breadboard is the actual skill.
- The motor series stalling at M2 is the natural place: M3 (H-bridge shoot-through) is where PySpice starts fighting you, and M4 (PID servo) is where you really need it. Worth pushing through M3 before the momentum dies.
Net: structurally one of the better learn-by-doing repos I’ve seen. Solder something next.
# Option B: nohup — fire and forget
cd ~/electronics-101
nohup claude --dangerously-skip-permissions -p "your task here" > run.log 2>&1 &
For unattended overnight runs, tmux is the right answer — you can reattach in the morning to see what happened.
- Headless / one-shot mode
For “run a single task to completion and exit,” use -p (print mode):
claude --dangerously-skip-permissions -p "Refactor X to Y, run the tests, commit if green"It runs non-interactively, streams output, exits when done. Perfect for cron jobs or shell pipelines. No interactive UI, no prompts. ──── 3. Recurring schedules ──── If “long-running” actually means “run every N minutes/hours,” you’ve got two options:
- System cron — standard, deterministic. crontab -e and add a claude -p … –dangerously-skip-permissions line.
- Claude Code’s /schedule skill — lets you set up scheduled remote agents from inside a Claude session. Better UX, but the agent runs in the cloud (different model from your local Pi).
Others
MIT, Self hosted file converter for images, video, audio, json, excel and more. Supports over 2,000 conversions!
 Flask Intro
 Data Chat Repo
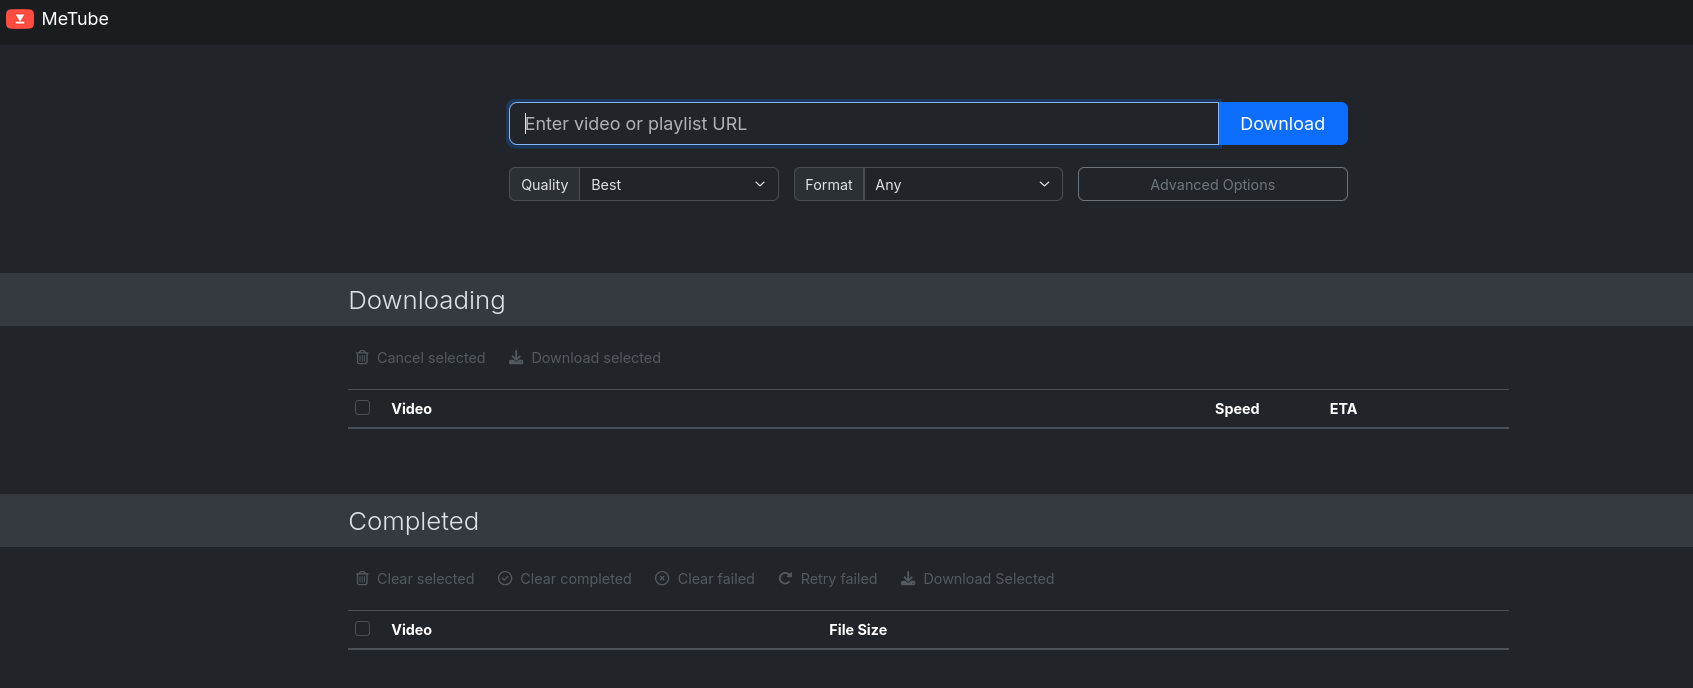
You always have: http://192.168.1.2:6011/ and 9696:

Or just metube:
Conclusions
That’s it for this month containers recap:
docker ps -a --filter status=exited --format 'table {{.Names}}\t{{.Image}}\t{{.Status}}'Problems with cognitive dilution due to AI usage?
You might be seeking for a proper knowledge base for the agentic era.
Why not starting using AI to make projects you could only dream about?
 Consulting Services
 DIY via ebooks
BackUps First!
My HomeLab Recently
Last months it was all about this and this.
https://haveibeenpwned.com/
Codex x Ordering My Media
Again: BAAAACK-ups
Continue at your own risk!
Choose any agent:
codex
#claude
#hermes
#gemini-cli
Visualizing the Changes via WebDav
Remember, Nextcloud brings its own WebDav: ...../remote.php/dav/files/whateverusername
But as this will be for experimenting, just go lean with a sftp-go setup:
#cd ./Home-Lab/sftp-go
docker compose -f docker-compose.pi.yml up -d #its just 2mb!
#docker stats
docker ps -a --filter name=sftp --format 'table {{.Names}}\t{{.Image}}\t{{.Status}}'
http://192.168.1.18:8066/web/admin/setupcreate an user with root directory as/srv
Then try to connect even from the same Pi
sftp -P 2022 <username>@localhost
#sftp -P 2022 jalcocert@192.168.1.18 #or from W11
#scp... #for one time shares
If you prefer an UI: try winSCP as sftp/webdav client
choco install winscp #winget install WinSCP.WinSCP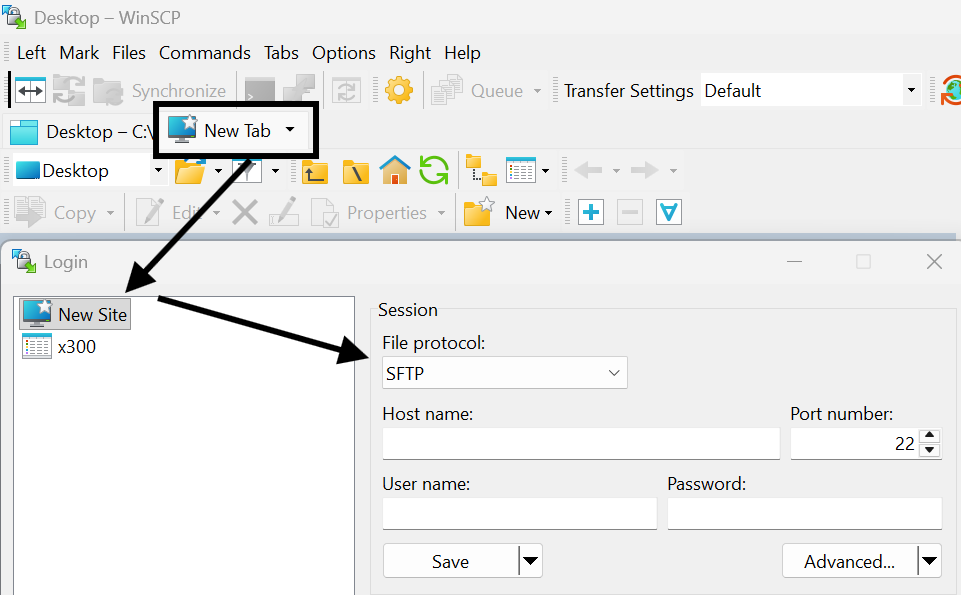
And for workstations/servers/x300:
volumes:
   - ./sftpgo-data:/var/lib/sftpgo   # persists users
   - /home:/srv/home
   - /mnt/data1tb:/srv/data1tb
   - /mnt/data2tb:/srv/data2tb
rsync -avhW --no-compress --progress --partial -e "ssh -p 2022" jalcocert@100.x.y.z:/source/ /destination/FAQ
How to NextCloud
Assuming:
- cloudflared_tunnel already exists as an external Docker network
- the host paths under /mnt/data2tb/nextcloud/… exist and are writable
- your
.envvalues are set as expected
sync_root="$(openssl rand -base64 24 | tr -d '=+/' | cut -c1-16)"
sync_pass="$(openssl rand -base64 24 | tr -d '=+/' | cut -c1-16)"

set_var() {
  key="$1"
  value="$2"
  if grep -q "^${key}=" .env; then
    sed -i "s|^${key}=.*|${key}=${value}|" .env
  else
    printf '\n%s=%s\n' "$key" "$value" >> .env
  fi
}

set_var MYSQL_ROOT_PASSWORD_SYNC "${sync_root}"
set_var MYSQL_PASSWORD_SYNC "${sync_pass}"
set_var MYSQL_DATABASE_SYNC "nextcloud_sync"
set_var MYSQL_USER_SYNC "nextcloud_sync"
set_var MYSQL_HOST_SYNC "nextclouddb-sync"
set_var NEXTCLOUD_TRUSTED_DOMAINS_SYNC "http://192.168.1.2:8069"
Then just:
git clone /Home-Lab
cd .Home-Lab/z-homelab-setup/evolution
#/home/jalcocert/Home-Lab/z-homelab-setup/evolution/2602_docker-compose.yml
#     sudo docker compose --env-file .env -f 2605_docker-compose.yml up -d wireshark
sudo docker compose -f 2605_docker-compose.yml up -d nextclouddb-sync nextcloud-app-sync
#sudo docker compose -f ./z-homelab-setup/evolution/2605_docker-compose.yml up -d nextclouddb-sync nextcloud-app-sync
#  sudo docker compose -f 2605_docker-compose.yml logs -f nextclouddb-sync nextcloud-app-sync
You can always do a quick CLI test:
#docker network create nextcloud_test_internal

docker run -d \
  --name nextcloud-test-db \
  --restart unless-stopped \
  --network nextcloud_test_internal \
  -e MYSQL_INITDB_SKIP_TZINFO=1 \
  -e MYSQL_ROOT_PASSWORD='change-root-pass' \
  -e MYSQL_PASSWORD='change-db-pass' \
  -e MYSQL_DATABASE=nextcloud \
  -e MYSQL_USER=nextcloud \
  -v /mnt/data2tb/z-nextcloud/db:/config \
  linuxserver/mariadb:11.4.8

docker run -d \
  --name nextcloud-test \
  --restart unless-stopped \
  --network nextcloud_test_internal \
  -p 8100:80 \
  -e MYSQL_PASSWORD='change-db-pass' \
  -e MYSQL_DATABASE=nextcloud \
  -e MYSQL_USER=nextcloud \
  -e MYSQL_HOST=nextcloud-test-db \
  -e NEXTCLOUD_TRUSTED_DOMAINS='192.168.1.2 localhost minube.jalcocertech.com' \
  -e OVERWRITEPROTOCOL=http \
  -v /mnt/data2tb/z-nextcloud/html:/var/www/html \
  nextcloud:32.0
du -h --max-depth=1 .
df -hT /mnt/data2tb /mnt/backup2tb/sftpgo /mnt/data2tb:/srv/data2tb
So sftpgo has the whole /mnt/data2tb mounted inside it as /srv/data2tb.
I also found compose references for pigallery2:
/mnt/data2tb/Z_BackUP_HD-SDD/Z_FOTOS:/app/data/images:ro
That one is read-only and appears in the evolution compose files, including the active 2602_docker-compose.yml. But in the current docker ps output from earlier, pigallery2 was not running, so the live user of /mnt/ data2tb right now is sftpgo.
Summary:
- /mnt/data2tb is exFAT.
- Running container using it: sftpgo, mounted read/write.
- Compose-configured but not currently running from what I saw: pigallery2, read-only photo mount.
- Existing Nextcloud is not using the 2TB disk; it uses /mnt/data1tb/nextcloud/….
NTFS makes sense for this external backup drive if you want Windows compatibility. It’s a reasonable format for “copy files here and keep it portable.” It’s just not a good format for running Nextcloud/MariaDB directly.
I can see the drive, but I can’t mount it from here because mounting requires local authorization/password and this shell cannot show the sudo/polkit prompt.
Please run this locally:
sudo mkdir -p /mnt/backup2tb sudo mount /dev/sdc2 /mnt/backup2tb df -hT /mnt/data2tb /mnt/backup2tb
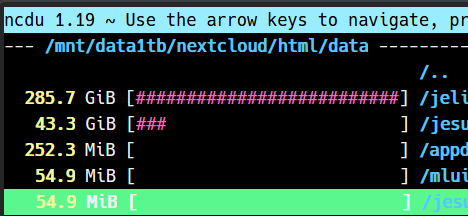
1.2T /mnt/data2tb/Z_BackUP_HD-SDD 155G /mnt/data2tb/nc 78G /mnt/data2tb/old-Synced SEPT23 66G /mnt/data2tb/pixel8pro 62G /mnt/data2tb/immich 19G /mnt/data2tb/sftpgo 14G /mnt/data2tb/nextcloud 12G /mnt/data2tb/Sync_Pixel 6.3G /mnt/data2tb/2tbepam
Destination already has:
893G /mnt/backup2tb/Z_FOTOS 41G /mnt/backup2tb/Aficiones 20G /mnt/backup2tb/.Trash-1000 12G /mnt/backup2tb/Estudios
http://192.168.1.2:8069/
You can test adding it to files as webdav already
dav://192.168.1.2:8069/remote.php/dav/files/<your-username>/which for me worked at 25mb/s locally
docker exec -u 1000 nextcloud-sync php occ status #pre-checks
#docker exec -u 1000 nextcloud-sync php occ files:scan --path='jesusalcocertech/files/YoutubeVideos'
#docker exec -u 1000 nextcloud-sync php occ files:scan jesusalcocertech # for the whole user
#du . -sh
You can use those exact commands to connect your pixel via usb-c: then just send the files via webdav (slow) or put them directly to your server
#  find /run/user/1000/gvfs -maxdepth 1 -type d
lsusb
/run/user/1000/gvfs/mtp:host=Google_Pixel_9_Pro_52141FDAP000NM/Internal shared storage/DCIM/Camera
dav://192.168.1.2:8069/remote.php/dav/files/<your-username>/
he trick was that the Pixel was mounted through GVFS MTP, not as a normal disk under /media or /mnt.
The actual mount path was:
/run/user/1000/gvfs/mtp:host=Google_Pixel_9_Pro_52141FDAP000NM
So to browse files:
cd ‘/run/user/1000/gvfs/mtp:host=Google_Pixel_9_Pro_52141FDAP000NM’ ls
Then usually:
cd ‘Internal shared storage/DCIM/Camera’
To discover it next time:
find /run/user/1000/gvfs -maxdepth 1 -type d
Also, the phone must be unlocked and USB mode set to File transfer / Android Auto. Otherwise Linux may see the USB device but not expose the files.
Files are at /mnt/data2tb/nextcloud/html/data/whateveruseryoucreated/files
This is the one im keeping for now: remember that you can use it via cf tunnels and just make it available for certain ips/countries
#! docker compose -f ~/Desktop/Home-Lab/nextcloud/docker-compose.yml up -d
#! docker exec -u www-data nc php occ user:resetpassword admin
docker exec -u 1000 nextcloud-sync php occ config:system:get trusted_domains
docker exec -u 1000 nextcloud-sync php occ config:system:set trusted_domains 1 --value="192.168.1.2:8069"
docker exec -u 1000 nextcloud-sync php occ config:system:set trusted_domains 1 --value="whatever.domain.com"
docker exec nextcloud php occ config:system:get trusted_domains #check the trusted domains
Point correctly the
nextcloud-sync:80
About manual scans of data you have scatter in folders, see this:
docker exec nc chown -R www-data:www-data /var/www/html/dataLast month I was doing by hand some maintainance via CLIs to nextcloud
Nextcloud doesn’t expose SSH/FTP; it exposes files over WebDAV on top of HTTPS.
In windows
add a network locationthenhttps://whatever.yourdomain.com/remote.php/dav/files/whateverusername- File size limit: Windows WebClient caps downloads at 50 MB by default
The integration in linux:
Via GNOME Files / Nautilus Files → “Other Locations” → in the Connect to Server bar enter: davs://whatever.domain.com/remote.php/dav/files/<your-username>/
(davs:// = WebDAV over HTTPS; plain dav:// = HTTP). It’ll prompt for username + app password.
graph TD
    %% Nodes
    FIREBAT[Firebat Mini PC
Nextcloud Desktop Client]
    LAPTOP[Laptop
Nextcloud Desktop Client]
    BROWSER[Web Browser
User Interface]

    subgraph Cloudflare_Infrastructure [Cloudflare Edge]
        TUNNEL[Cloudflare Tunnel
Cloudflared]
    end

    subgraph Home_Network [Local Network / X300]
        X300[ASRock X300 Server
Nextcloud Instance]
    end

    %% Connections
    FIREBAT <== "HTTPS (Sync)" ==> TUNNEL
    TUNNEL <== "Secure Pipe" ==> X300

    LAPTOP <== "Local/Remote Sync" ==> X300
    BROWSER <== "Web Access" ==> X300

    %% Styling
    style FIREBAT fill:#f9f,stroke:#333,stroke-width:2px
    style X300 fill:#0082c9,stroke:#fff,stroke-width:2px,color:#fff
    style TUNNEL fill:#f38020,stroke:#333,stroke-width:2px,color:#fff
How to Immich
The generated folders are different:
thumbs = resized preview images encoded-video = transcoded video versions profile = profile images
Those are not originals.
The caveat: Immich can only preserve what it was given. If your phone/client uploaded an already-processed JPEG instead of the camera RAW/HEIC original, then Immich’s “original” is that uploaded JPEG. Also, if metadata was stripped before upload by the source app/device, Immich cannot recreate it.
So the practical answer:
/mnt/data2tb/immich/library/upload = keep/backup; contains original uploaded assets /mnt/data2tb/immich/library/thumbs = generated /mnt/data2tb/immich/library/encoded-video = generated
rsync -a --info=progress2 /mnt/data2tb/immich/library/upload/ /mnt/backup2tb/backup_from_data2tb_immich/library/upload/ #130mb/s to usbCGot dups?
jdupes -r -S /mnt/data2tb/pixel8pro /mnt/data2tb/Sync_Pixel#sudo snap install czkawka #UI wont work
cd /tmp
wget https://github.com/qarmin/czkawka/releases/latest/download/linux_czkawka_cli_x86_64
chmod +x linux_czkawka_cli_x86_64
sudo install -m 755 linux_czkawka_cli_x86_64 /usr/local/bin/czkawka_cli
Test it:
czkawka_cli --help
Then your duplicate scan should work as:
czkawka_cli dup \
-d "/mnt/data2tb/old-Synced SEPT23" \
-d "/mnt/data2tb/Z_BackUP_HD-SDD" \
-f /mnt/backup2tb/czkawka_old_synced_vs_zbackup.txt
czkawka_cli dup \
-d "/mnt/data2tb/old-Synced SEPT23" \
-d "/mnt/data2tb/Z_BackUP_HD-SDD" \
-f /mnt/backup2tb/czkawka_old_synced_vs_zbackup.txt Even safer content-level compare, slower:
rsync -ainc --delete \
"/mnt/data2tb/Z_BackUP_HD-SDD/Z_FOTOS/" \
"/mnt/backup2tb/Z_FOTOS/"rsync -ainc –delete
“/mnt/data2tb/Z_BackUP_HD-SDD/Z_FOTOS/”
“/mnt/backup2tb/Z_FOTOS/”
> /mnt/backup2tb/rsync_compare_Z_FOTOS_checksum.txt
if you get tired of waiting
      rsync -a --info=progress2 \
    "/mnt/data2tb/Z_BackUP_HD-SDD/Z_FOTOS/" \
    "/mnt/backup2tb/Z_FOTOS/"
I was using Immich wrong:
/data/compose/14/library-> mounted into immich_server as /usr/src/app/upload/data/compose/14/postgres-> mounted into immich_postgres as /var/lib/postgresql/data
rclone authorize “drive” “someidcodewhatever” #you can do this from a laptop with browser access, then feedback the token it generates rclone lsd googledrive:
tmux new -s gdrive-backup
rclone copy
“/mnt/data2tb”
“googledrive:x300-backup/data2tb”
–progress
–transfers 4
–checkers 8
–log-file “/home/jalcocert/rclone-data2tb-to-gdrive.log”
–log-level INFO
tmux attach -t gdrive-backup
After 1 week…
rclone copy
“/mnt/data2tb/Z_BackUP_HD-SDD/OA5Pro”
“googledrive:x300-backup/data2tb/Z_BackUP_HD-SDD/OA5Pro”
–progress
–transfers 1
–checkers 2
–tpslimit 4
–log-file “/home/jalcocert/rclone-oa5pro-retry.log”
–log-level INFO
What is backed up:
/mnt/data2tb -> Google Drive x300-backup/data2tb 1.745 TiB uploaded 196137 files transferred 388643 checks completed
Local backup drive also has key copies we made earlier:
/mnt/backup2tb/backup_from_data2tb_nc /mnt/backup2tb/backup_from_data2tb_immich /mnt/backup2tb/backup_from_data2tb_phone_sync /mnt/backup2tb/backup_from_data2tb_old_synced_sept23
Before formatting, I’d do one last read-only check:
df -hT /mnt/data2tb /mnt/backup2tb lsblk -f
Then we can identify the exact device behind /mnt/data2tb, unmount it, and format it to a Linux-native filesystem. For Docker/Nextcloud/DB data, I’d use:
ext4
Not exFAT, not NTFS.
Do not format until we confirm the exact disk/device path.
udo umount /mnt/backup2tb [sudo] password for jalcocert: jalcocert@jalcocert-x300:~$ tmux ls gdrive-backup: 1 windows (created Sun May 17 16:19:54 2026) mqtt: 1 windows (created Wed May 6 09:52:13 2026) webapp: 1 windows (created Wed May 6 09:52:17 2026) jalcocert@jalcocert-x300:~$
tmux kill-session -t gdrive-backup
Run these exactly.
#Unmount:
sudo umount /mnt/data2tb
#Format the internal NVMe partition as ext4:
sudo mkfs.ext4 -L data2tb /dev/nvme0n1p1
#Get the new UUID:
sudo blkid /dev/nvme0n1p1
#  sudo nano /etc/fstab
If you ever have to restore from this backup, you just run one command on your server to force Nextcloud to re-scan the folder and rebuild its database from the raw files:
sudo -u www-data php /var/www/nextcloud/occ files:scan --allBreakdown:
50G /data/compose/14/library/upload 6.8G /data/compose/14/library/encoded-video 669M /data/compose/14/library/thumbs 314M /data/compose/14/library/backups
Go to: http://192.168.1.2:2283/map#12.43/36.33211/-6.14777
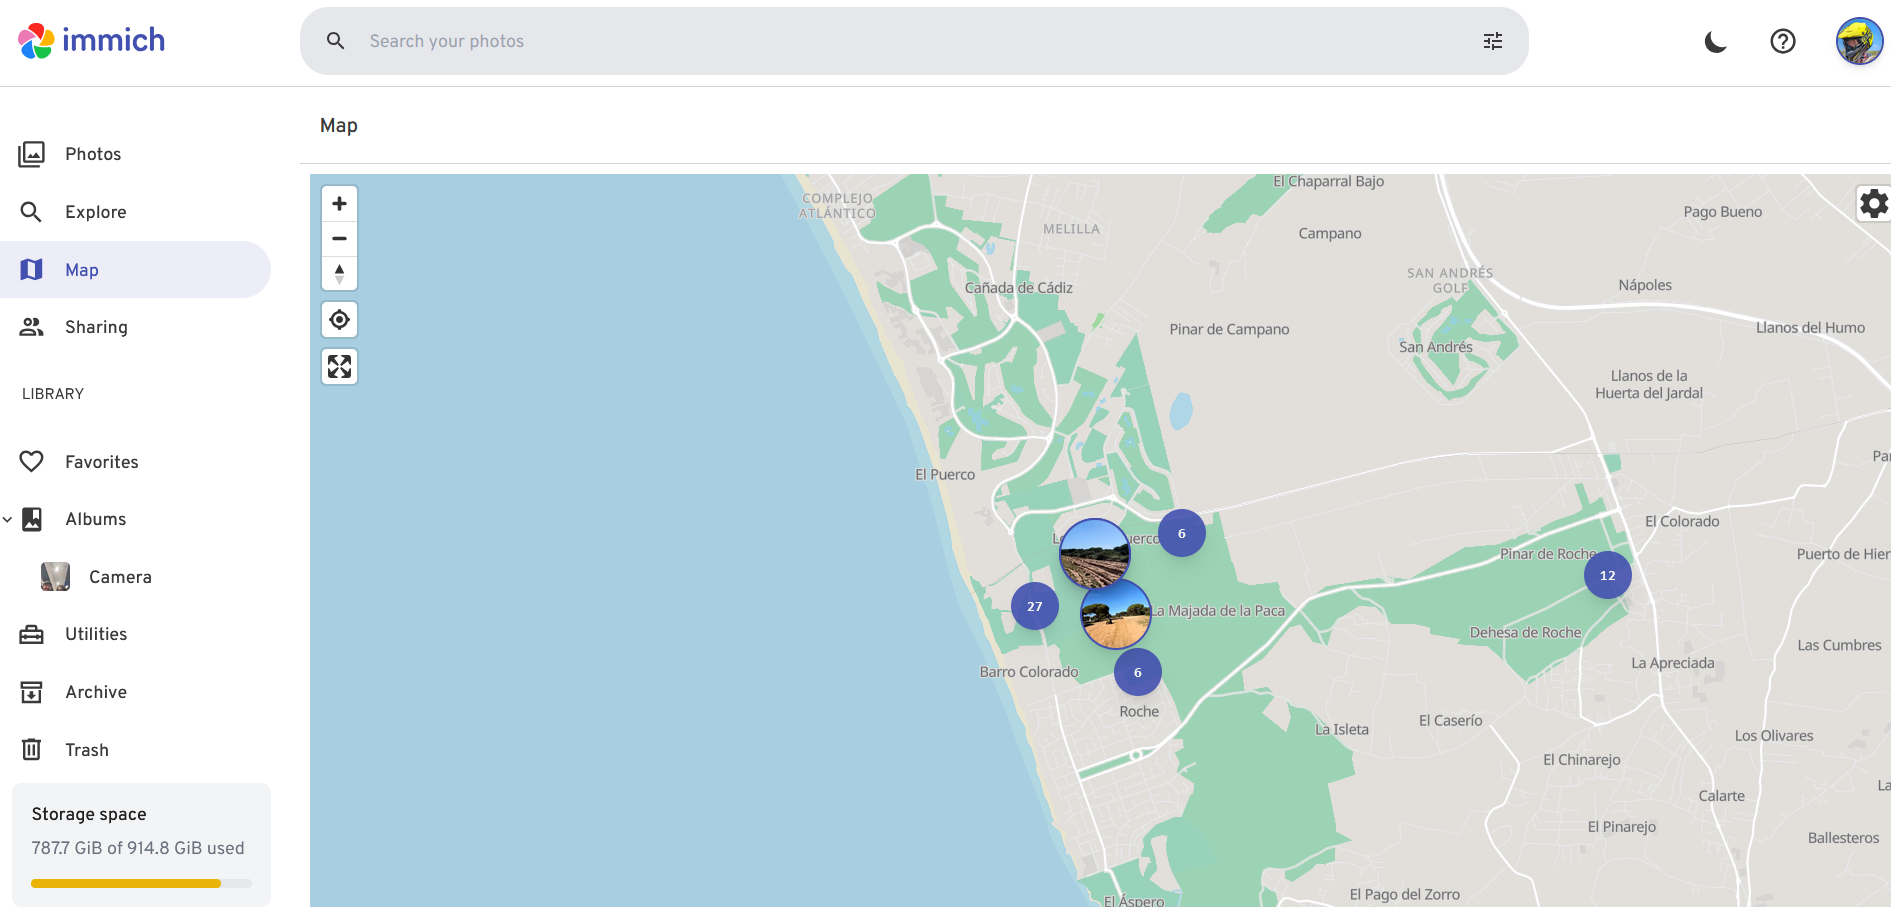
I still appreciate their map feature:
docker stop immich_server immich_machine_learning immich_postgres immich_redis
docker ps -a --filter name=immich --format 'table {{.Names}}\t{{.Status}}'
I didnt like the immich makes strange paths inside: /mnt/data2tb/immich/library/upload
Immich stores files in an app-managed layout, not a human folder layout.
Example:
/mnt/data2tb/immich/library/upload/<user-id>/<hash folders>/<asset-id>.jpg
/mnt/data2tb/immich/library/thumbs/<user-id>/...
/mnt/data2tb/immich/library/encoded-video/<user-id>/...
That is normal for Immich.
It uses UUIDs, hash-like subfolders, thumbnails, encoded video copies, metadata, and a Postgres database to know what each file actually is.
The folder names are optimized for the app, not for browsing manually.
Nextcloud feels different because it exposes a user-facing filesystem:
nextcloud/data/<user>/files/Photos/...
nextcloud/data/<user>/files/Documents/...
So Nextcloud’s storage mirrors what users see in the web UI.
Immich’s storage is closer to an internal media database: the UI, albums, dates, people, locations, and search come from its database and generated assets, not from nice folder names.
Short version: Nextcloud is file-first. Immich is photo-library-first.
So, I said bye to immich:
sudo rm -rf /data/compose/14Baseline
- Automatic security updates On Ubuntu/Debian, use unattended-upgrades for OS security patches.
sudo apt install unattended-upgrades sudo dpkg-reconfigure unattended-upgrades
Good for: kernel/security patches, OpenSSL, SSH, system packages.
- Firewall with UFW Default-deny inbound, allow only what you actually use.
Typical:
sudo ufw default deny incoming sudo ufw default allow outgoing sudo ufw allow ssh sudo ufw enable sudo ufw status verbose
Then only expose needed service ports, for example Nextcloud via reverse proxy ports 80/443, not every container port.
- SSH hardening Use keys, disable password login if possible.
In /etc/ssh/sshd_config:
PasswordAuthentication no PermitRootLogin no PubkeyAuthentication yes
Then:
sudo systemctl reload ssh
- Fail2ban or CrowdSec Useful if SSH or web services are internet-facing.
Simple option:
sudo apt install fail2ban sudo systemctl enable –now fail2ban
- Reverse proxy only Expose only Traefik/Nginx Proxy Manager/Caddy to the internet. Keep app containers internal unless they must be public.
- Backups Security includes recovery. For your setup, I’d especially back up:
Nextcloud config Nextcloud database Nextcloud user data Docker compose files Reverse proxy config/certs
- Docker hygiene Avoid running random containers as privileged. Prefer:
no privileged: true unless required pinned image tags where practical bind mounts only where needed no Docker socket exposed to web apps
- Separate public vs private services Public:
Nextcloud maybe landing pages reverse proxy
Portainer databases dashboards Home Assistant admin file managers SSH
- VPN for admin access Tailscale, WireGuard, or NetBird is usually better than exposing admin panels publicly.
- Monitoring At minimum:
df -h docker ps systemctl –failed
Longer term, Uptime Kuma or Beszel are nice lightweight options.
For your case, I’d do this order:
- Enable unattended security updates
- Configure UFW
- Confirm only 80/443/SSH are exposed
- Harden SSH
- Put admin tools behind VPN only
- Build a real Nextcloud backup routine
› do i need fail2ban if im exposing via cloudflare tunnels?
• Usually: less need, but not zero.
If your public services are exposed only through Cloudflare Tunnel, then random internet clients are not directly hitting your home IP/ports. That greatly reduces the usefulness of Fail2ban on the homelab host, because attackers are connecting to Cloudflare, not directly to your server.
You still may want Fail2ban if:
SSH is exposed directly to the internet Nextcloud is also reachable by direct IP/port, not only tunnel you have local/LAN attackers or compromised LAN devices you expose anything outside the tunnel
If everything public goes through Cloudflare Tunnel, I would prioritize Cloudflare-side controls instead:
Cloudflare Access for admin apps WAF/security rules rate limiting for login paths country/IP restrictions if useful 2FA on Cloudflare account no direct router port forwards to the homelab
For your homelab, the better setup is:
Public internet -> Cloudflare Tunnel -> selected apps Admin access -> Tailscale/WireGuard/VPN Router port forwards -> none, or only absolutely required SSH -> LAN/VPN only
Then Fail2ban becomes optional rather than essential. It’s still fine to install, but it won’t see most Cloudflare-side attack traffic unless requests reach your service with real client IPs and your logs are configured accordingly.
For a normal personal Google Drive account, you mainly need this:
- rclone installed on the server
- a Google account login in a browser
- an rclone remote config stored on the server
The artifact rclone creates is usually:
~/.config/rclone/rclone.conf
That file contains the Google Drive remote definition and OAuth token. Treat it like a secret.
Typical setup:
rclone config
Then choose roughly:
n) New remote name: gdrive storage: Google Drive client_id: leave blank client_secret: leave blank scope: drive root_folder_id: leave blank service_account_file: leave blank auto config: yes, if browser available
After browser login, rclone saves credentials here:
/home/jalcocert/.config/rclone/rclone.conf
Test it:
rclone lsd gdrive: rclone mkdir gdrive:homelab-backups rclone lsd gdrive:
If the server has no browser/GUI, run:
rclone config
and when asked:
Use auto config? n
Then rclone gives you a URL. Open that URL on your laptop/desktop, sign in to Google, copy the token/code back into the server prompt.
For backups, the only artifact you need to preserve is: ~/.config/rclone/rclone.conf
If using restic, also preserve your restic repository password. Without it, the encrypted backup is unrecoverable.
How to Photos
To open RW2 photos I needed:
#sudo apt install geeqie
geeqie P1000130.RW2
Geeqie: best if you want a lightweight viewer.
It is focused on fast browsing, thumbnails, zoom, and folder-based viewing, and it supports RW2 directly. It is not a RAW editor.
RawTherapee: best if you want strong RAW processing and editing. It is much heavier than a simple viewer, but it gives you serious control over development.
darktable: best if you want a full RAW workflow plus cataloging. It supports RW2, but it is explicitly built as a RAW developer and uses substantial memory, so it is the least lightweight of the three.
gThumb or nomacs: decent general-purpose image viewers, but they are not as clearly lightweight-and-RAW-focused as Geeqie, and Geeqie has the clearest RW2 support documentation among the lightweight viewers I checked.
My recommendation for your use case:
- Just view RW2: Geeqie
- View and do quick RAW edits: RawTherapee
- Full photo workflow: darktable
How to youtube
With claude code as a builder, ffmpeg, yt-dl and openai API key…
cd ./poc/yt-distill
#make up
PORT=8000 docker compose up --build
#cd ./out #to get the transcripts