Weddings are expensive. Be smart with the right software.
Website for Weddings
With astro, you can build pretty cool weddings ssgs themes:
- https://github.com/Boston343/horizon Ive forked it to https://github.com/JAlcocerT/horizon (could not resist!)
Selfhostable Software for Weddings
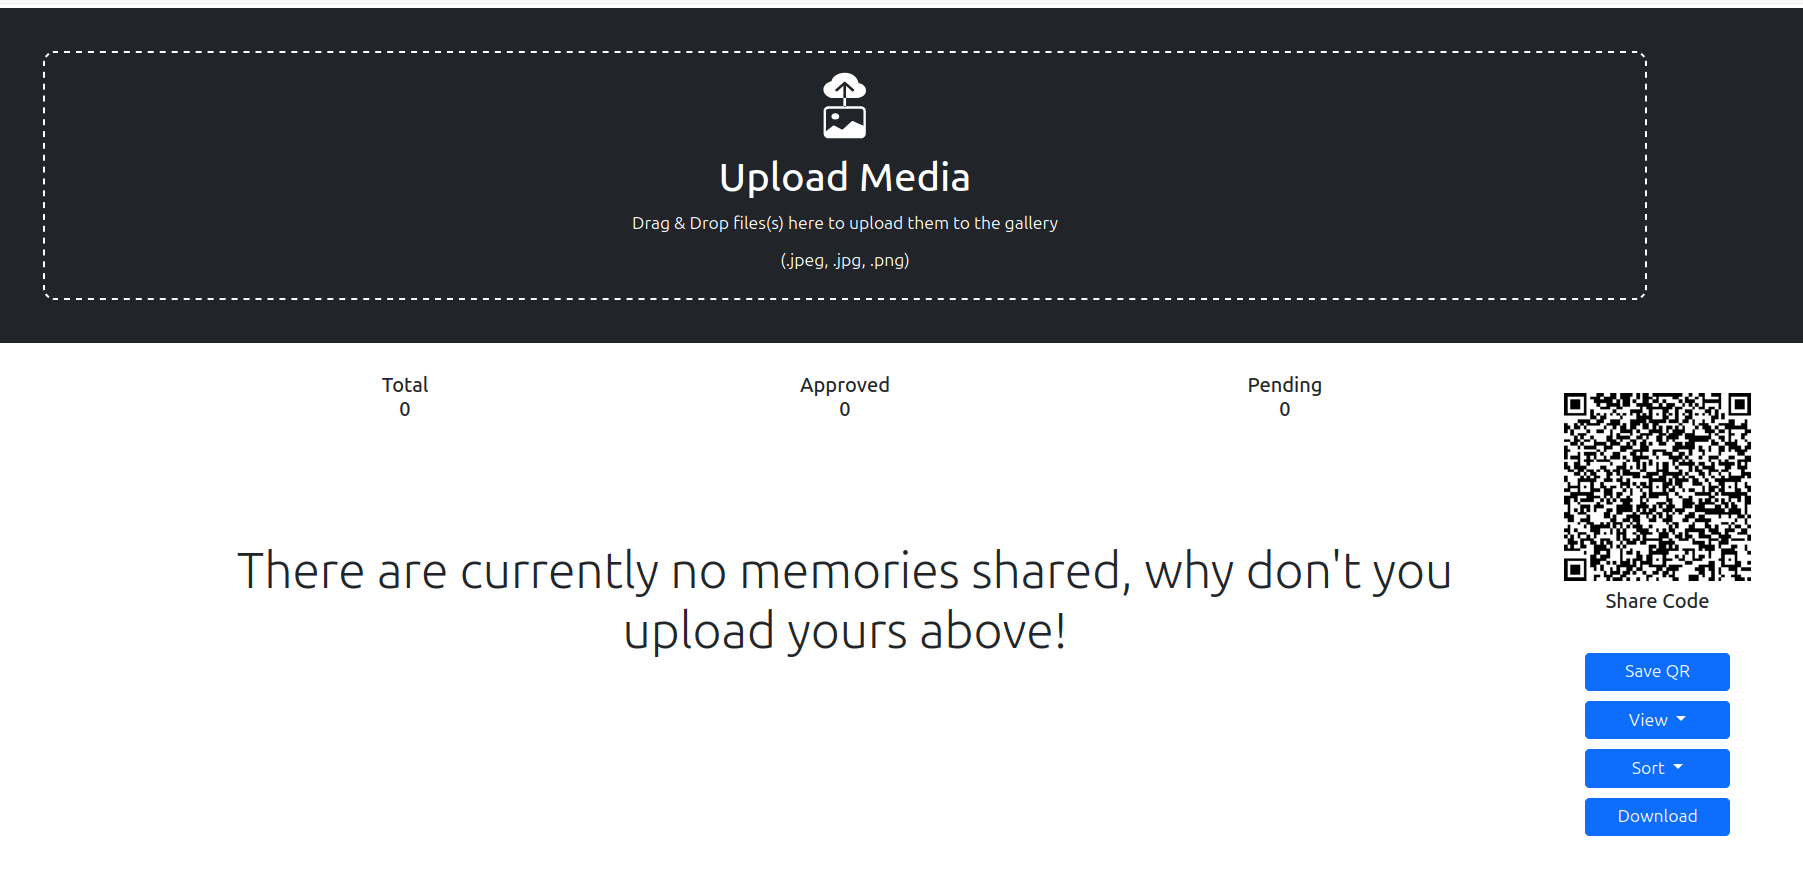
GPL3.0 | A place for guests to view and drop pictures of the big day
WeddingShare Setup
Just spin up this service:
services:
  wedding-share:
    container_name: WeddingShare
    image: cirx08/wedding_share:latest
    ports:
      - '${HTTP_PORT:-8080}:5000/tcp'
    environment:
      TITLE: 'WeddingShare'
      LOGO: 'Url'
      GALLERY_COLUMNS: 4
      ALLOWED_FILE_TYPES: '.jpg,.jpeg,.png'
      MAX_FILE_SIZE_MB: 10
      SECRET_KEY: 'password'
    volumes:
      - data-volume-config:/app/config
      - data-volume-thumbnails:/app/wwwroot/thumbnails
      - data-volume-uploads:/app/wwwroot/uploads
    network_mode: bridge
    hostname: wedding-share
    restart: always

volumes:
  data-volume-config:
    name: WeddingShare-Config
  data-volume-thumbnails:
    name: WeddingShare-Thumbnails
  data-volume-uploads:
    name: WeddingShare-Uploads
Default credentials to localhost:8080/Admin are…admin/admin
BASE_URL env variable as per readmeMaking Deployments Easy
After having tinkered with both, SBCs/Homelabs and with the Cloud.
Once you are clear on the piece of software that you want to use, just decide where that code will be running"
Typically, you can connect to the device/server via SSH:
ssh someuser@192.168.0.232 #pi 2gb
ssh someuser@192.168.0.155 #pi 4gb
# hetzner vps server
And for this one, I will be using a Hetzner VPS
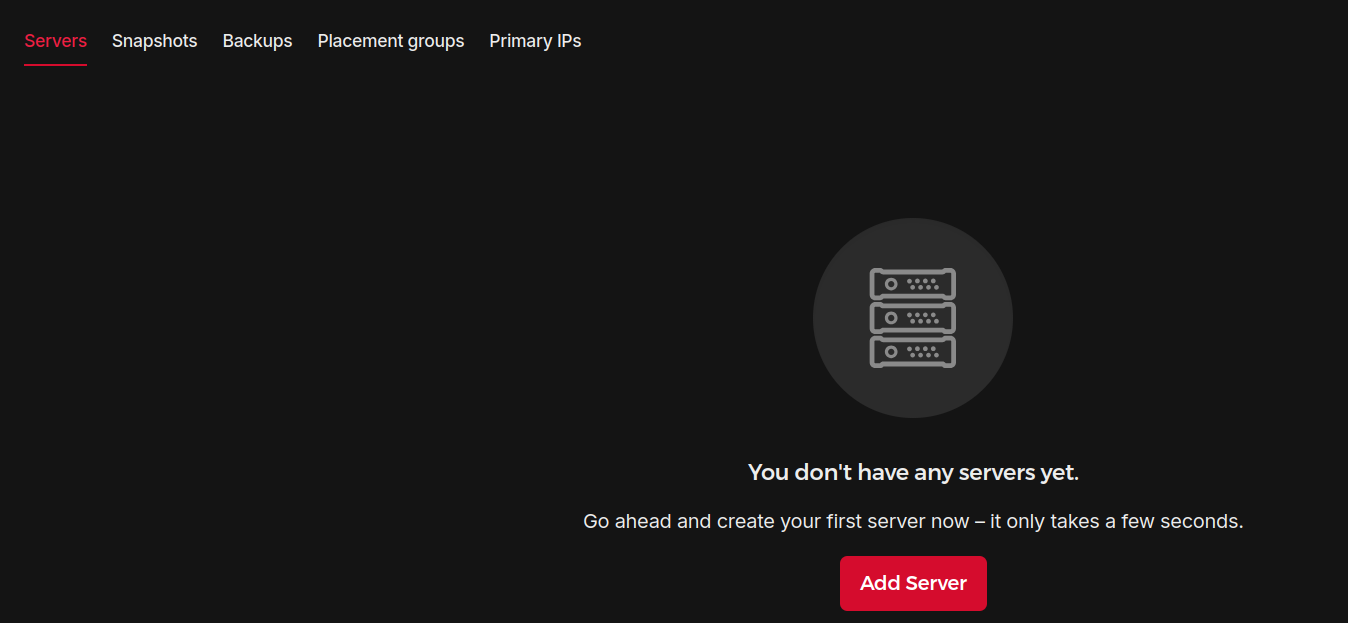
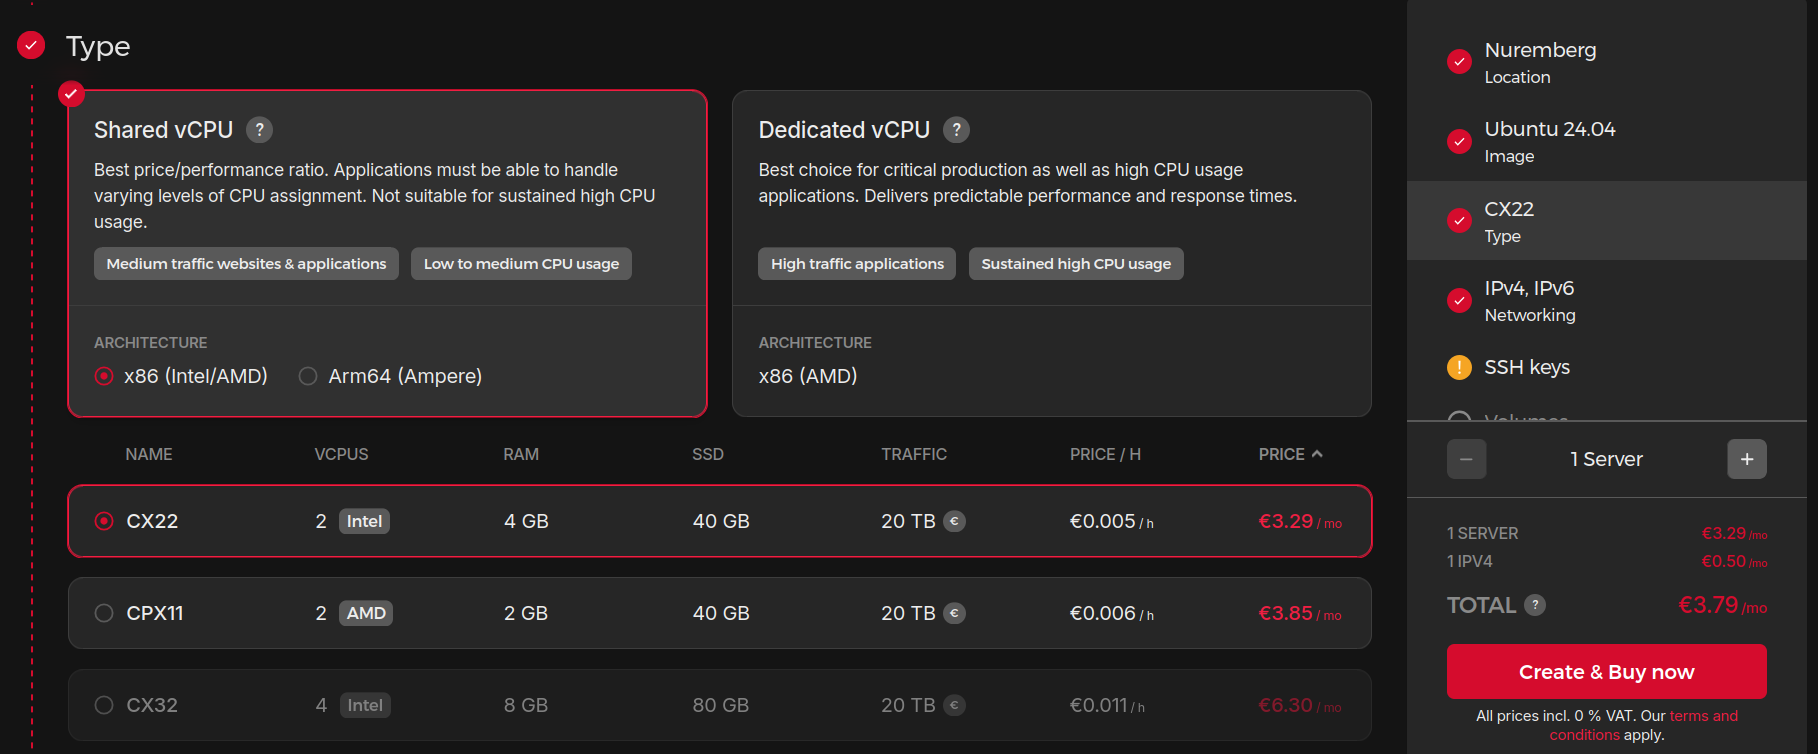
- See your projects and select OS + Hardware - https://console.hetzner.cloud/projects
- Create SSH keys and give the public key to Hetzner
ssh-keygen
cat id_ed25519.pub #provide this /home/your_username/.ssh/id_rsa: This is your private key. Keep this file secret! Never share it with anyone./home/your_username/.ssh/id_rsa.pub: This is your public key. You can share this file. You’ll add the contents of this file to the authorized_keys file on the server you want to access.
- Create the VPS (you can tweak the name), then just login:
ssh cx22@88.198.ip.address- Get ready for SelfHosting with Containers
curl -O https://raw.githubusercontent.com/JAlcocerT/Linux/main/Z_Linux_Installations_101/Selfhosting_101.sh
#nano Selfhosting_101.sh #MAKE SURE YOU UNDERSTAND WHAT YOU WILL BE RUNNING

chmod +x Selfhosting_101.sh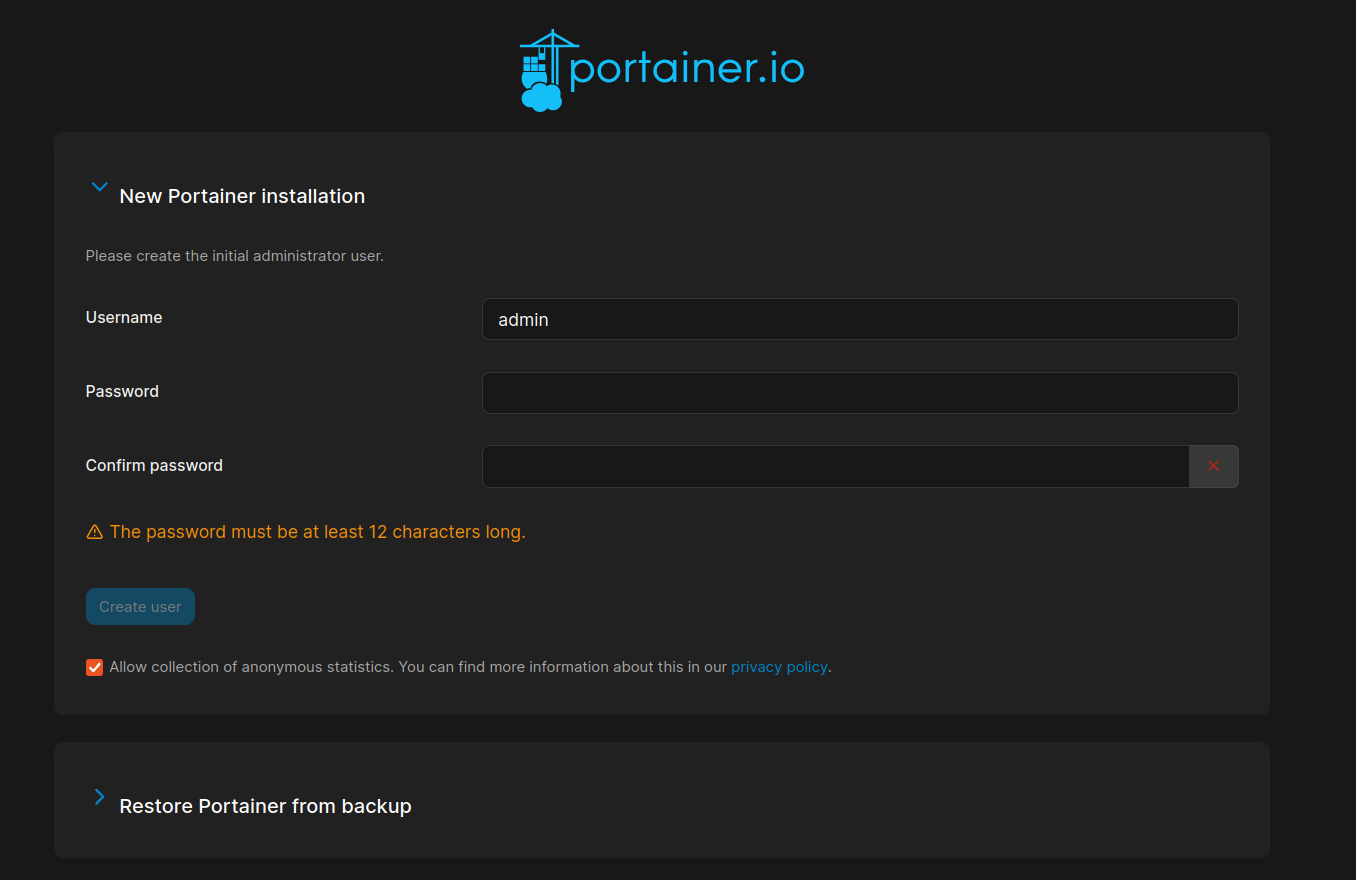
sudo ./Selfhosting_101.sh- Check that Docker and Portainer are ready:
docker --version
Docker version 27.5.1, build 9f9e405
Go to ip:9000 and setup Portainer properly:
- Use the docker-compose stack for weddings share
See that it works at ip:8080
http://ip:8080/Admin/Login
Example: https://elenayjosesecasan.top/
- Choose a Reverse Proxy Manager:
As seen on this post, there are few alternatives:
- NGINX
- Caddy
- Traefik
NGINX Setup Details with Cloudflare 📌
Dont forget to add this A record, pointing to the VPS, so that it will be able to create sub domains from it with https:

And also the CNAME, to be able to create certificates for subdomains with cloudflare:
But like this, also with the CNAME record for CF if using CF:

version: "3"
services:
  app:
    image: 'jc21/nginx-proxy-manager:latest'
    restart: unless-stopped
    container_name: nginx
    ports:
      - '80:80' # Public HTTP Port
      - '443:443' # Public HTTPS Port
      - '81:81' # Admin Web Port - UI
    volumes:
      - ~/Docker/Nginx/data:/data
      - ~/Docker/Nginx/letsencrypt:/etc/letsencrypt
    networks:  # Only ONE networks section
      - nginx_network  # Use the desired network name here

networks:  # Only ONE networks section
nginx_network: # Define the network with the desired name- Connect the wedding share container with nginx network
sudo docker network ls
docker network connect nginx_nginx_network WeddingShare

#docker network connect nginx_nginx_default WeddingShare

#docker network inspect nginx_nginx_network #now its connected- Setup Https with NGINX
- Email:
admin@example.com - Password:
changeme
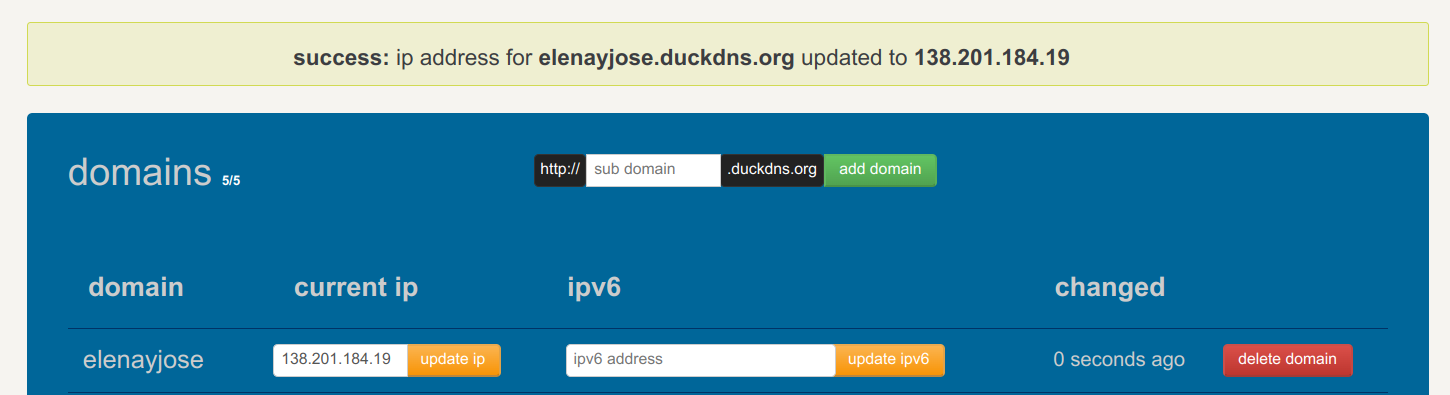
For the DNS Challenge, you need input from your domain registrar, like: Cloudflare, duckDNS, Porkbun,…
Thanks to this awsome video!
Do you need a powerfull VPS?
Not really, see how much im using a CX22: Portainer + NGINX + Wedding share ~500mb RAM

Dont forget the DNS challenge | Cloudflare + NGINX 📌
As seen at https://jalcocert.github.io/JAlcocerT/firebat-ak2-plus-minipc-review/
- Point your DNS to your server:

I like to have the internal IP and other for the device tailscale VPN IP
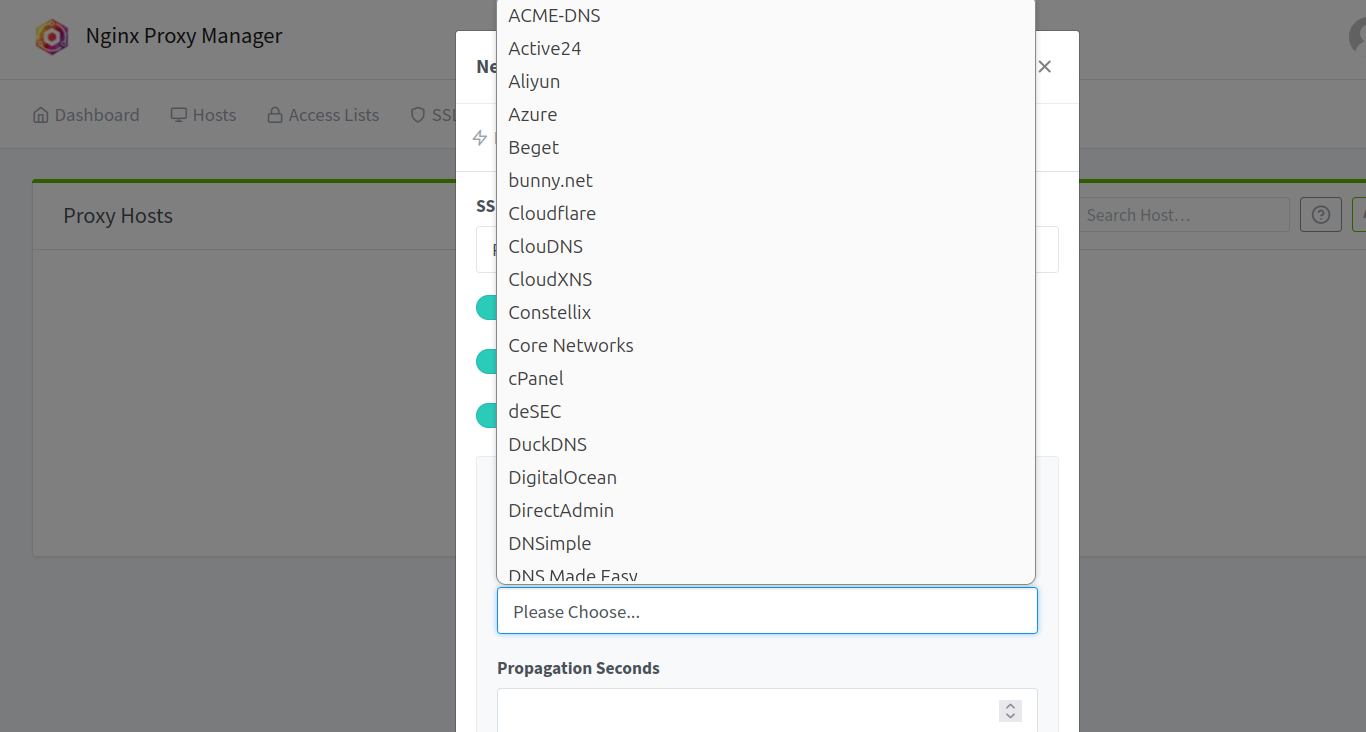
- In the SSL tab, you will need to Add a DNS Challenge, for Cloudflare would be:
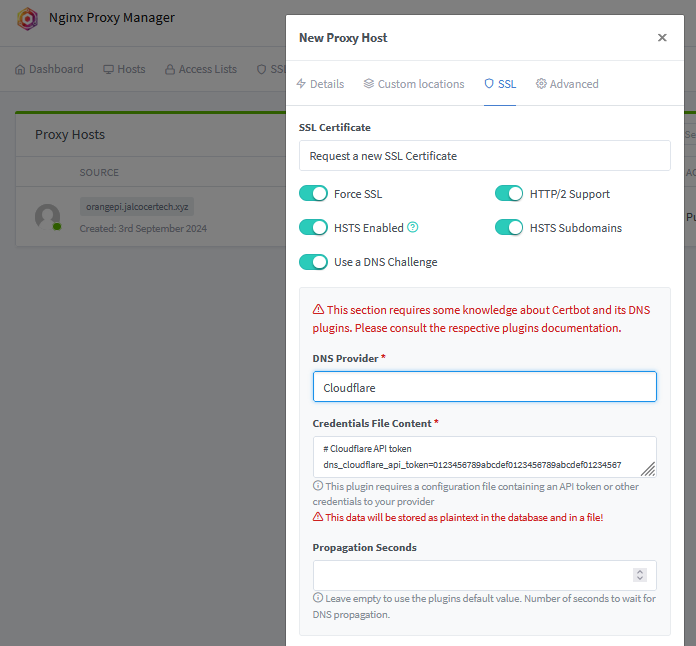
- With Cloudflare, you will need their API Token from here
- Go to Edit zone DNS. Zone Resources -> Include all zones (or a specific domain only) and create it. Add it as
dns_cloudflare_api_token=
- Go to Edit zone DNS. Zone Resources -> Include all zones (or a specific domain only) and create it. Add it as
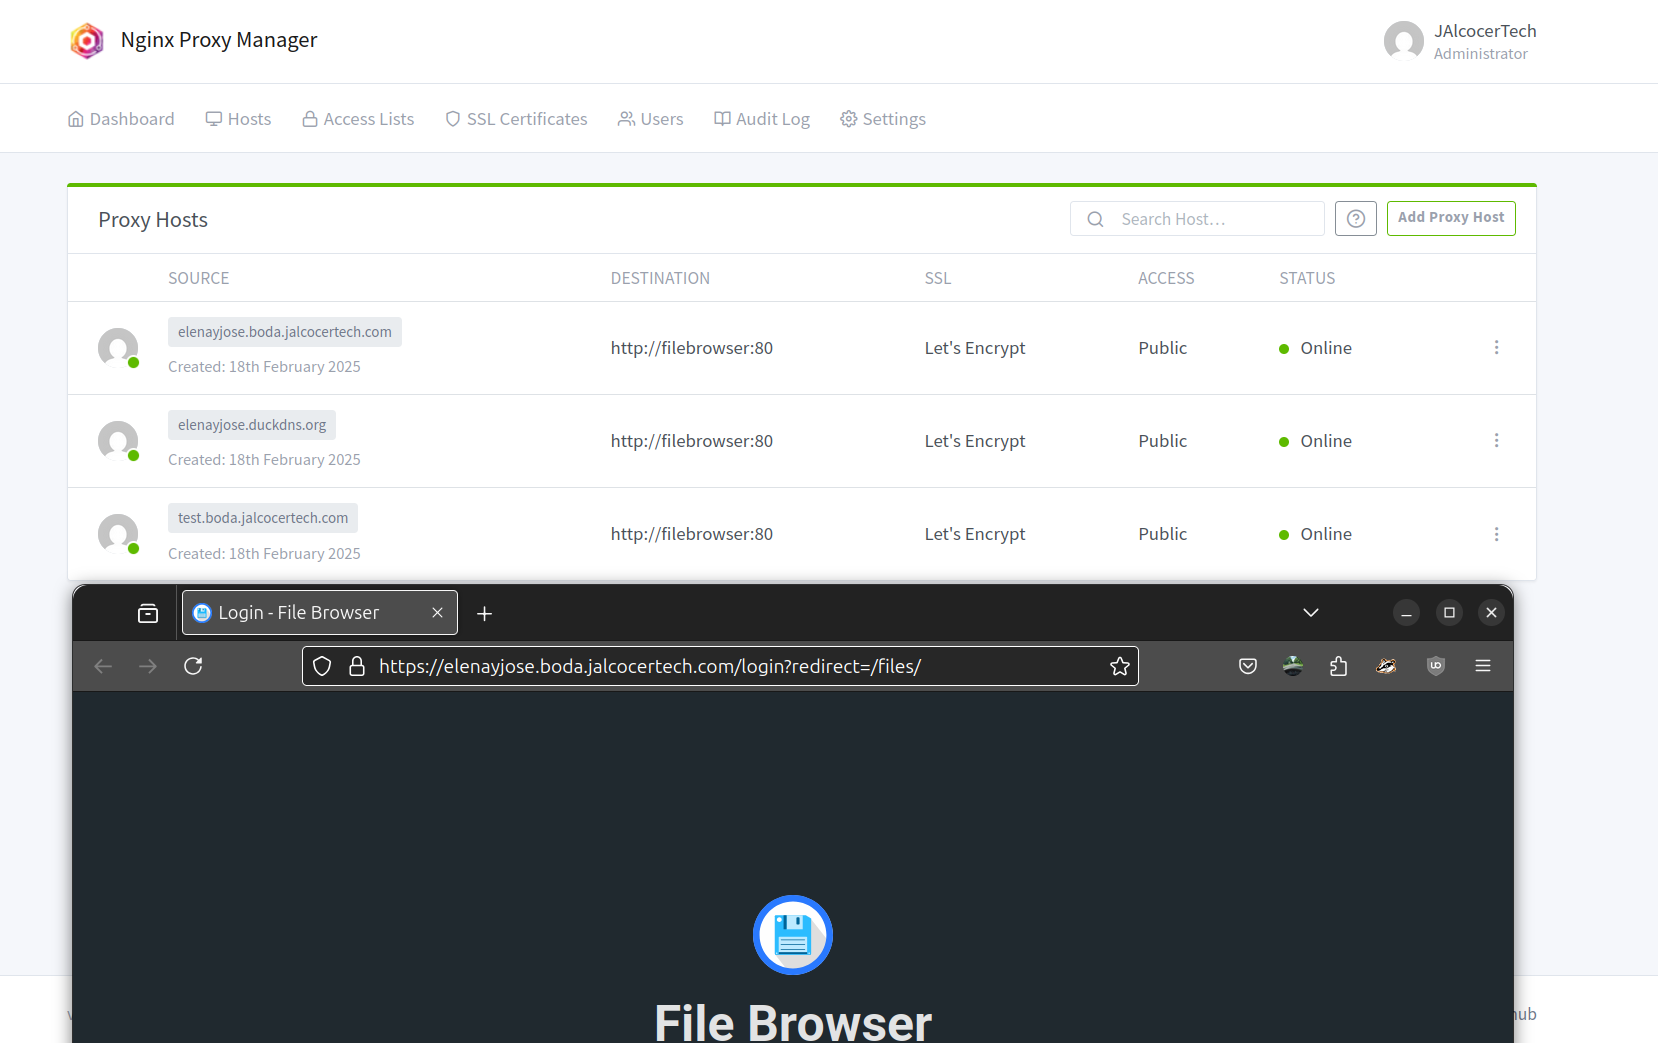
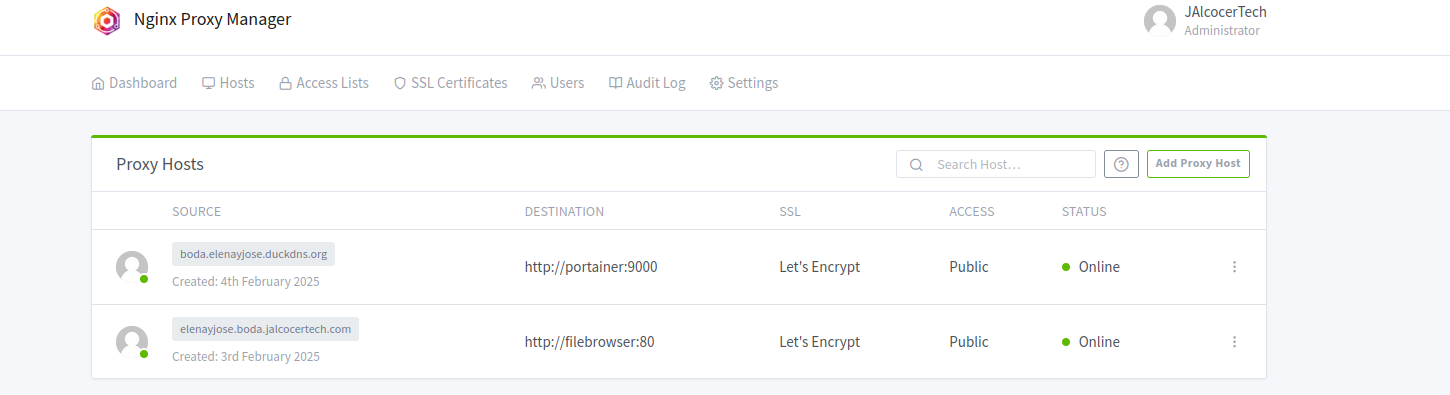
- In NginX UI, you will add the: container name and port of the services
DNS challenge | PorkBun + NGINX 📌
Conclusions
Using cloudflared for a sub.sub.domain.com will be problematic with the https/SSL.
So I restarted everything (with a hetzner CPX11, AMD x86).
curl -O https://raw.githubusercontent.com/JAlcocerT/Linux/main/Z_Linux_Installations_101/Selfhosting_101.sh
#nano Selfhosting_101.sh #MAKE SURE YOU UNDERSTAND WHAT YOU WILL BE RUNNING

chmod +x Selfhosting_101.sh
sudo ./Selfhosting_101.sh
This preparation step took ~42s.
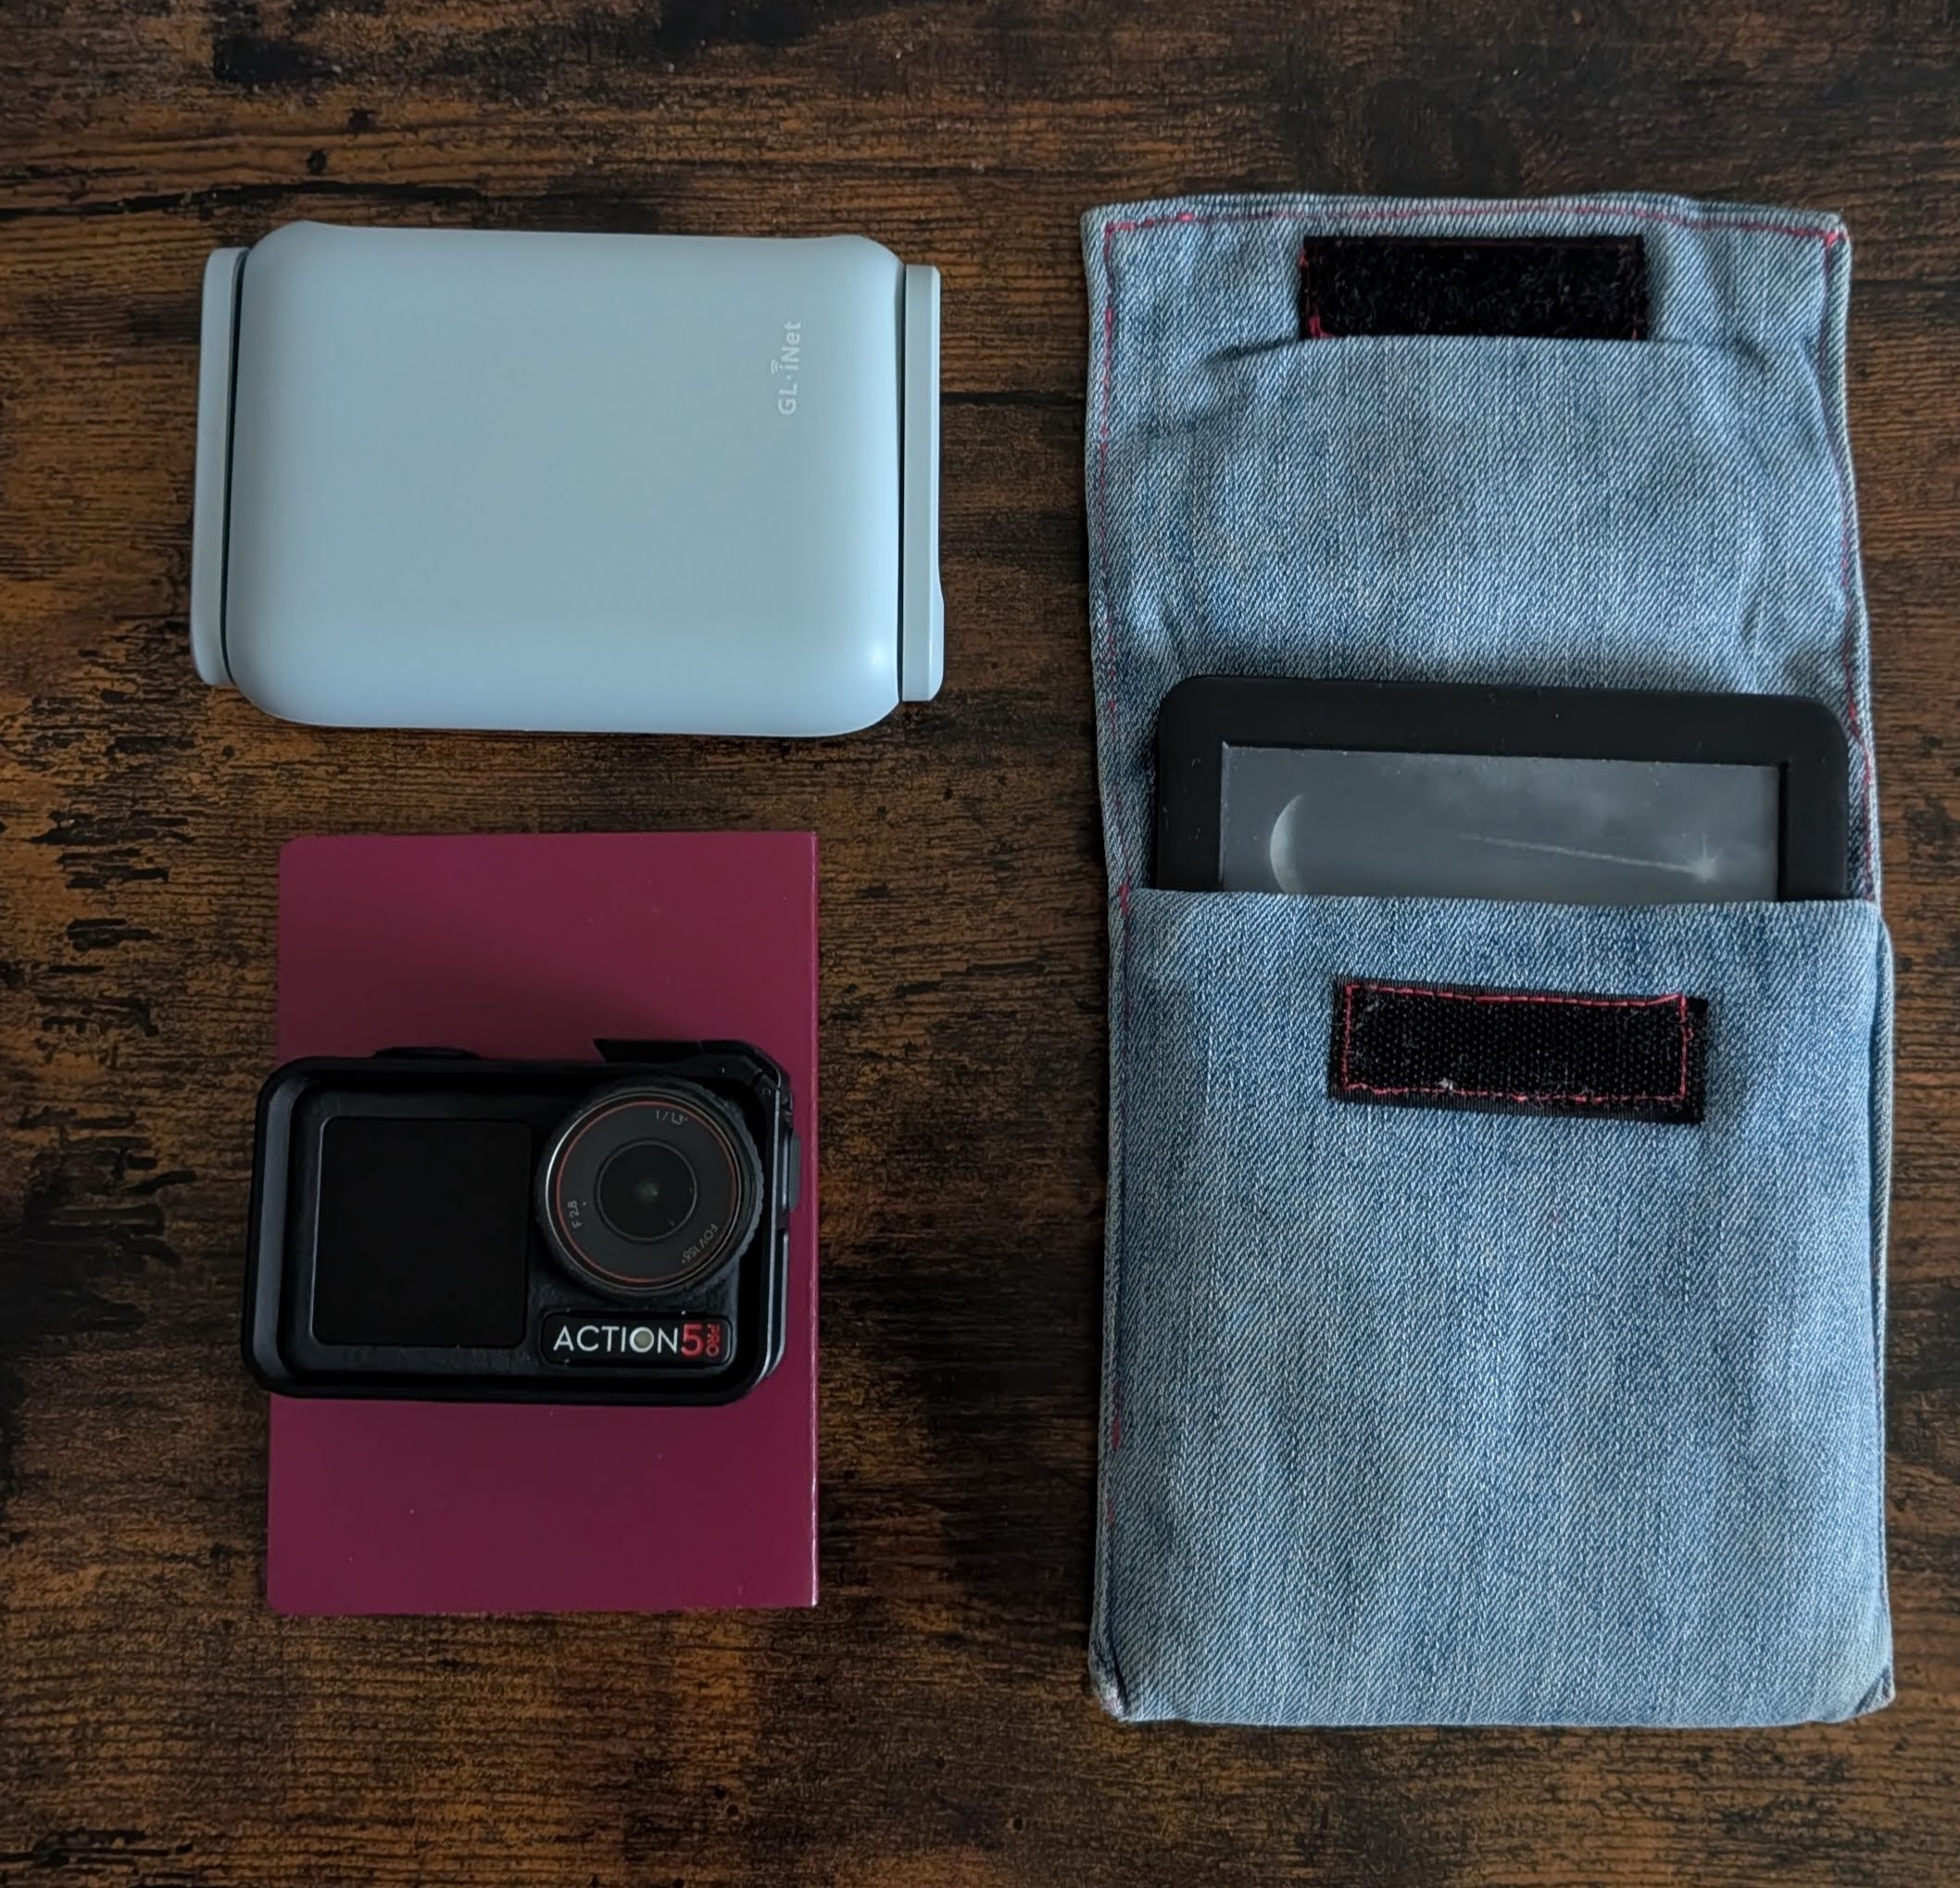 Tech for a Trip
 Wireguard with Hetzner as VPS
services:
  app:
    image: 'jc21/nginx-proxy-manager:latest' #admin@example.com / changeme
    restart: always
    container_name: nginx
    ports:
      - '80:80' # Public HTTP Port
      - '443:443' # Public HTTPS Port
      - '81:81' # Admin Web Port - UI
    volumes:
      - nginx_data:/data #  - ~/Docker/Nginx/data:/data
      - nginx_letsencrypt:/etc/letsencrypt #  - ~/Docker/Nginx/letsencrypt:/etc/letsencrypt

volumes:
  nginx_data:
  nginx_letsencrypt:

networks:
  nginx_default:
name: nginx_default services:
filebrowser:
image: filebrowser/filebrowser
container_name: filebrowser
ports:
- 8080:80
volumes:
- /root/Docker/FileBrowser/config:/config
- /root/Docker/FileBrowser/data:/srv
restart: unless-stopped
networks:
- nginx_default #this will allow communication between chevereto service and the existing nginx service
networks:
nginx_default:
external: trueThis requires ~309mb/1.87GB of RAM.
And for DNS Challenge with Cloudflare:
You will need their API Token from here
- Go to Create token: Edit zone DNS.
Zone Resources->Include all zones(or a specific domain only) and create it. Add it asdns_cloudflare_api_token= - In NginX UI, you will add the: container name and port of the services
Then you will be done in under a minute:
And…
if you are looking for a Theme for a Wedding landing page: you can have a look to Astro Theme Horizon.
FAQ
Getting a Domain Name
Get a TLD, there are many places, like: https://sered.net/dominios
Or the typical: These have an API to play…
- Porkbun
- NameCheap
- Cloudflare Domains (but does not allow to buy via API)
Alternatives to Weddingshare
The good thing about Weddingshare, is that it creates a QR to point to the url.
But, it does NOT support .HEIC files.
And having the https done right was a headache.
So I went with FileBrowser

services:
  filebrowser:
    image: filebrowser/filebrowser
    container_name: filebrowser
    ports:
      - 8080:80
    volumes:
      - /home/Docker/FileBrowser/config:/config
      - /home/Docker/FileBrowser/data:/srv #same as Syncthing!
    restart: unless-stopped

networks:
  nginx_nginx_default:
    external: true
Not like this:
But like this, also with the CNAME record for CloudFlare: if using CF at all
And this is how they get to work, with the container port:
More
What I learnt
Another HUGO cool theme! https://tmuguet.gitlab.io/hugo-split-gallery/
To generate QR’s with logo thanks to Python
![]()
QRs can also be done with Inkscape or with IT-Tools as a container or emn178
- Make sure to secure your Hetzner Server
Some Ports might be Open and you can receive a BSI mail 📌
sudo apt update
sudo apt install ufw
sudo ufw deny 111/tcp
sudo ufw deny 111/udp
sudo ufw allow ssh
sudo ufw status
#sudo ufw enable- For https, cloudflared tunnels are tricky for
sub.sub.domain.com(ok forsub.domain.com). With the NGINX setup and proper DNS records (A and CNAME) before creating the certificates, it works.
Creating a tunnel is fine:
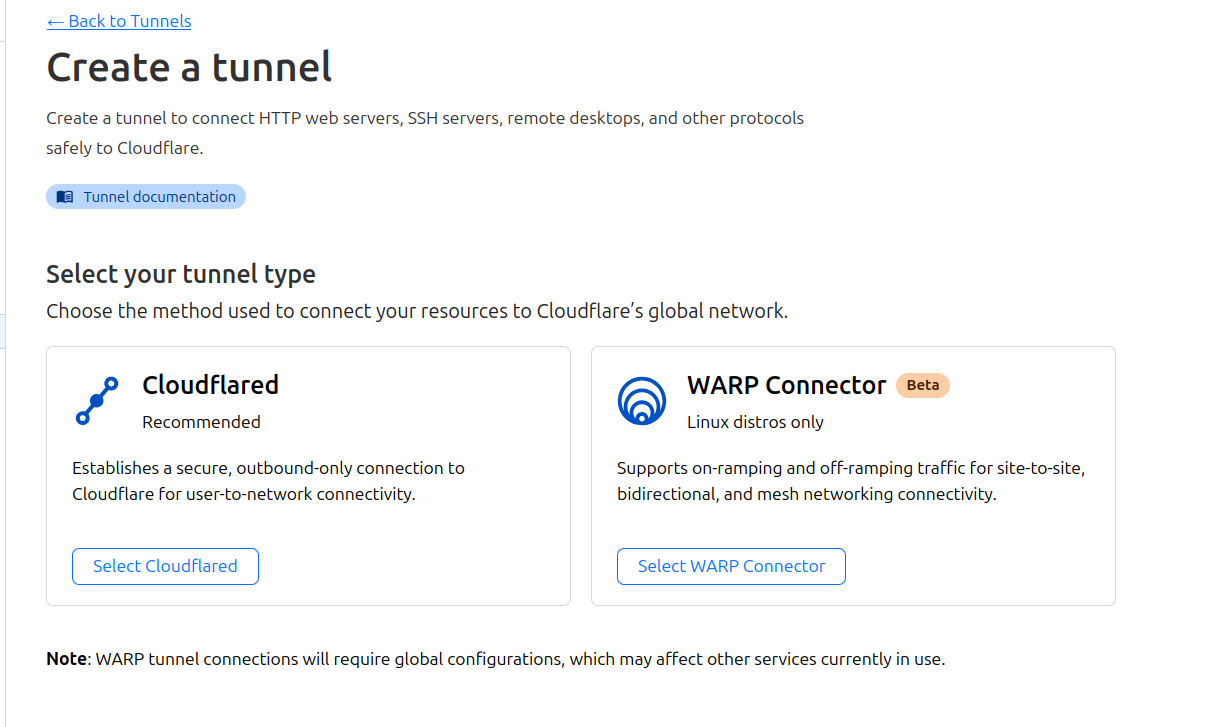
But this will not create SSLs:
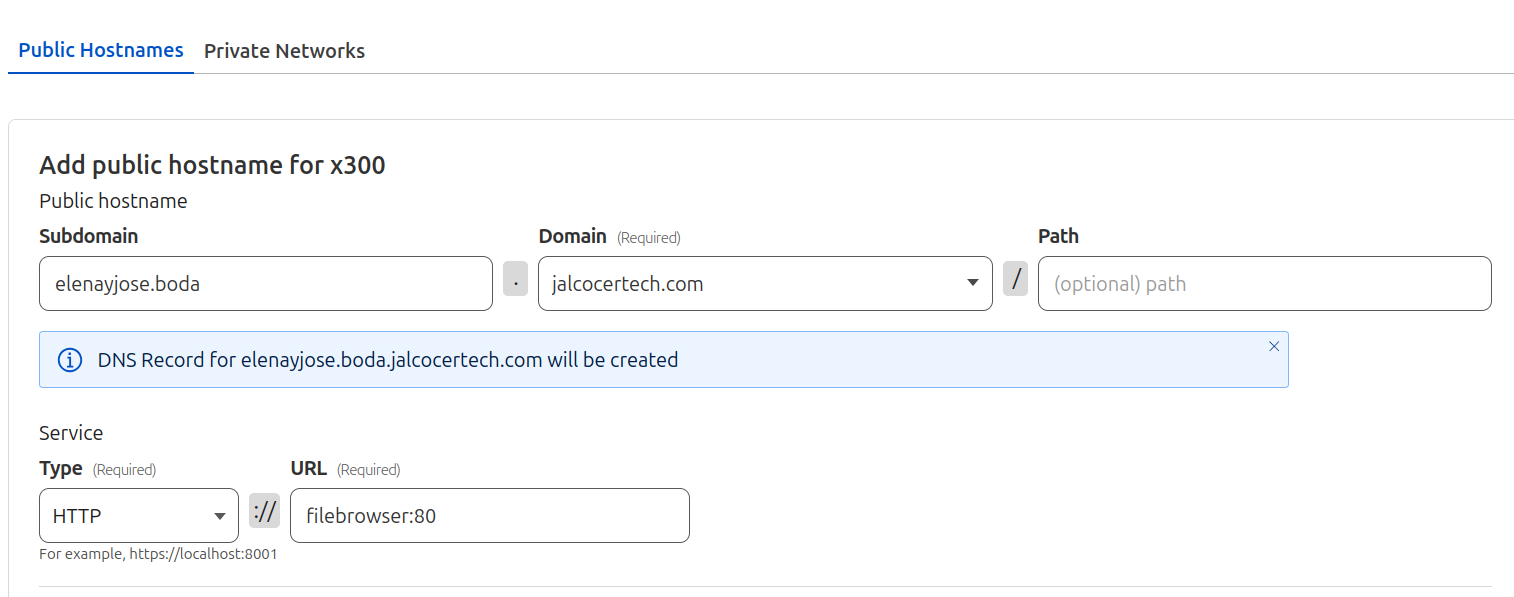
Fortunately, we can get that SSL for the sub sub domain with NGINX and these records set:

- After the event has finished, you just have to copy the files to your own laptop. You can try with rSync:
rsync -avz root@157.678.45.123:/root/Docker/FileBrowser/ ./- [Optionally] You can use Selfhostable Photo Management tools and see what have been uploaded to Filebrowser