How to setup TinyAuth x Traefik with DNS Challenge
TL;DR
Getting Traefik v3.3 to work reliably and plugging TinyAuth with GH auth
Intro
I was having a look to https://selfh.st/newsletter/2025-02-07/ and found out about TinyAuth
Which seems to integrate with https services and provide an auth layer:
- https://tinyauth.doesmycode.work/docs/guides/github-oauth.html
- https://github.com/steveiliop56/tinyauth
- https://tinyauth.doesmycode.work/docs/getting-started.html
But what’s TinyAuth?
Just a Okta alternative, similarly to Authentik
We will be setting up a Flask Web app with https via Traefik and auth via TinyAuth. Jump.
TinyAuth
Remember, generate your keys:
openssl rand -base64 32And at first, the docker compose example was a little bit intimidating…
TinyAuth Compose with traefik and nginx web server 📌
This docker-compose.yml file defines a setup using Traefik as a reverse proxy, Nginx as a web server, and TinyAuth for authentication.
Let’s break down each service:
1. traefik Service:
container_name: traefik: Assigns the name “traefik” to the container.image: traefik:v3.3: Specifies the Traefik image version to use.command: --api.insecure=true --providers.docker: Configures Traefik.--api.insecure=true: Enables the Traefik API in insecure mode. This is generally discouraged for production. It’s useful for development and testing, but in production, you should use a secure API.--providers.docker: Tells Traefik to use Docker as a provider, meaning it will automatically discover and configure routing for other containers based on their labels.
ports: - 80:80: Maps port 80 on the host to port 80 in the container. This means that requests to port 80 on your host machine will be forwarded to Traefik.volumes: - /var/run/docker.sock:/var/run/docker.sock: Mounts the Docker socket into the Traefik container. This is how Traefik can communicate with the Docker daemon to discover other containers and configure routing. This is a security consideration. Only grant access to the Docker socket to trusted containers.labels:: These labels are used by Traefik to configure routing and middleware.traefik.http.middlewares.tinyauth.forwardauth.address: http://tinyauth:3000/api/auth: Defines a middleware named “tinyauth”. This middleware uses forward authentication, meaning it will send authentication requests to the TinyAuth service running athttp://tinyauth:3000/api/auth.
2. nginx Service:
container_name: nginx: Assigns the name “nginx” to the container.image: nginx:latest: Specifies the Nginx image to use.labels:: Traefik uses these labels for configuration.traefik.enable: true: Tells Traefik to enable routing for this container.traefik.http.routers.nginx.rule: Host(\nginx.example.com`): Defines a router named "nginx". This router will handle requests to the hostnginx.example.com`.traefik.http.services.nginx.loadbalancer.server.port: 80: Defines a service that points to port 80 of the Nginx container.traefik.http.routers.nginx.middlewares: tinyauth: Applies the “tinyauth” middleware to the “nginx” router. This means that requests tonginx.example.comwill be authenticated by TinyAuth before being forwarded to Nginx.
3. tinyauth Service:
container_name: tinyauth: Assigns the name “tinyauth” to the container.image: ghcr.io/steveiliop56/tinyauth:latest: Specifies the TinyAuth image to use.environment:: Sets environment variables for TinyAuth.SECRET=some-random-32-chars-string: Sets the secret used for JWT signing. Change this to a strong, randomly generated secret.APP_URL=https://tinyauth.example.com: Sets the URL of your application.USERS=user:$$2a$$10$$UdLYoJ5lgPsC0RKqYH/jMua7zIn0g9kPqWmhYayJYLaZQ/FTmH2/u: Defines a user “user” with a bcrypt hashed password. You should generate a strong password and hash it using bcrypt. The$$are needed because$has a special meaning in YAML.
labels::traefik.enable: true: Enables Traefik routing for this container.traefik.http.routers.tinyauth.rule: Host(\tinyauth.example.com`): Defines a router fortinyauth.example.com`.traefik.http.services.tinyauth.loadbalancer.server.port: 3000: Defines a service pointing to port 3000 of the TinyAuth container.
How it Works Together:
- A request comes in to
nginx.example.com. - Traefik, acting as a reverse proxy, receives the request.
- Traefik checks the labels and sees that the “tinyauth” middleware is applied to this route.
- Traefik forwards the request to the TinyAuth service at
http://tinyauth:3000/api/auth. - TinyAuth checks the credentials (if any) and authenticates the user.
- If authentication is successful, TinyAuth redirects the request back to Traefik.
- Traefik then forwards the request to the Nginx container.
- Nginx serves the website content
Key Security Considerations:
--api.insecure=true: Do not use this in production. Use a secure API with TLS.SECRET: Change theSECRETenvironment variable to a strong, randomly generated value.USERS: Generate a strong password and hash it using bcrypt. Do not store passwords in plain text.- Docker Socket: Mounting the Docker socket is a security risk. Only do this if you trust all the containers that have access to it. Consider alternative methods if possible.
This setup provides a basic example of how to use Traefik, Nginx, and TinyAuth together. Remember to address the security concerns before deploying this in a production environment.
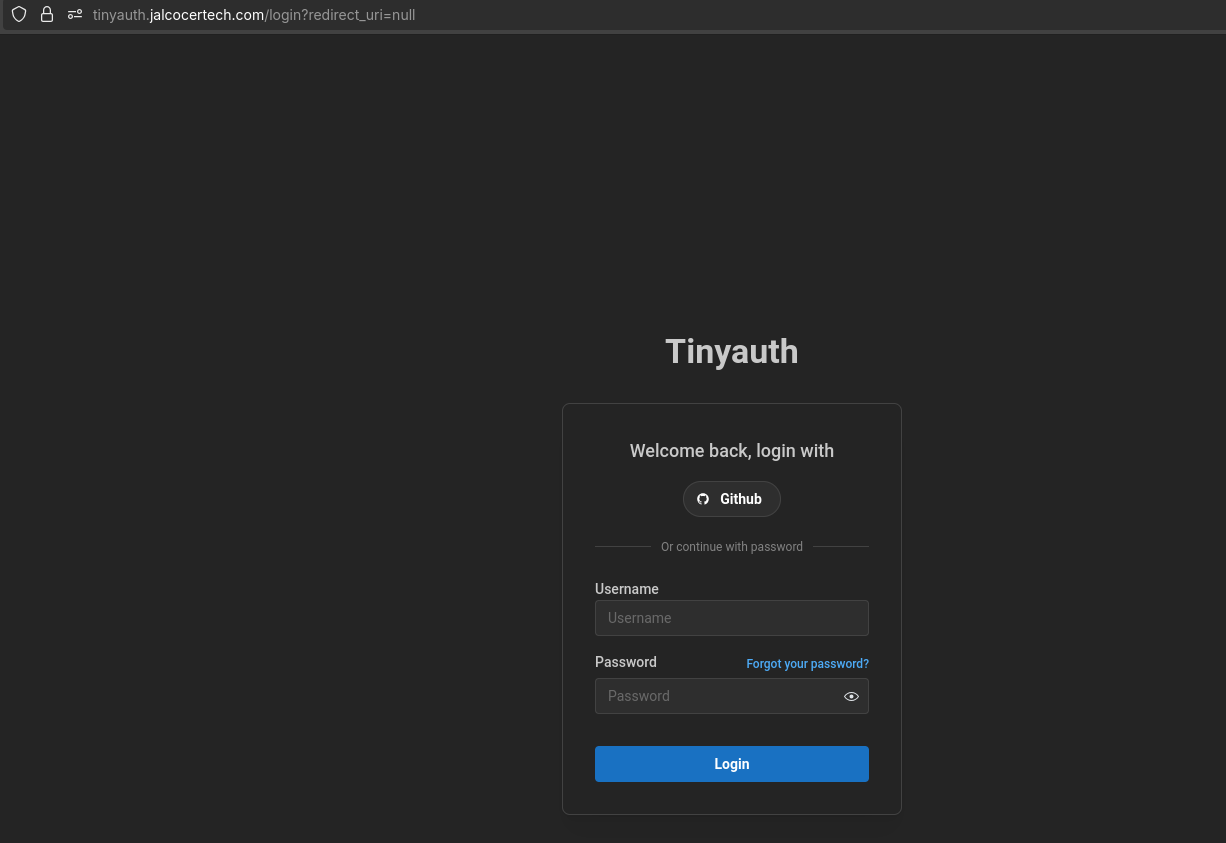
The flow is that Traefik exposes NGINX with a sample website, but you need to pass TinyAuth to see the content
With TinyAuth, we will be able to login via GITHUB or with particular users and passwords
When hitting: Forgot your password?
You can reset your password by changing the USERS environment variable.
Here you have a great explanation:
But, to get to that point, make sure to get Traefik ready first.
See how I have used TinyAuth with Traefik on [this post section]#traefik-x-tinyauth-x-flask)
About Traefik
If you have ever faced with the problem of http vs https,
- https://doc.traefik.io/traefik/plugins/
- https://plugins.traefik.io/plugins
- https://www.youtube.com/watch?v=vVKMey6SfSw
Traefik is an open-source reverse proxy and load balancer that’s designed to be easy to use, flexible, and scalable.
It’s written in Go, which makes it lightweight and efficient.
Traefik is ideal for modern web applications, microservices, and containerized environments.
Benefits of Traefik? 📌
Ease of use, high performance, and flexibility. You’ll learn how Traefik can help you simplify your infrastructure, improve your application’s scalability, and reduce errors.
Traefik offers a range of features that make it an attractive choice for developers.
Some of its key features include:
- Automatic service discovery
- Load balancing and routing
- SSL termination and encryption
- Support for multiple protocols (HTTP, WebSocket, TCP)
- Integration with popular technologies like Docker, Kubernetes, and Mesos
Traefik is a powerful and flexible reverse proxy that’s worth considering for your next project.
With its ease of use, high performance, and scalability, Traefik can help you improve your application’s reliability and performance.
How to Install Traefik
Not enough with Nginx or Caddy?
Id say that Traefik setup was not a easy for beginners (like ~ NGINX is), but lets try:
Have a look to Traefik
We can also get SSL certificates thanks to LetsEncrypt.
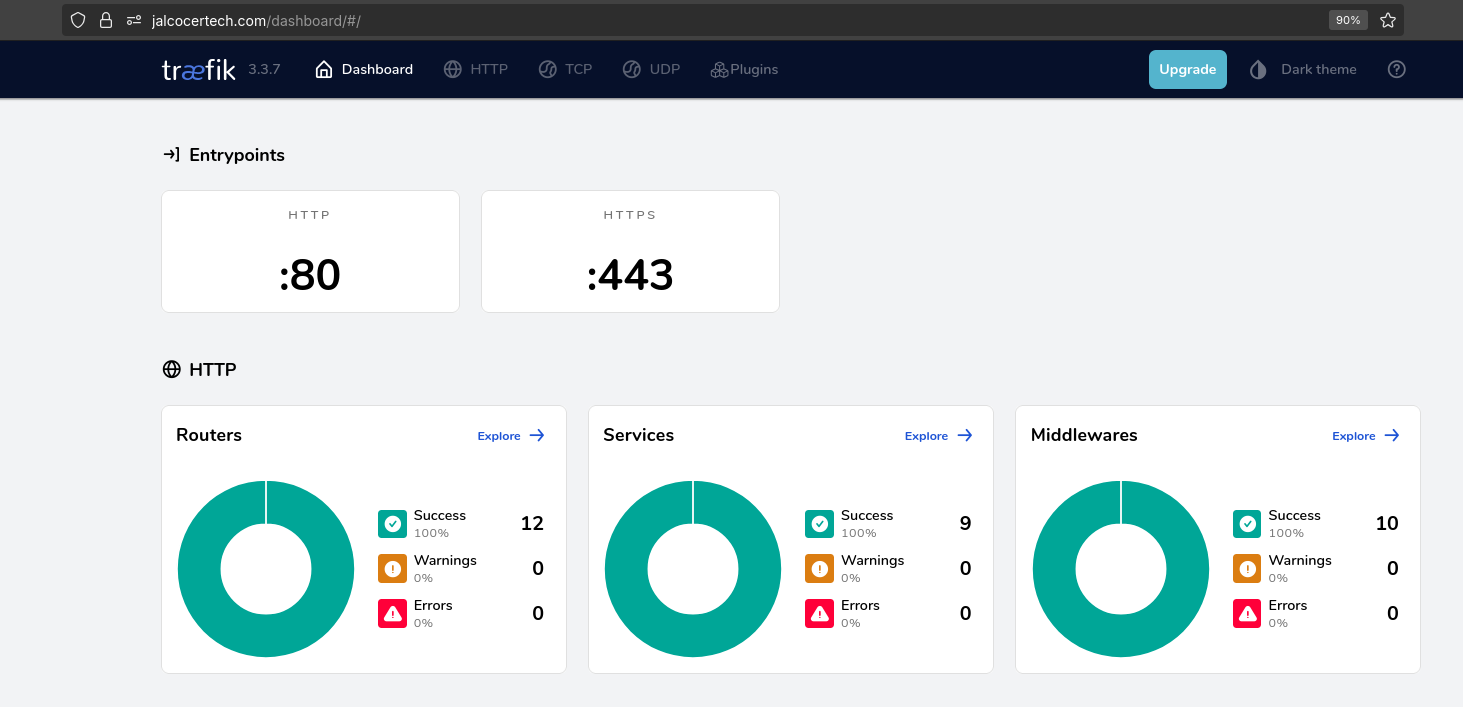
Traefik also provides a UI dashboard:
- https://github.com/traefik/traefik
- https://hub.docker.com/_/traefik
- https://doc.traefik.io/traefik/getting-started/install-traefik/
MIT | The Cloud Native Application Proxy
- Strengths:
- Dynamic Configuration: Traefik excels at automatically discovering and configuring services based on service discovery mechanisms like Docker, Kubernetes, and Consul.
- Extensive Plugin Ecosystem: Offers a wide range of plugins for various use cases, including authentication, rate limiting, and middleware.
- Ease of Use: Relatively easy to set up and configure, especially with dynamic configurations.
- Weaknesses:
- Configuration Complexity: While dynamic configuration is a strength, it can also lead to complex configurations for more advanced setups.
- Performance: May not be as performant as Nginx for very high-traffic scenarios.
Container first proxy, configurable via code
Traefik JimGarage
- https://doc.traefik.io/traefik/user-guides/docker-compose/basic-example/
- https://doc.traefik.io/traefik/user-guides/docker-compose/acme-dns/
Thanks to https://github.com/JamesTurland/JimsGarage/blob/main/Traefik/docker-compose.yml
What we will need:
- Docker
- NGINX to serve a website
- Traefik providing SSL with your Domain
For the DNS Challenge, we just need the API access, for example to Cloudflare Domains.
Which uses the v3.3 approach from Jim
nano docker-compose.yamlImportant:
/home/ubuntu/docker/traefik/acme.jsonstores the private keys of the certificates/home/ubuntu/docker/traefik/traefik.ymlentry points for traefik/home/ubuntu/docker/traefik/config.yml
With that, LetsEncrypt will login to the Domain registrar and creates a temporary record.
Then, it will know that you are the one that really own the domain and therefore you can get certificates for that domain.
How to get API Token from Cloudflare - DNS Challenge!
Log into Cloudflare and Go to My Profile on the top right -> API Tokens -> Create Token -> Select the Edit Zone DNS Template
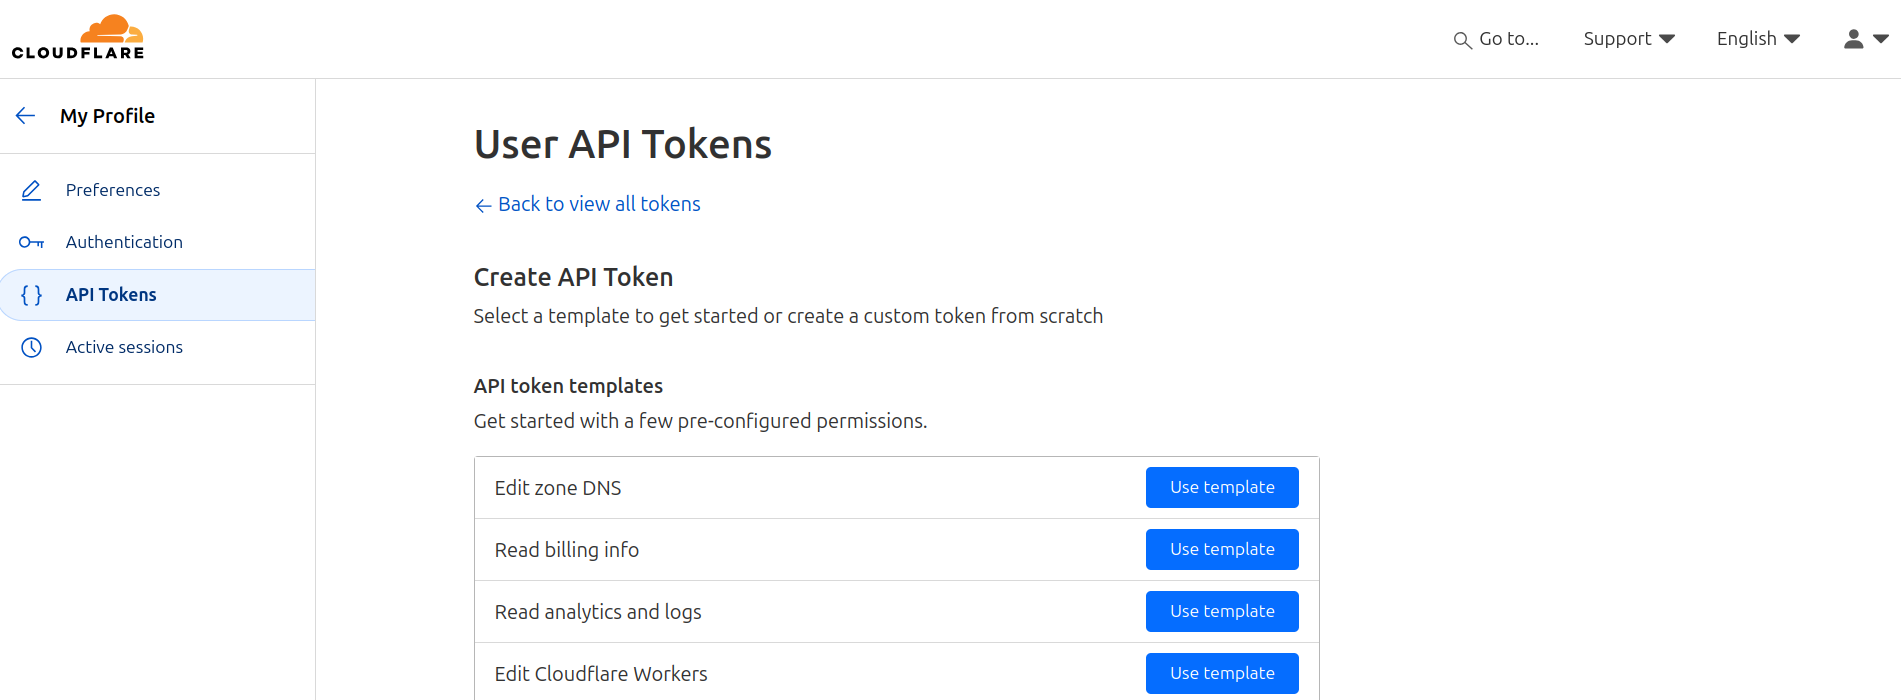
Keep Permissions Zone: DNS And as Zone Resources you can specify the particular domain (optional).
You will need to point DNS to your server via Cloudflare UI or programatically
You will get a way to verify that the token works:
curl -X GET "https://api.cloudflare.com/client/v4/user/tokens/verify" \
     -H "Authorization: Bearer some-cf-token" \
     -H "Content-Type:application/json"
You can use that API into the Traefik docker-compose below at CF_DNS_API_TOKEN
Or even better, just paste it into the
cf-tokenfile. Just the API, no additional strings.
See that we also have a traefik.yml linked in the volumes of this compose.
And the docker network:
sudo docker network create proxyAcme file has to be created blank (and fill later automatically).
mkdir -p /home/docker/traefik
cd /home/docker/traefik
touch /home/docker/traefik/acme.json #blank, just change the permissions to 600 later (private key)
touch /home/docker/traefik/config.yml
touch /home/docker/traefik/traefik.ymlchmod 600 ./acme.json && \
chmod 600 ./traefik.yml #or it will be a security risk for other users to see the privatekeySee https://github.com/JamesTurland/JimsGarage/tree/main/Traefikv3
And last but not least, we need to create a strong password
sudo apt install apache2-utils

#generating a hashed password for the user "admin" using the htpasswd utility
echo $(htpasswd -nb "admin" "admin") | sed -e s/\\$/\\$\\$/g #place the full result into the dockercompose for the dash creds
Right on this label of the docker compose: traefik.http.middlewares.traefik-auth.basicauth.users
And now, we just do:
##https://github.com/JamesTurland/JimsGarage/blob/main/Traefik/docker-compose.yml
sudo docker-compose up -d
And I got this kind of error:
2025-02-08T22:54:03Z ERR Error while building configuration (for the first time) error="error reading configuration file: /config.yml - read /config.yml: is a directory" providerName=file
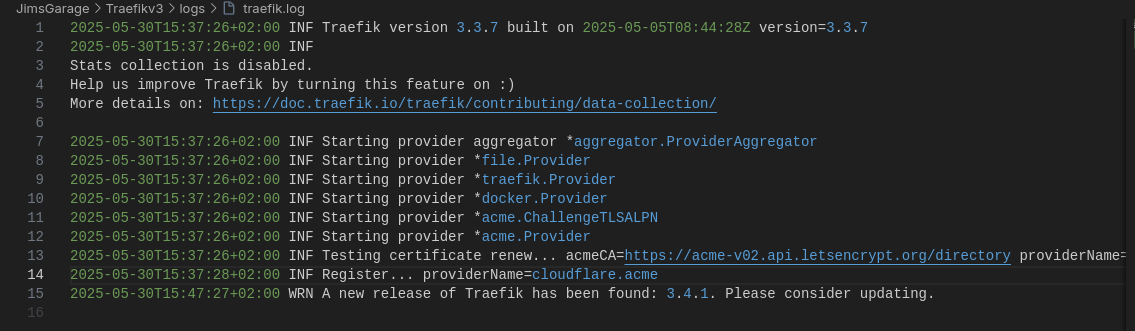
But it worked for me with the Traefik v3.3 version and this JimGoGarty guide.
Traefik JimGarage v3.3
Thanks to this, finally I got my head around Traefik, for good:
- acme.json
- config.yml
- traefik.yml
Thanks to
Conclusions
Traefik has been a really interesting setup, what I liked:
- Programatic implementation of new subdomains
- No need to expose services ports (though you still can)
- Automatic https for homelab private IPs working (also for public ones on VPS’s)
- The rabbithole of middlewares…like for Authentication purpuses (as we will see below with TinyAuth)
With Traefik working, its time to combine it with a sample Flask Web App and Tinyauth
git clone https://github.com/JAlcocerT/ThreeBodiesTraefik x TinyAuth x Flask
I have vibe coded this Flask App:
It’s the 3 body problem, baby!
 Three Body x Flas
 Three Bodies Web App
How about using this Flask web app with https thanks to Traefik?
Easy.
We will need to create a Github OAUTH App:
Add the link as per your subdomain: https://tinyauth.jalcocertech.com/api/oauth/callback/github
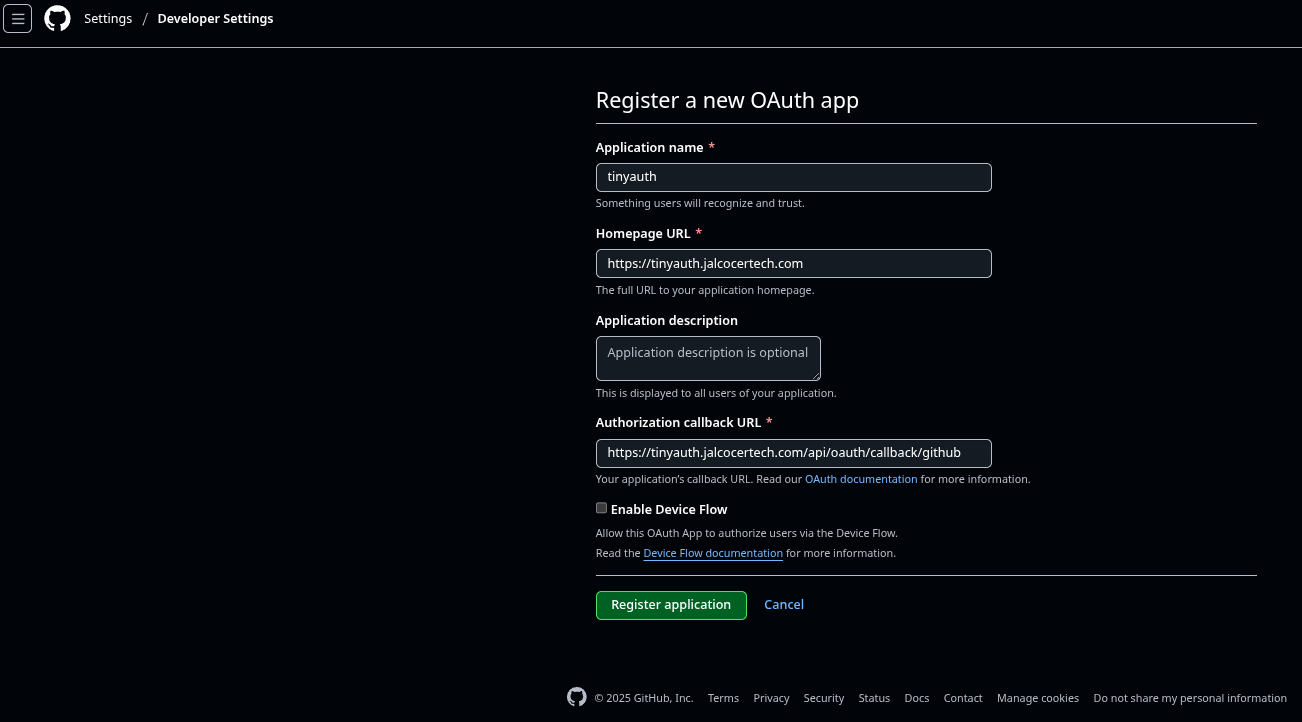
- Then, registre the application. Get its ID and and its client secret:
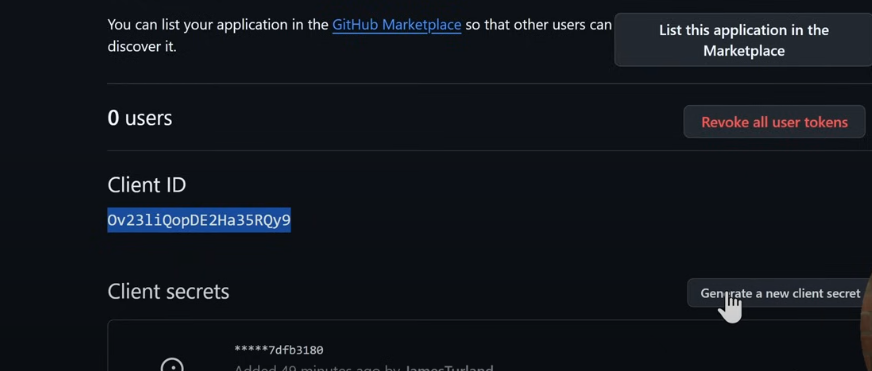
Those are required for
environment:
- GITHUB_CLIENT_ID=${GITHUB_CLIENT_ID} #For GitHub OAuth
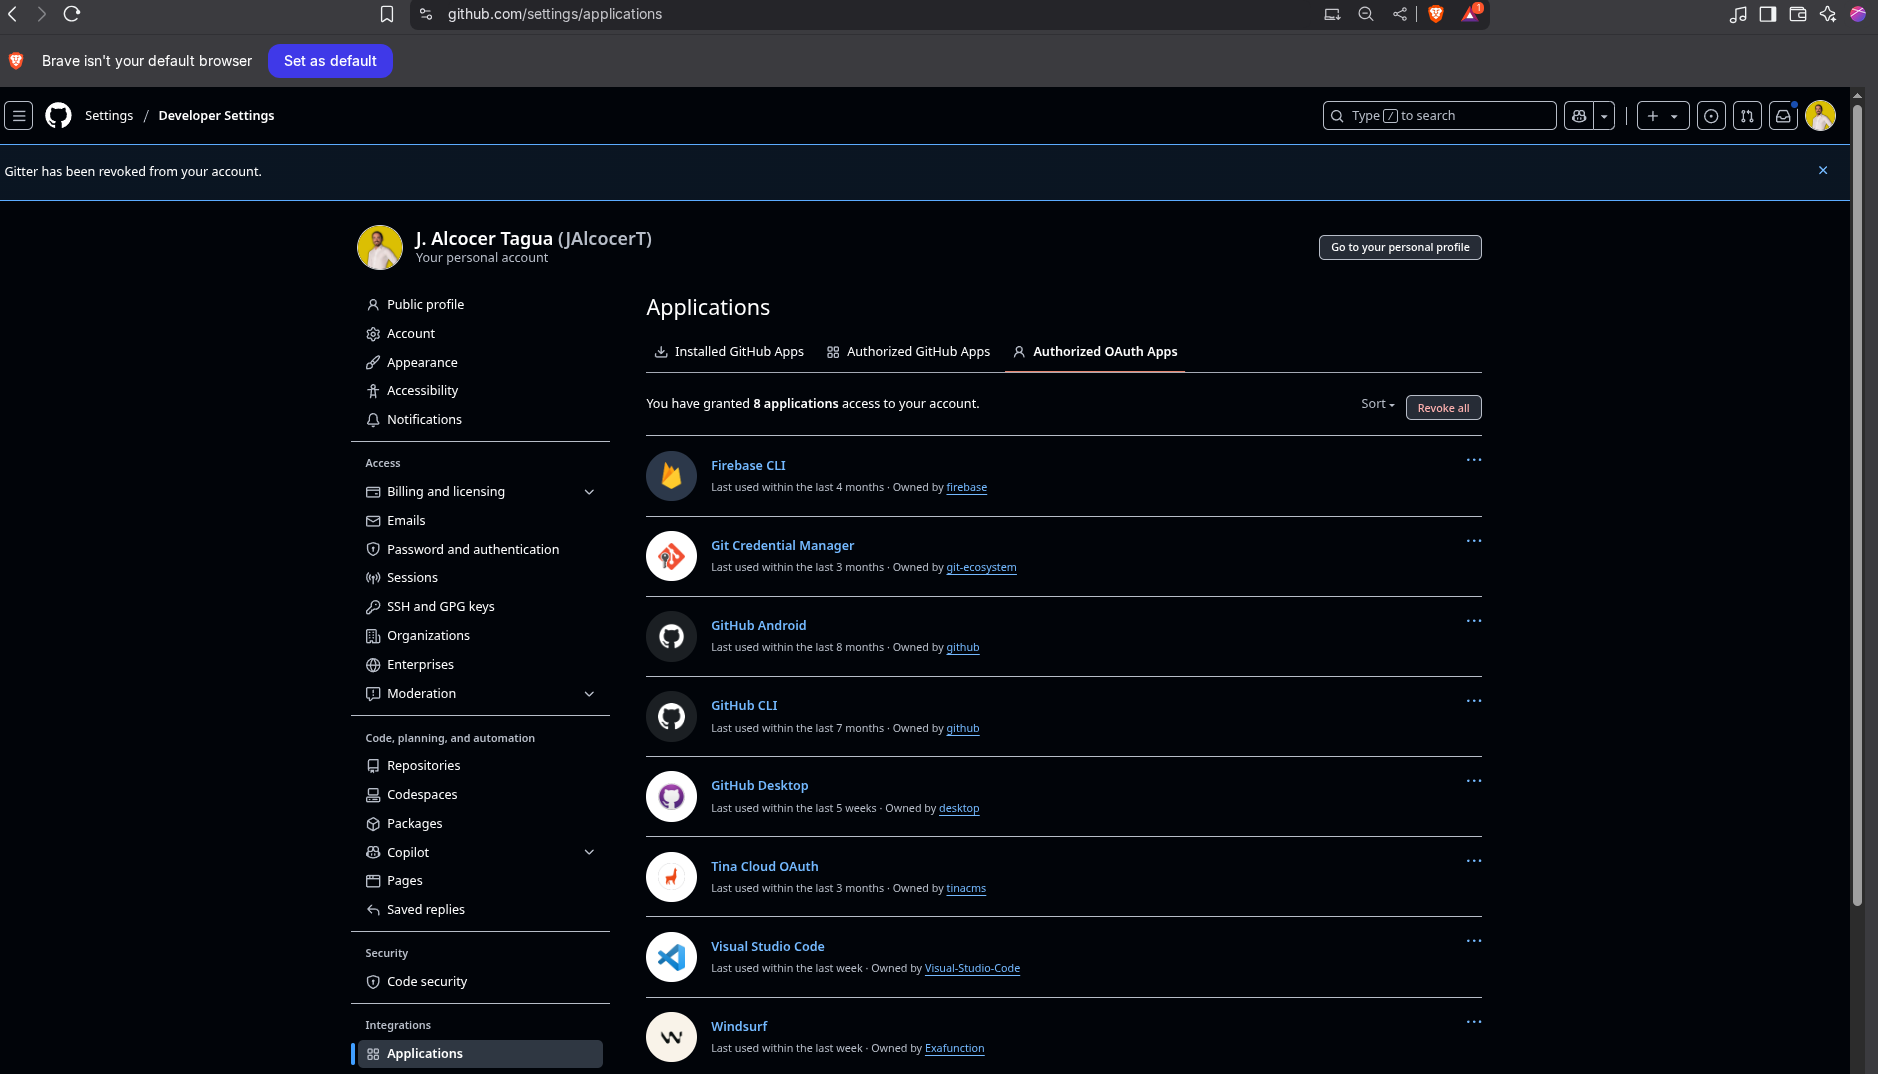
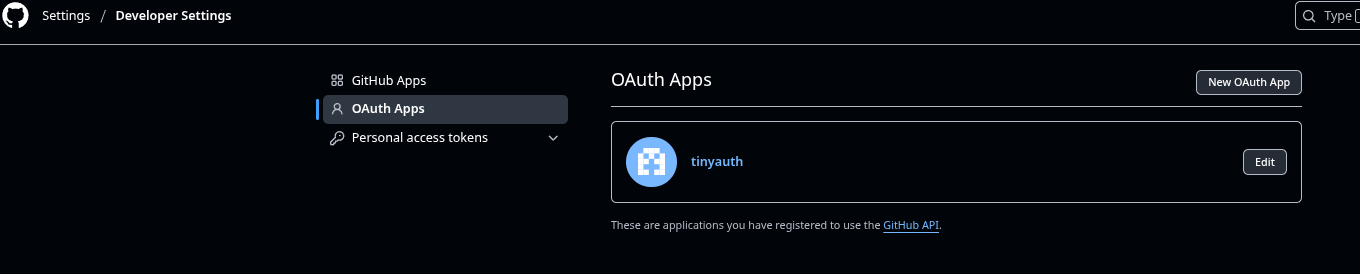
- GITHUB_CLIENT_SECRET=${GITHUB_CLIENT_SECRET}- When its done, we will be Seeing the application: https://github.com/settings/applications/3023538
particularly at the OAUTH developer section.
Just spin up Tiny Auth with:
sudo docker compose up -dAnd go to https://tinyauth.jalcocertech.com or whatever subdomain you placed.
Authorize the app:
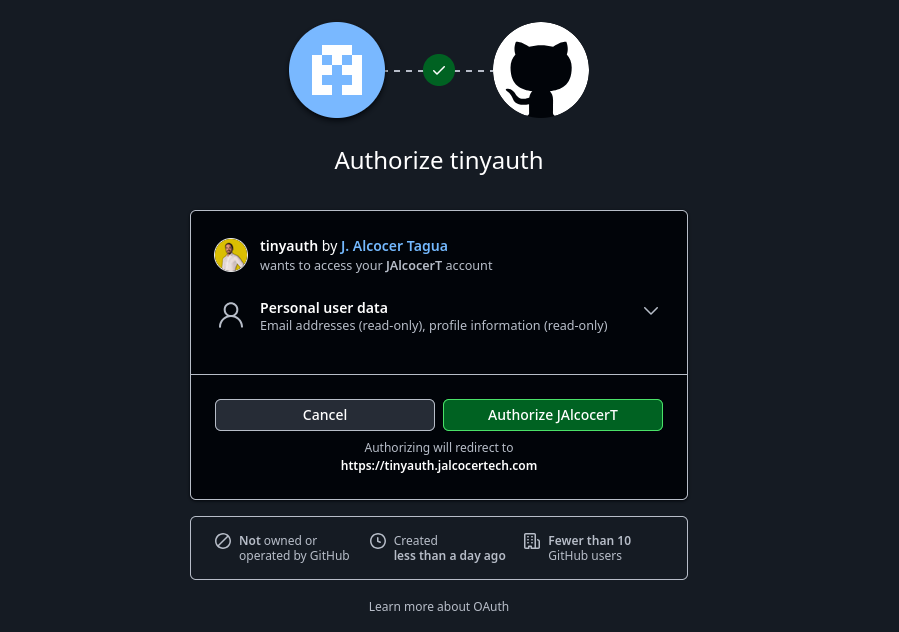
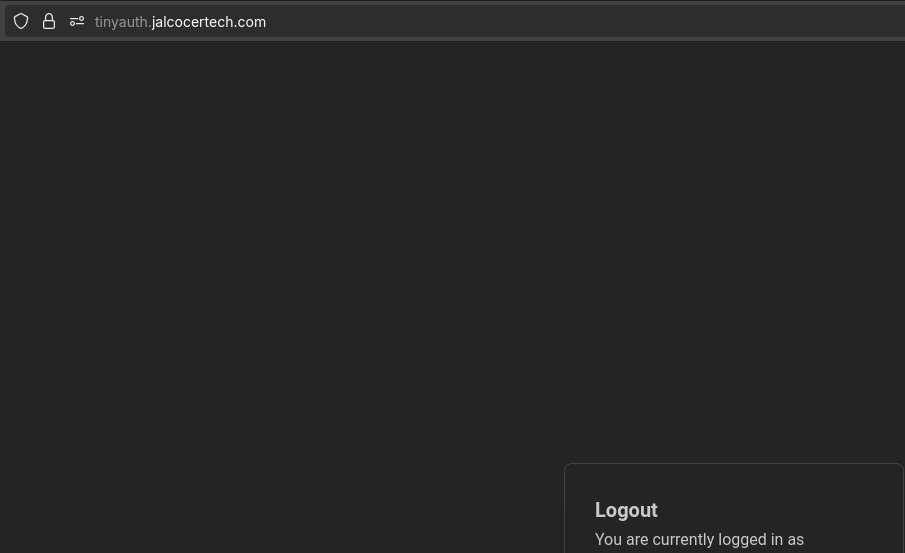
And you will be logged in:
docker compose -f PiwigoTraefik_docker-compose.yml up -d
##command: tail -f /dev/null #in case you need to keep running
If you are done…
# docker builder prune
# #docker system prune -a
# docker volume prune
# docker image prune -a
Updating DNS Records
Before moving forward…make sure that you have proper DNS records at your domain provider.
I have tested this with Cloudflare.
See this script to updated Cloudflare DNS records programatically
Ive also used it at the 3bodies flask tinker app
We will need the Cloudflare API and zoneID, which you can get from:
curl -X GET "https://api.cloudflare.com/client/v4/zones?name=whateveryourdomainis.com" \
  -H "Authorization: Bearer whateveryourAPIis" \
  -H "Content-Type: application/json"
Or, if you just want it simple, get the ZoneID parsed with:
curl -X GET "https://api.cloudflare.com/client/v4/zones?name=whateveryourdomainis.com" \
  -H "Authorization: Bearer whateveryourAPIis" \
  -H "Content-Type: application/json" | jq -r '.result[0].id'
FAQ
Logto Authentication
- https://docs.logto.io/quick-starts/python
- https://github.com/JAlcocerT/ThreeBodies/tree/main/LogTo
- https://openapi.logto.io/operation/operation-identifyuser
You will need an account: https://cloud.logto.io/ and some project to tinker with it, like this: https://github.com/JAlcocerT/ThreeBodies/tree/main/LogTo
And follow these steps:
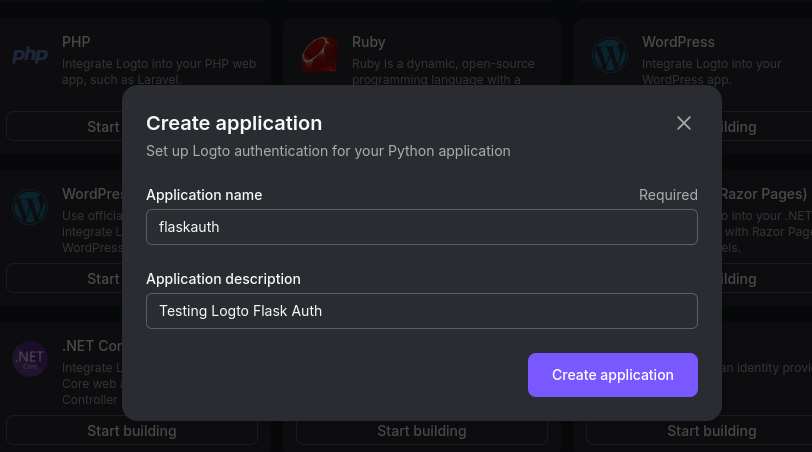
- Go to the Apps page and create a new one: https://cloud.logto.io/vurfo6/applications/create

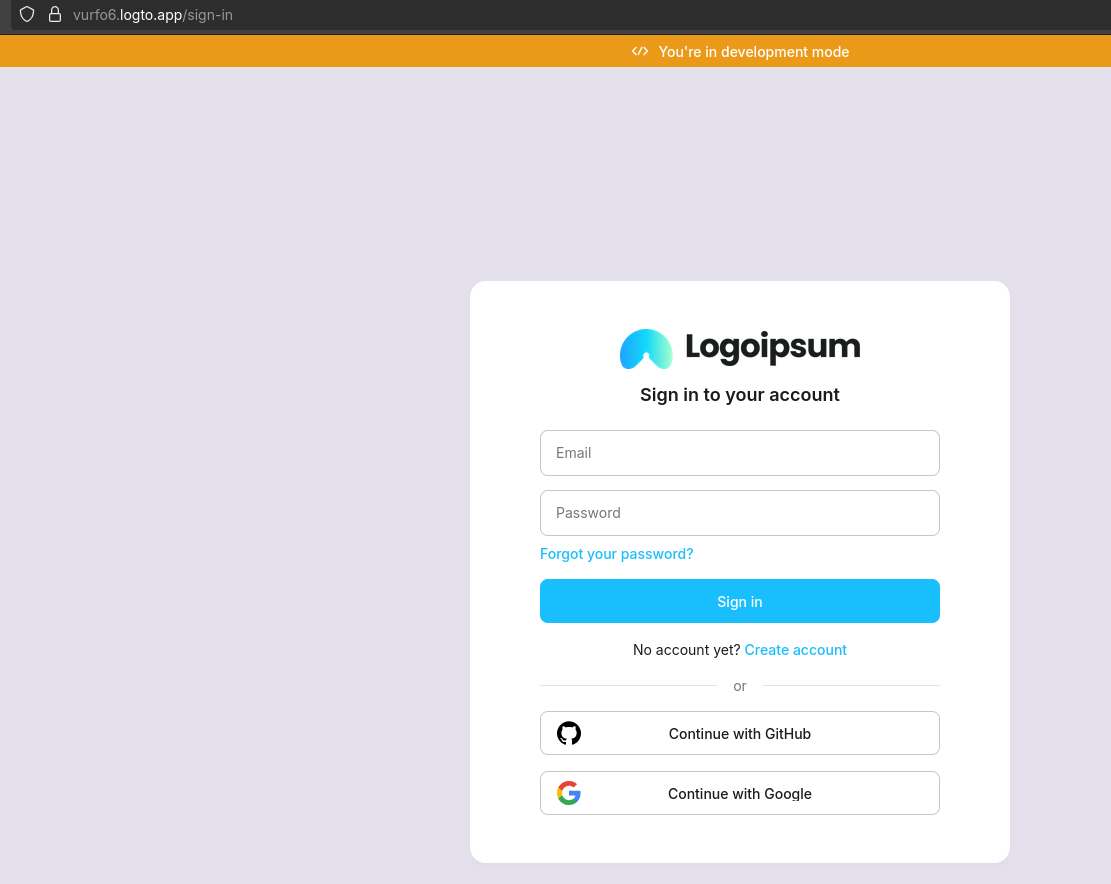
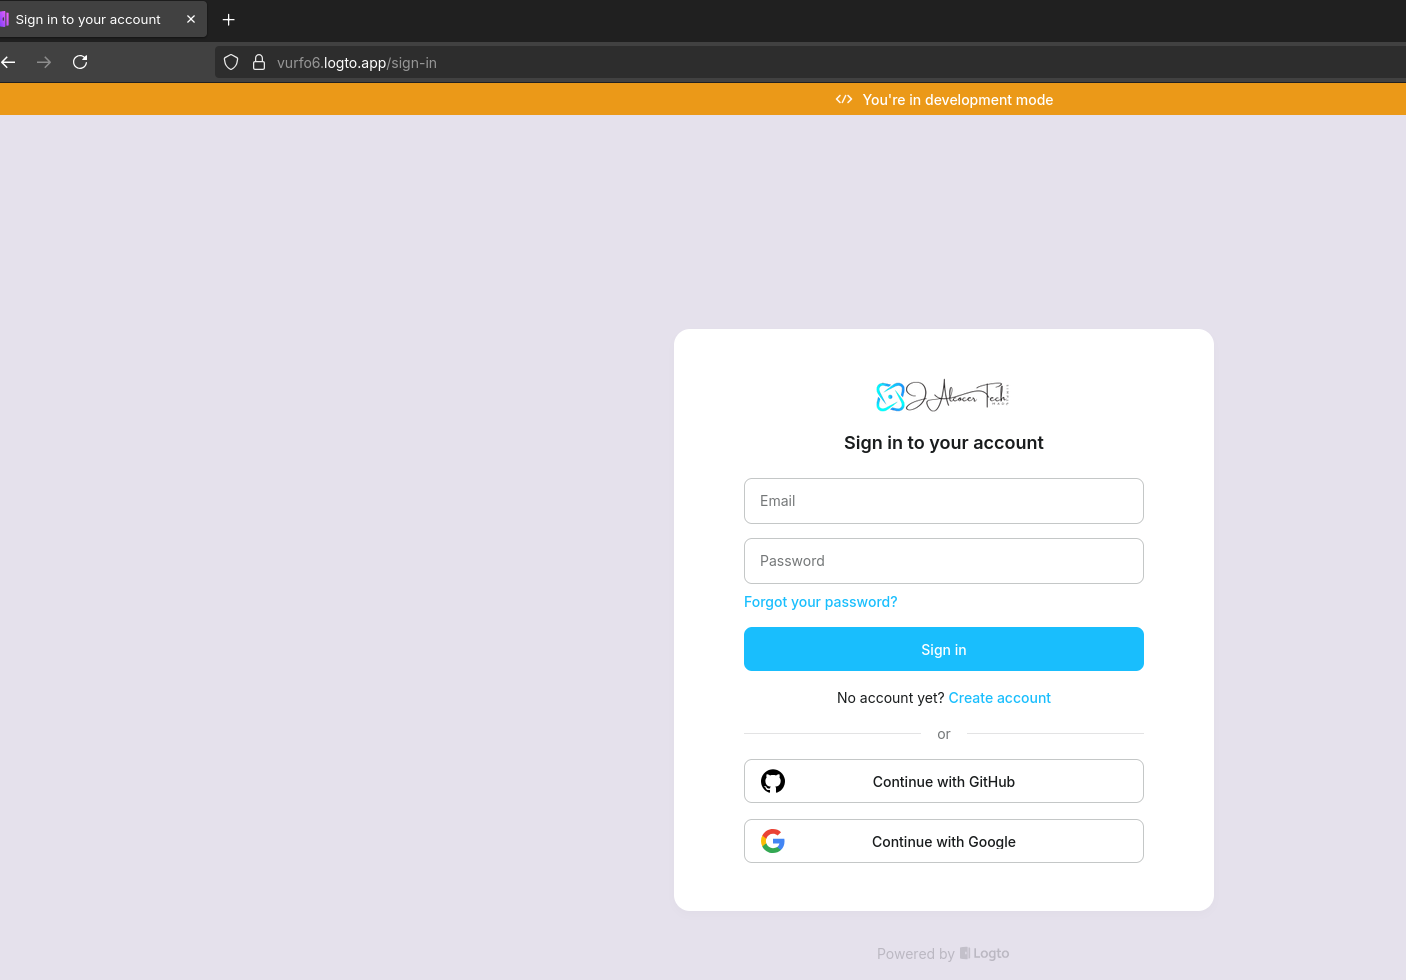
You will get the preview of the auth page: https://oxa37q.logto.app/sign-in you can put your sub/domain later
- Create a Python app withing Logto:
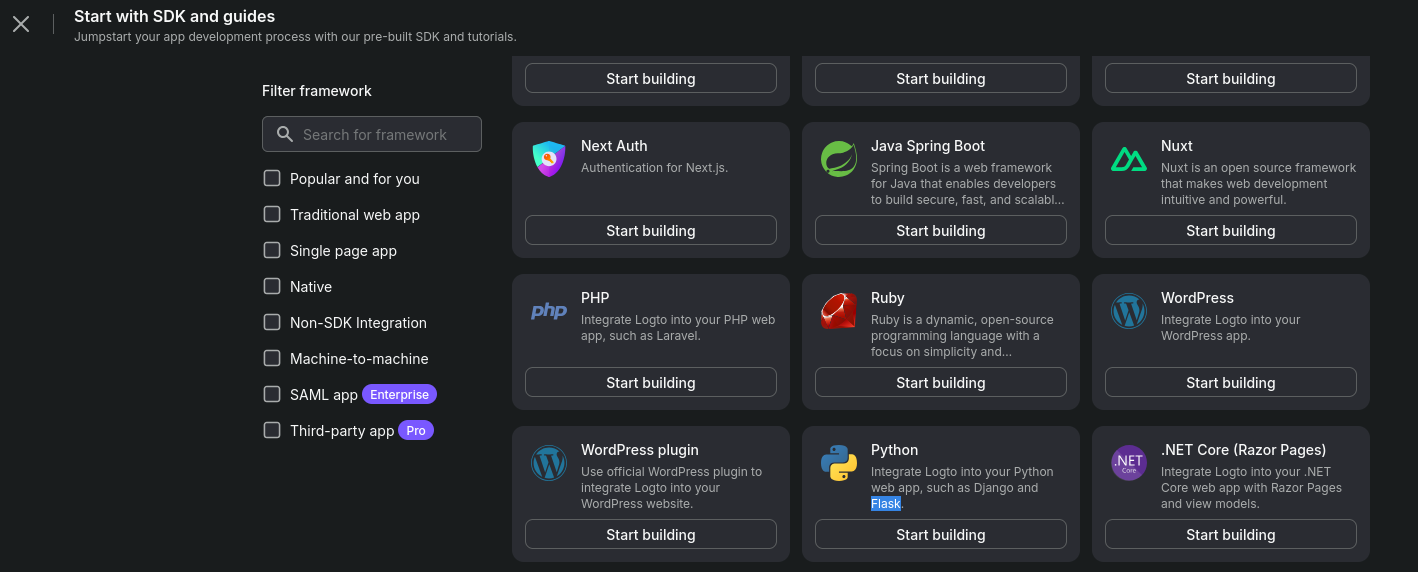
Be prepared to get familiar with these fields: https://docs.logto.io/quick-starts/python
And install the artifacts:
uv venv
source .venv/bin/activate
uv pip install logto # or `poetry add logto` or whatever you use
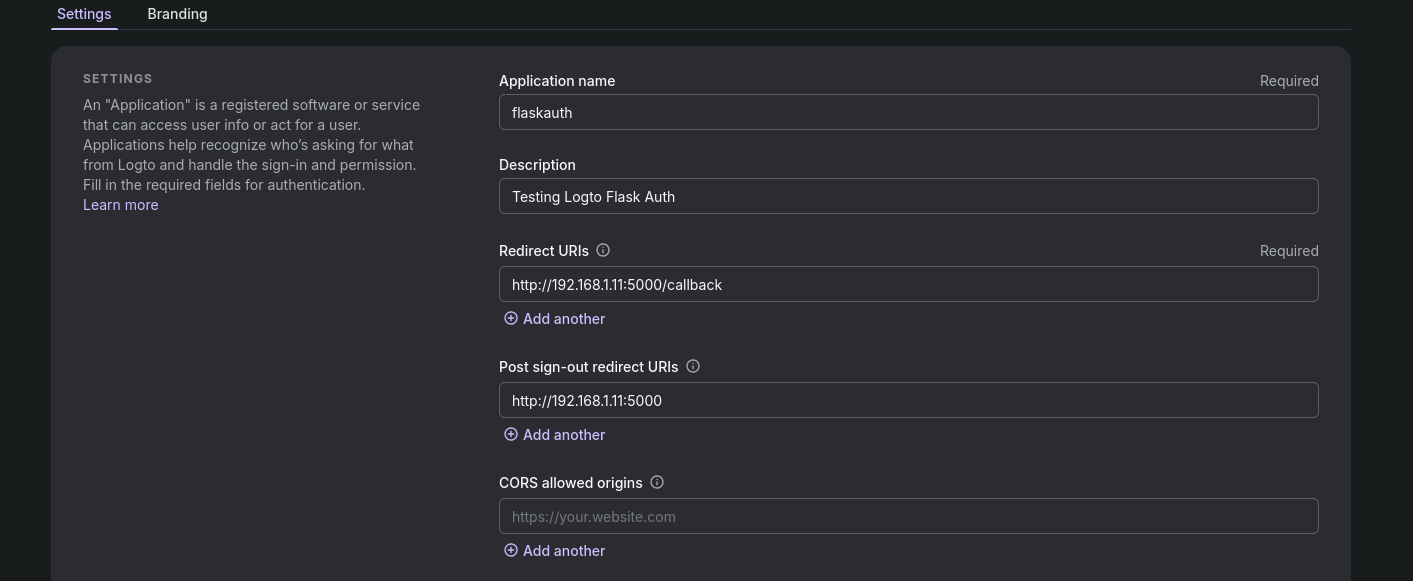
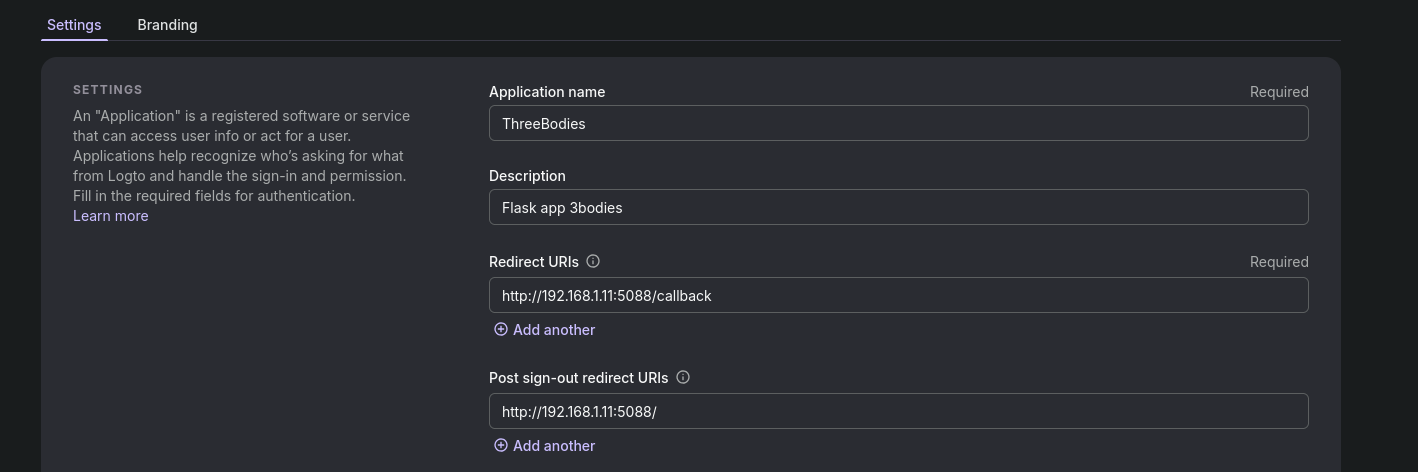
#uv pip install -r requirements.txtMake sure to set proper redirects:
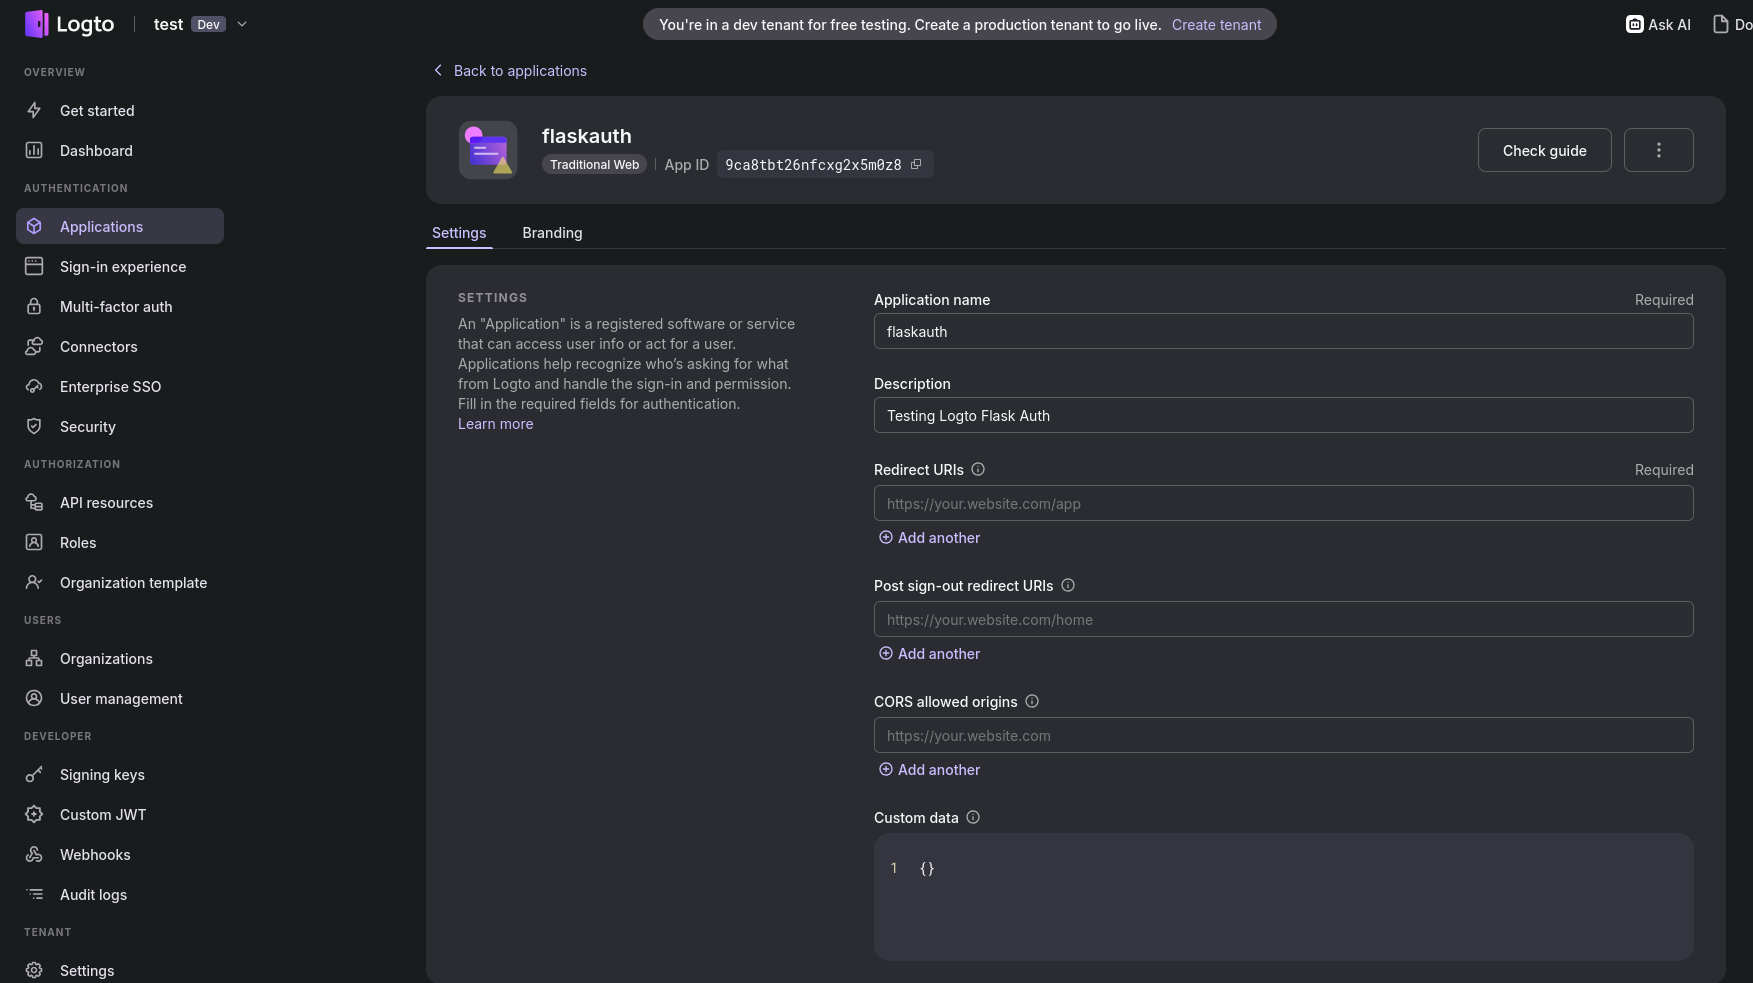
Like these for the flask app:
Optionally, add the custom domain to LogTo:
remember that these will be DNS only if you are using cloudflare
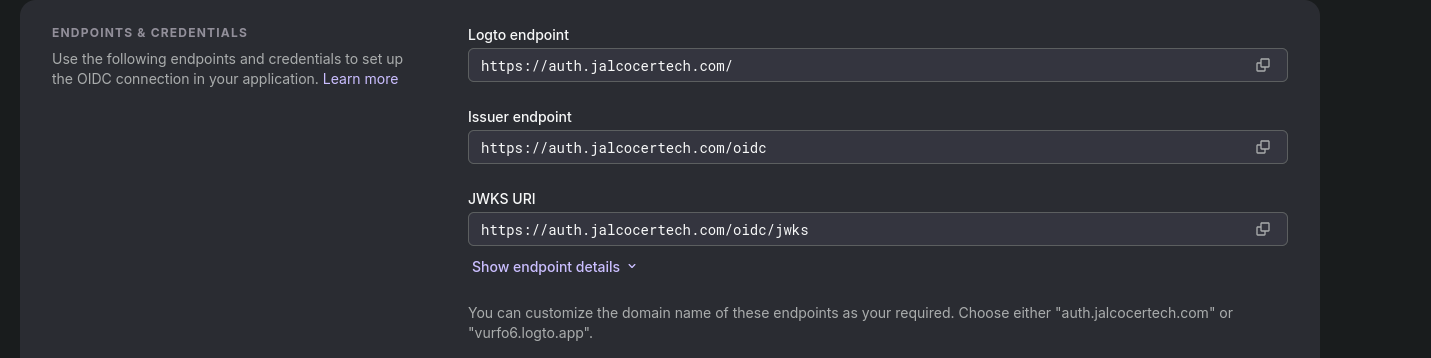
You will need to configure DNS records so that they match LogTo expectations:
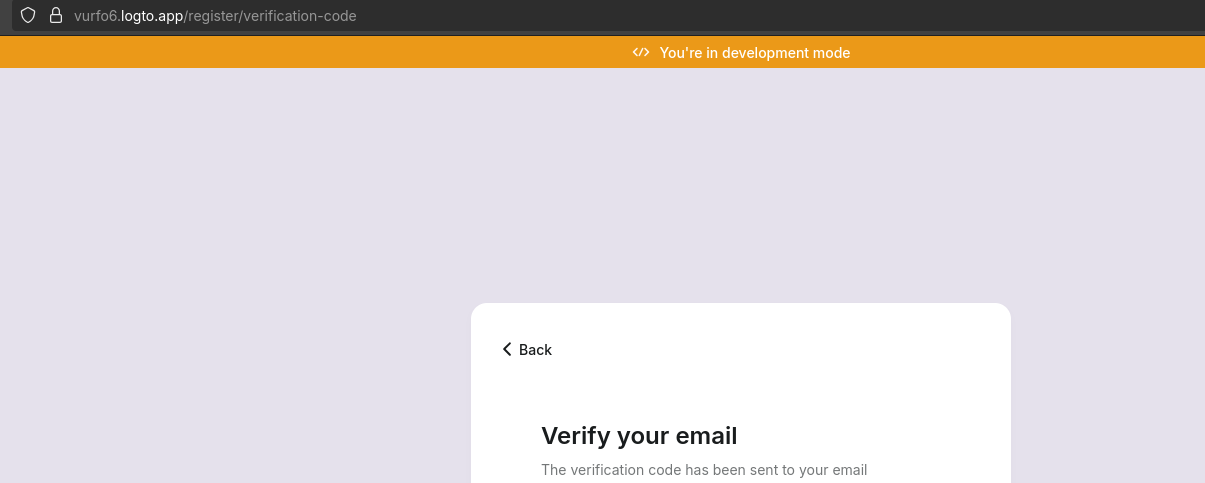
If set properly, you will get this kind of middleware from LogTo, when tyring to signin to your app:
Which allow us to verify emails: https://cloud.logto.io/vurfo6/connectors/passwordless
And which you can customize further, with your logo etc:
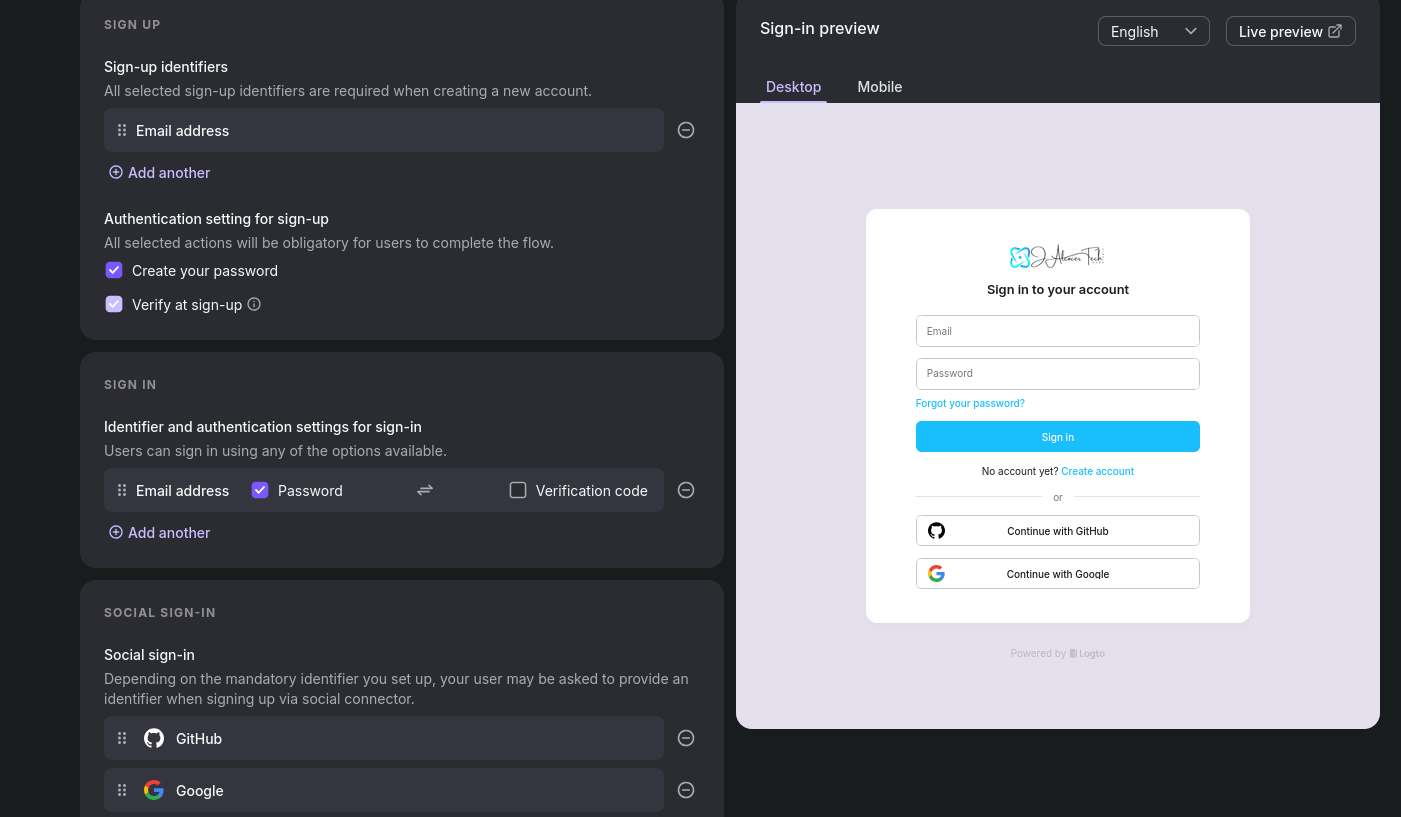
So that the sign in/up experience looks like so:
And also very interesting config for: email, terms and conditions, policy, tick box before entering…
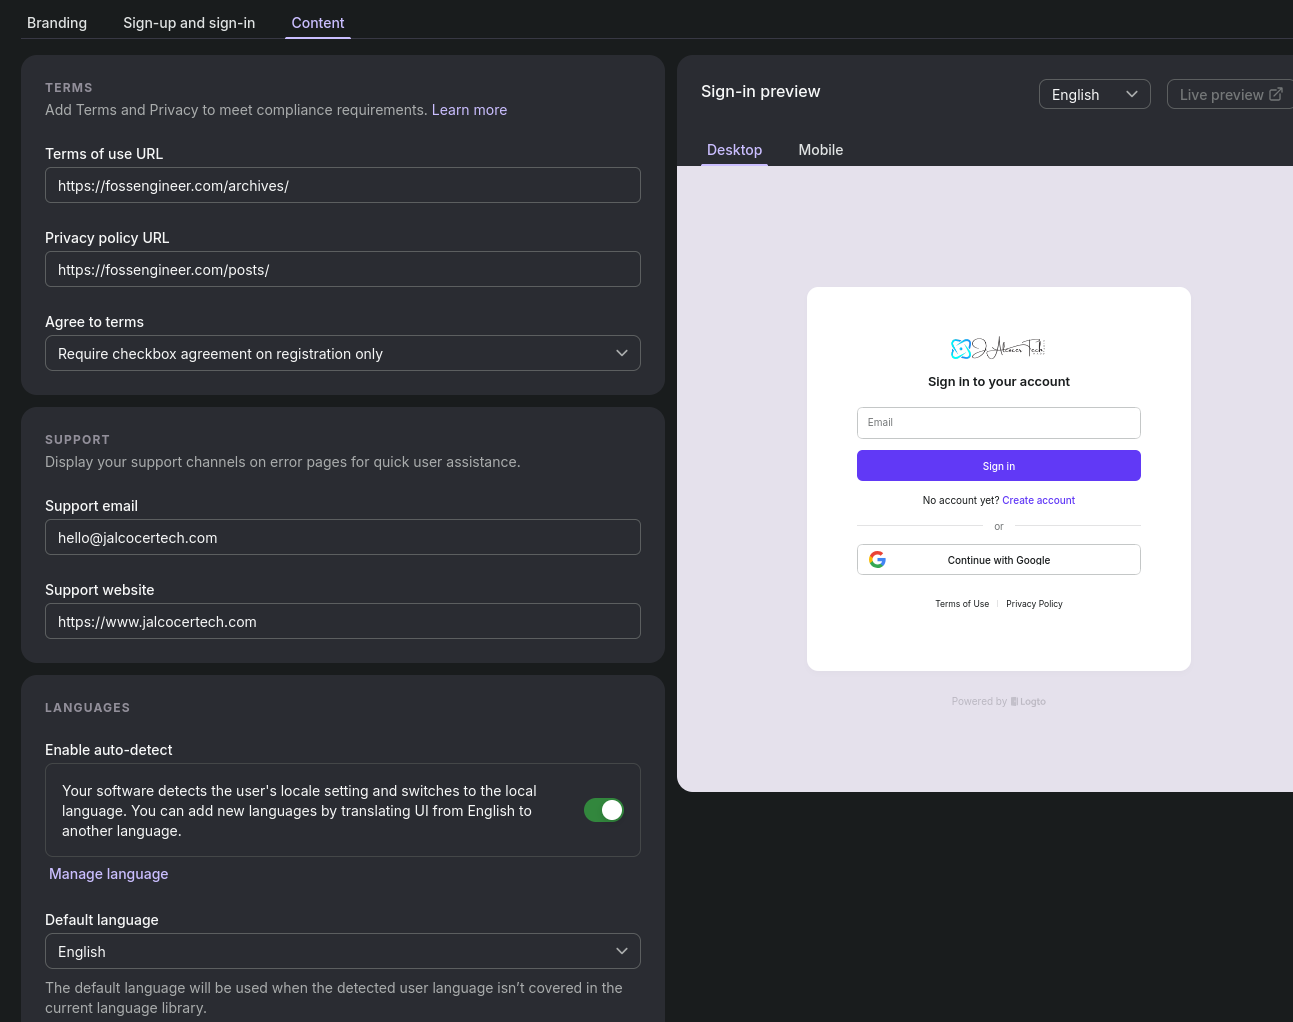
You can also customize it as per https://docs.logto.io/customization/bring-your-ui
To bring the information to the UI of the signed in email, you can try with Webhooks https://cloud.logto.io/vurfo6/webhooks
Because this is cool:

But how to know who’s actually signed in?
In that case, you will need a:
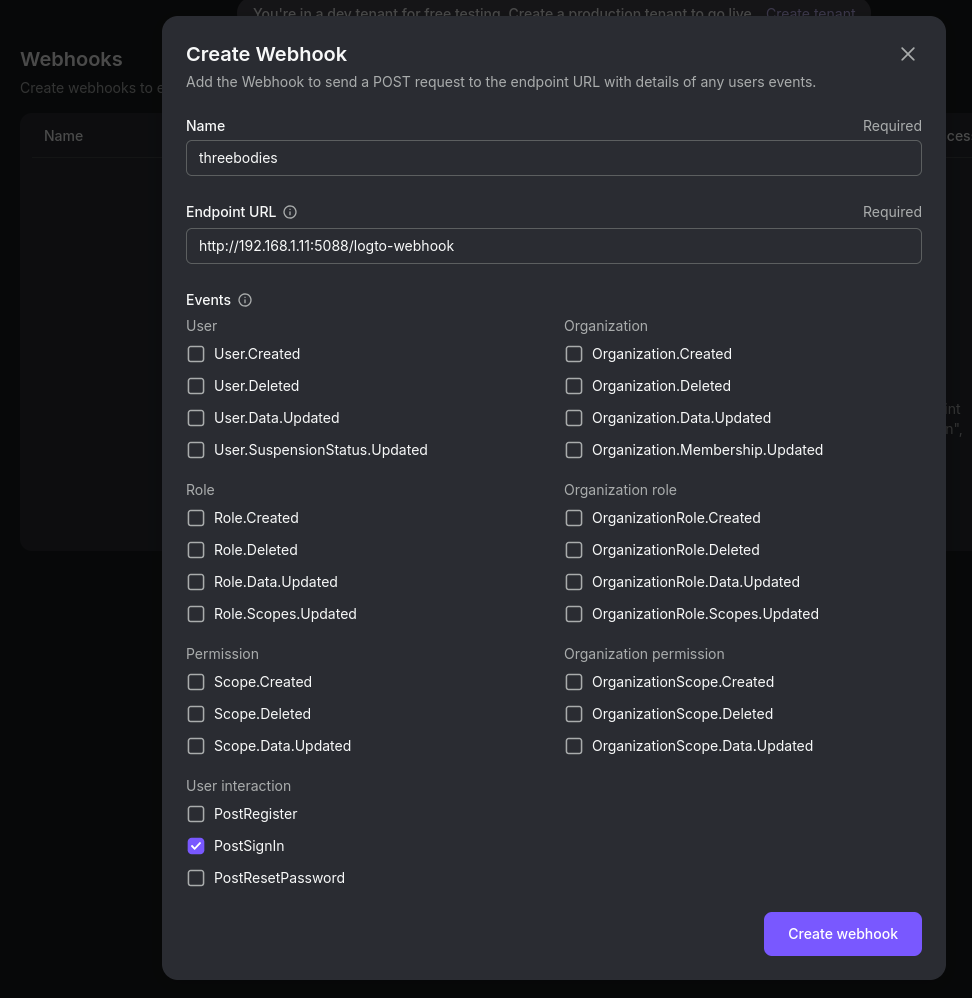
LOGTO_WEBHOOK_SECRET=your-very-secret-valueAnd create the webhook: Go to your Logto Admin Console → Developer → Webhooks.
With url: http://192.168.1.11:5088/logto-webhook
And copy the Signing key
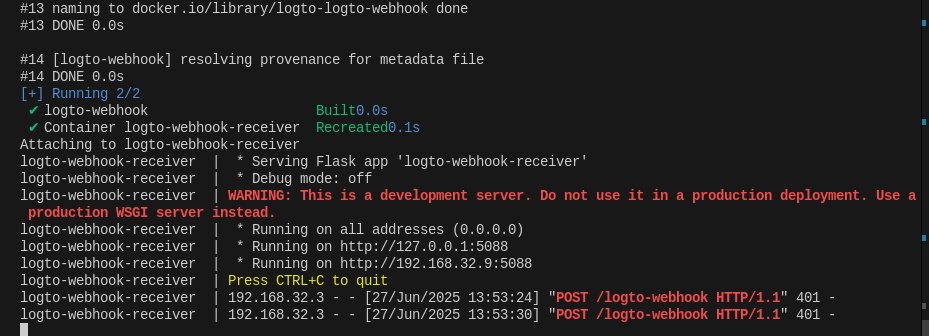
After a user signs in, signs up, or triggers any selected event, Logto will POST a JSON payload to your /logto-webhook endpoint. Check the logto_webhook_events.log file in your project directory to see the events.
To test a webhook from LogTo console, they should be able to send requests:
#this wont receive it
#curl -X POST http://192.168.1.11:5088/logto-webhook -d '{}' -H 'Content-Type: application/json'
So be prepared to use Cloudflare Tunnels or any other form of exposing your app:

I Added a new tunnel as http to
logto-webhook-receiver:5088which goes to https://webhooks.jalcocertech.com/
ping webhooks.jalcocertech.comFrom that moment, when i hit the test webhook via logtoUI, at least I was getting these 401:
And then:
#source .env
curl -X POST https://webhooks.jalcocertech.com/logto-webhook \
  -H 'Content-Type: application/json' \
  -H 'X-Logto-Signature: ${LOGTO_WEBHOOK_SECRET}' \
  -d '{"test":123}'
By pointing the sample flask app to cloudflare tunnel as well: https://flask.jalcocertech.com/
Bringing logged in information with Logto, the easy way As per the docs, add the scopes
from logto import UserInfoScope #this does the trick to get the signed in and verified email!
client = LogtoClient(
LogtoConfig(
endpoint=LOGTO_ENDPOINT,
appId=LOGTO_APP_ID,
appSecret=LOGTO_APP_SECRET,
scopes=[UserInfoScope.profile, UserInfoScope.email], #add these!
),
storage=SessionStorage(),
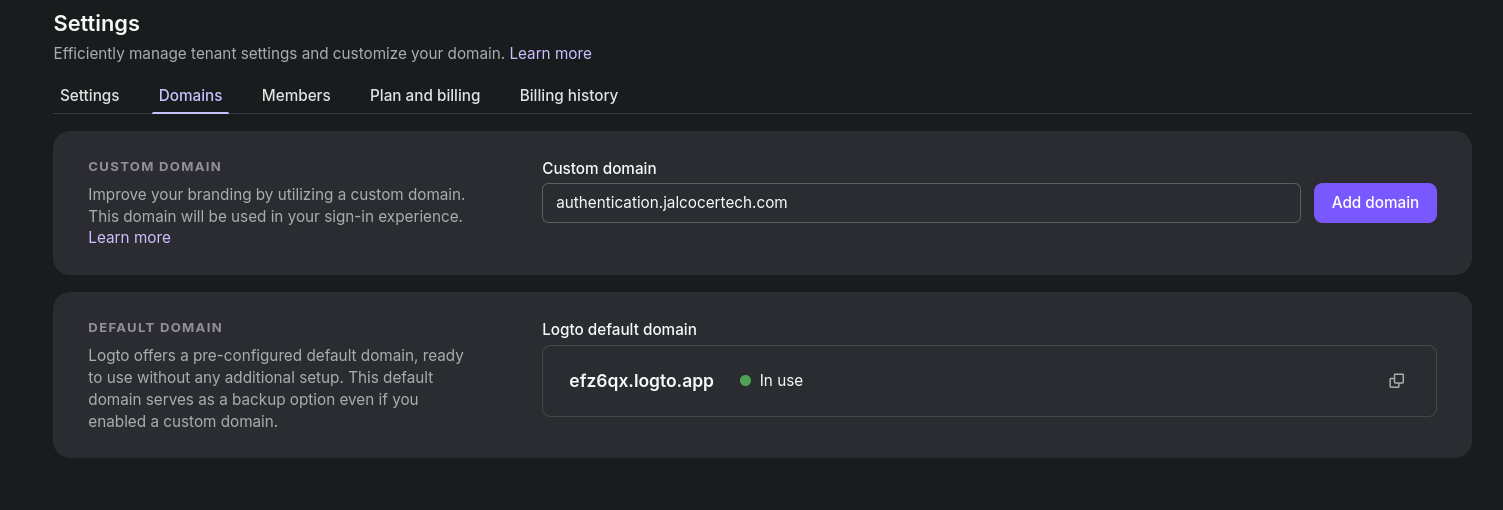
)Updating the domain for a custom domain with Logto will look like: https://cloud.logto.io/vurfo6/tenant-settings/domains
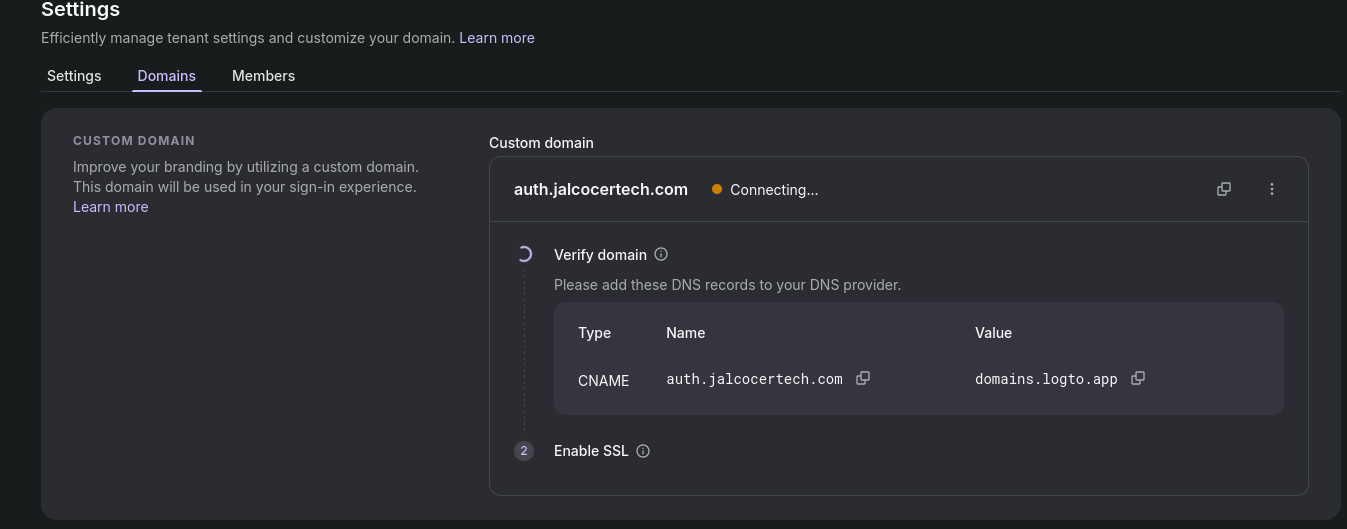
Example: https://auth.jalcocertech.com/sign-in
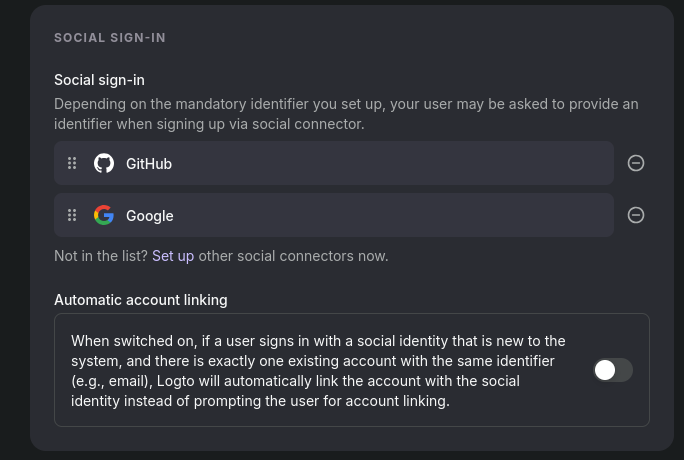
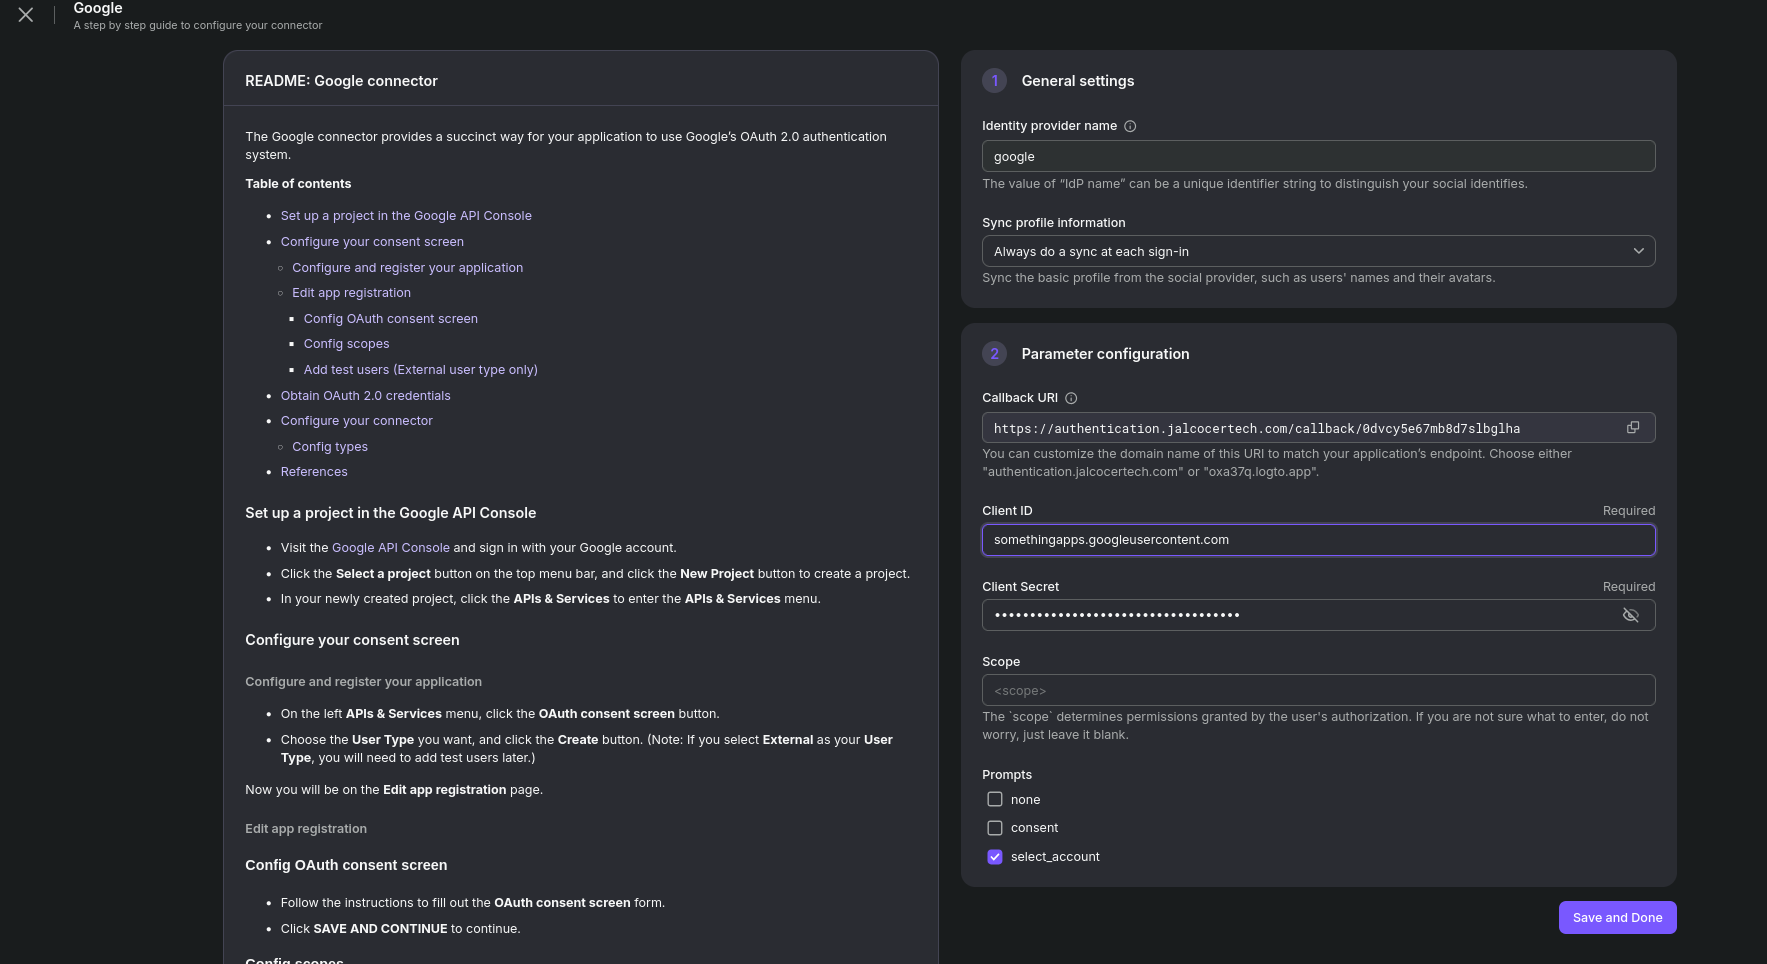
Configuring social signin for Logto: https://cloud.logto.io/vurfo6/connectors/social

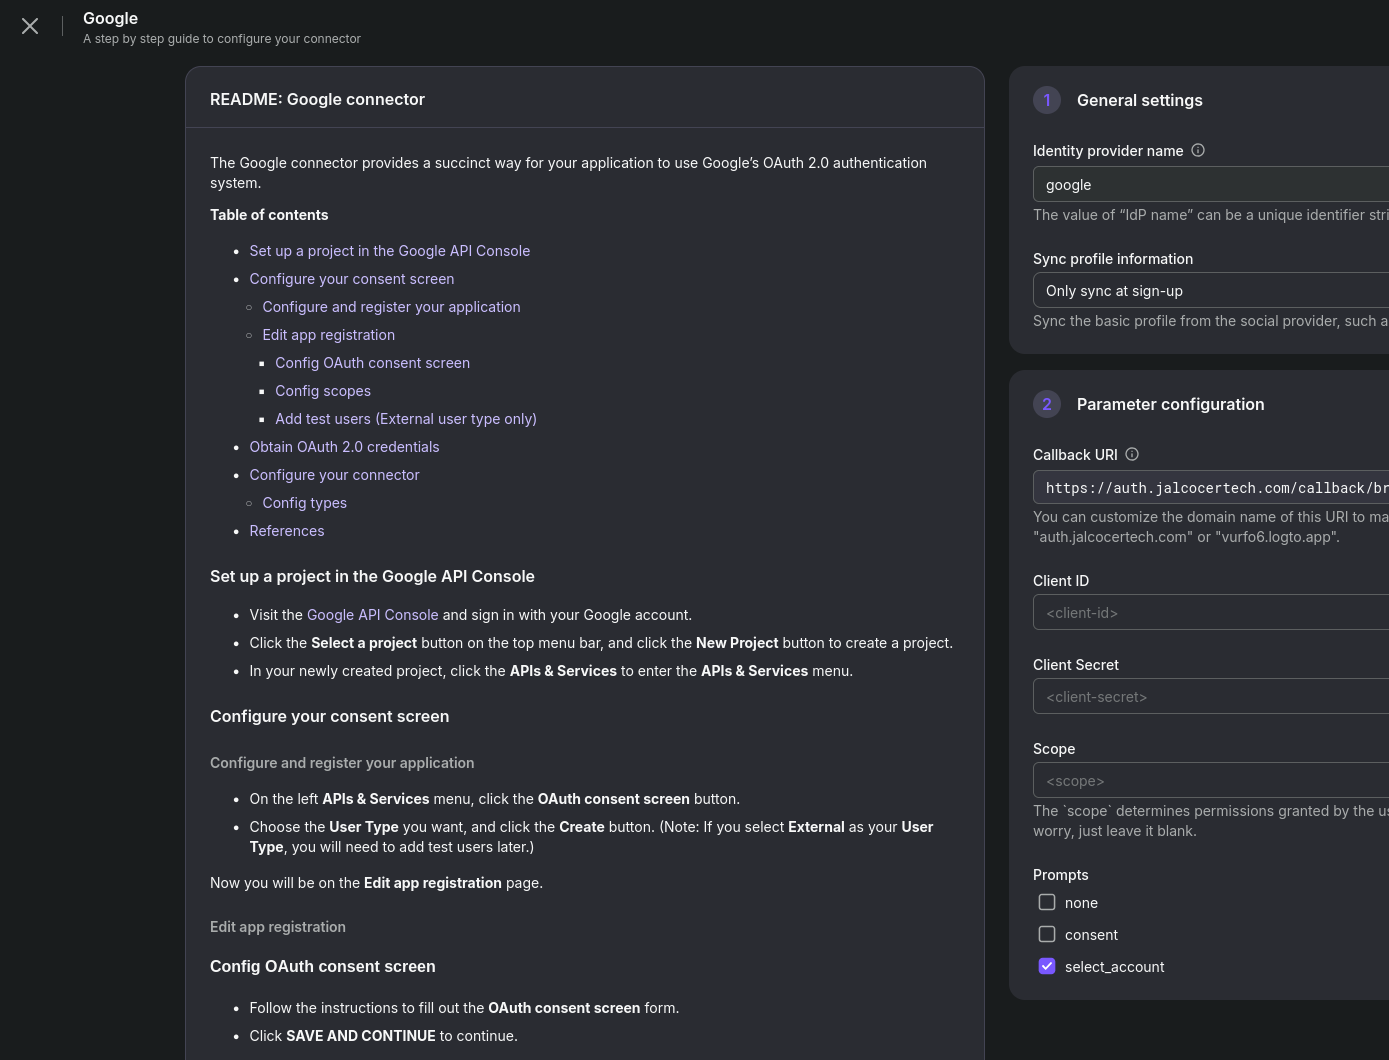
- Create a project on GCP https://console.cloud.google.com/projectcreate
- Look for
API and Services->OAUT consent screen
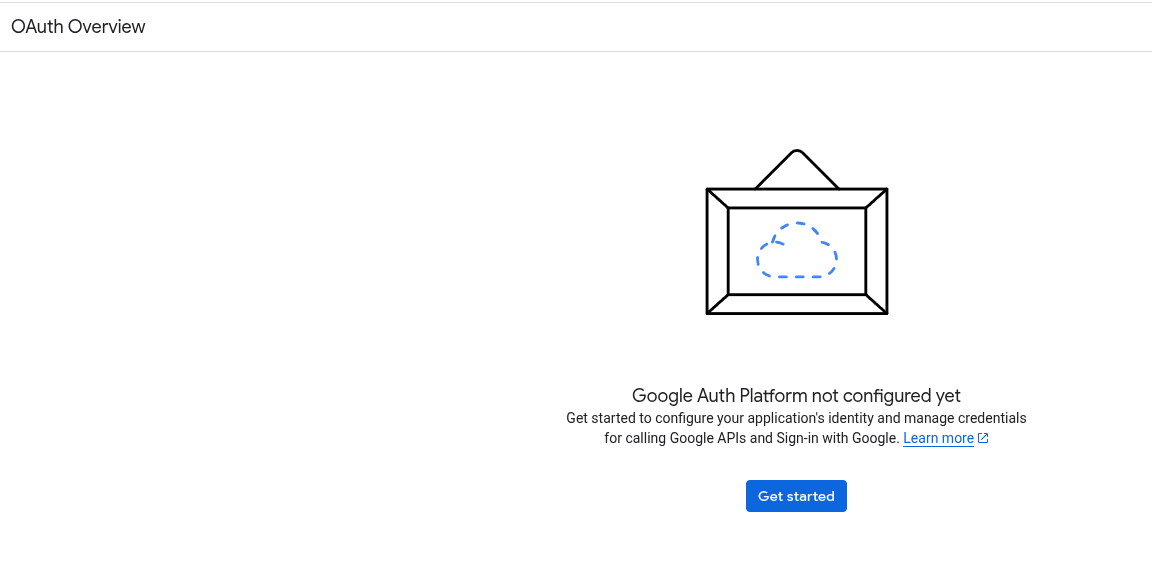
Choose the User Type you want, and click the Create button. (Note: If you select External as your User Type, you will need to add test users later.)
External User Type
Audience: Your app is available to any user with a Google Account, regardless of their Google Workspace affiliation. This includes personal Gmail accounts and users from other Google Workspace organizations.
Use Cases:
Public-facing applications: Any app designed for general users (e.g., a picture editing app that integrates with Google Photos, a task manager that syncs with Google Calendar).
Third-party integrations: When your app needs to interact with users outside of your direct organization.

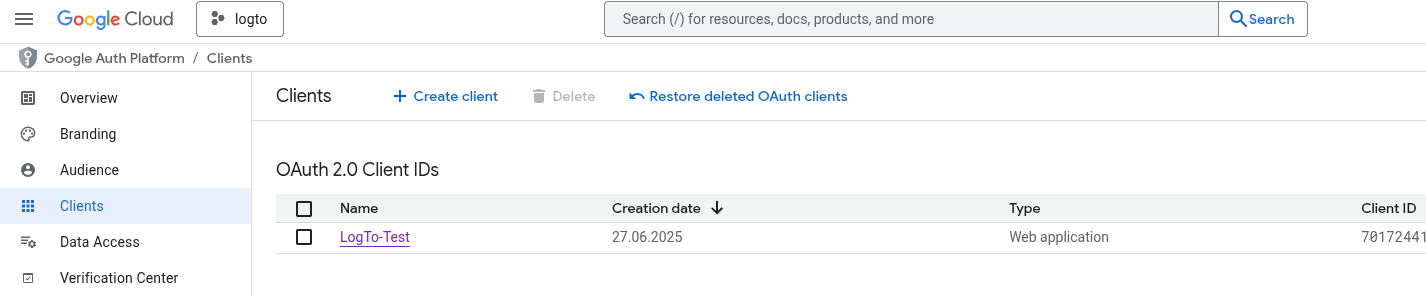
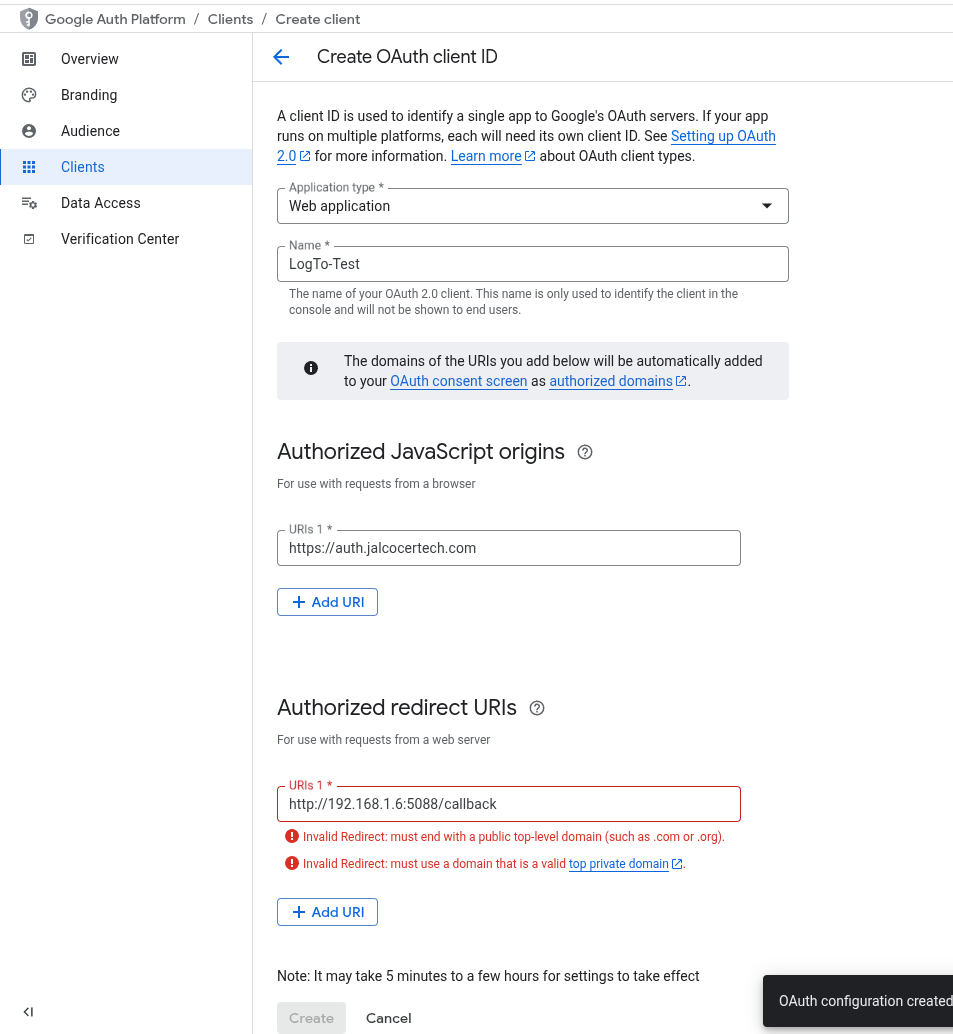
- Hit
Create OAUTH client, select a WebApp:
You’re on the “Create OAuth client ID” page in the Google Cloud Console.
This is where you tell Google how your application (via Logto) will interact with Google’s OAuth servers.
.com from here and a subscription to LogToAnd there are few interesting concepts here.
Authorized JavaScript origins:
- For use with requests from a browser
- What this means: This field is for applications that make API calls directly from a user’s browser using JavaScript (e.g., if you had a “Sign in with Google” button directly on your custom website that called Google’s APIs). It enforces the “same-origin policy” for security.
- What to do: In your case, Logto handles the authentication flow on its own domain. So, you need to add the origin (base URL) of your Logto endpoint.
- Referring to your previous instructions: “This is the domain that your logto authorization page will be served from. In our case, this will be
${your_logto_endpoint_origin}. e.g.https://foo.logto.app.” - Example: If your Logto instance is
https://auth.jalcocertech.com, then you would click “+ Add URI” and enter:https://auth.jalcocertech.com
- Referring to your previous instructions: “This is the domain that your logto authorization page will be served from. In our case, this will be
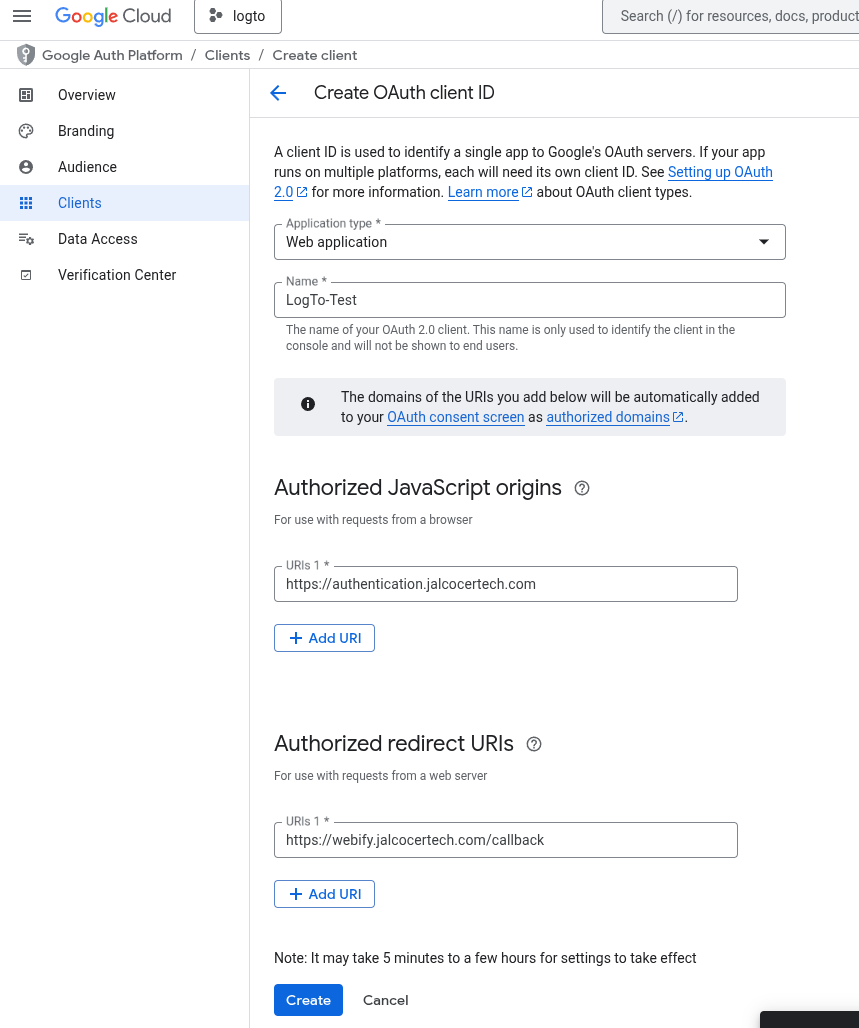
Authorized redirect URIs:
- For use with requests from a web server
- What this means: This is critical. After a user successfully signs in with their Google account and grants consent, Google will redirect their browser back to this specific URL in your application (or in this case, your Logto instance).
This URI must exactly match what Google is expecting. If it doesn’t, you’ll get a redirect_uri_mismatch error.
- What to do: You need to add the full callback URI provided by Logto for the Google connector.
- Referring to your previous instructions: “In our case, this will be
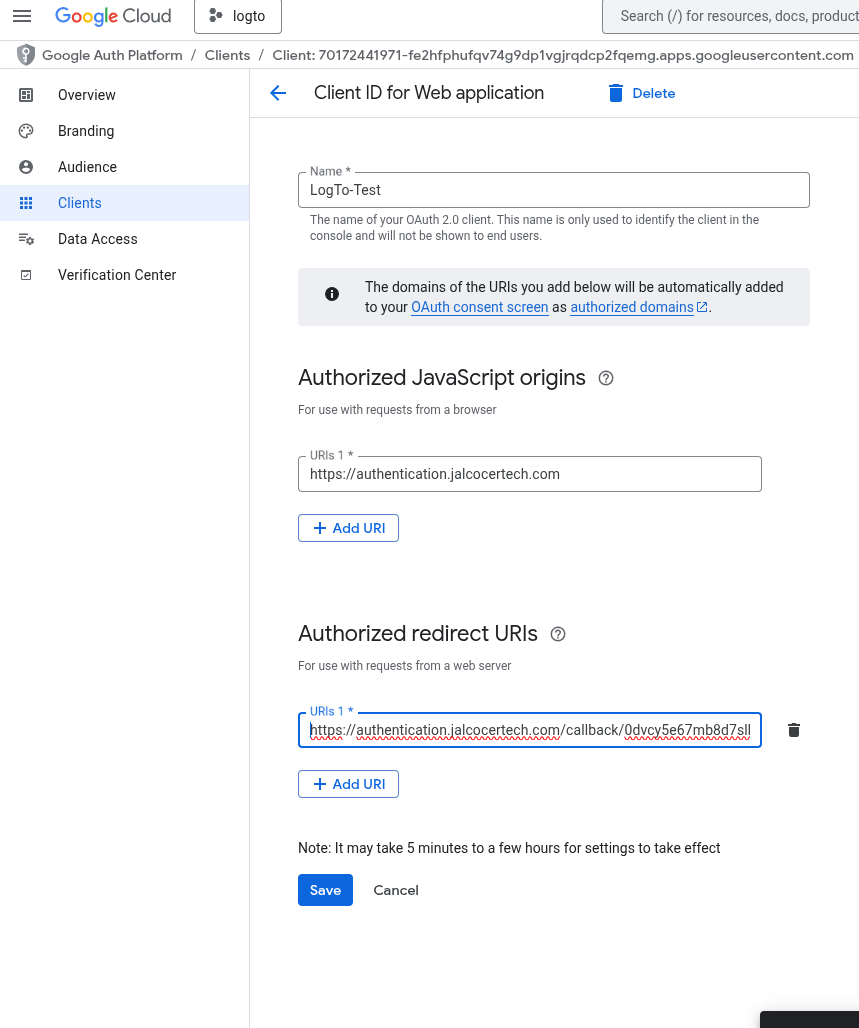
${your_logto_endpoint}/callback/${connector_id}. e.g.https://foo.logto.app/callback/${connector_id}. Theconnector_idcan be found on the top bar of the Logto Admin Console connector details page.” - To get the
connector_id:- Open your Logto Admin Console in a separate browser tab.
- Navigate to Connectors -> Social Connectors.
- Click on the “Google” connector (you should have started setting it up by now).
- On that Google connector’s detail page in Logto, look for the “Callback URI” or similar field. It will show you the full URL, including the unique
connector_id.
- Example: If your Logto endpoint is
https://auth.jalcocertech.comand theconnector_idisbrbkm77m35jfe7qzkkvel(from your example):- Click “+ Add URI” and enter:
https://auth.jalcocertech.com/callback/brbkm77m35jfe7qzkkvel - When seeting up the google social signin, Logto will give you the ORI to add to google and you will have to fill in LogTO UI the ClientId and Client Secret (after completing this step in Google CLoud)
- Click “+ Add URI” and enter:
- Referring to your previous instructions: “In our case, this will be
After filling these out:
- Click the Create button.
- Google will then display a pop-up showing you your Client ID and Client Secret.
- IMPORTANT: Copy both of these values immediately and securely! The Client Secret is often shown only once. You’ll need these for the next step in Logto.
So not like this:
But like this:
Then, save it and bring the artifacts:
And it will stay like so: