[Review]ing a Travel Router - GL-MT3000
TL;DR
Testing the GL-MT3000 Travel Router with Wireguard and Tailscale VPN.
Intro
The last years I have been interested to improve my networking knowledge.
Being involved in Telecom projects was a great motivation.
How to use a travel router to access home resources while abroad?
But its something that goes even behind in time with the Raspberry Pi.
Which I tried to summarize here with 3rd party VPNs and recently using VPS+Wifi2Ethernet
And VPNs are helpful of course to make sure that relevant content will be available, like Linux OS images that we want to keep.
But they are also useful to connect to our home server when we are far from home.
And if for some reason you are no table to do port forwarding with your home router…
…you will have come across already with TailScale
This is why I got a GL-MT3000 Router, to combine it with Tailscale VPN

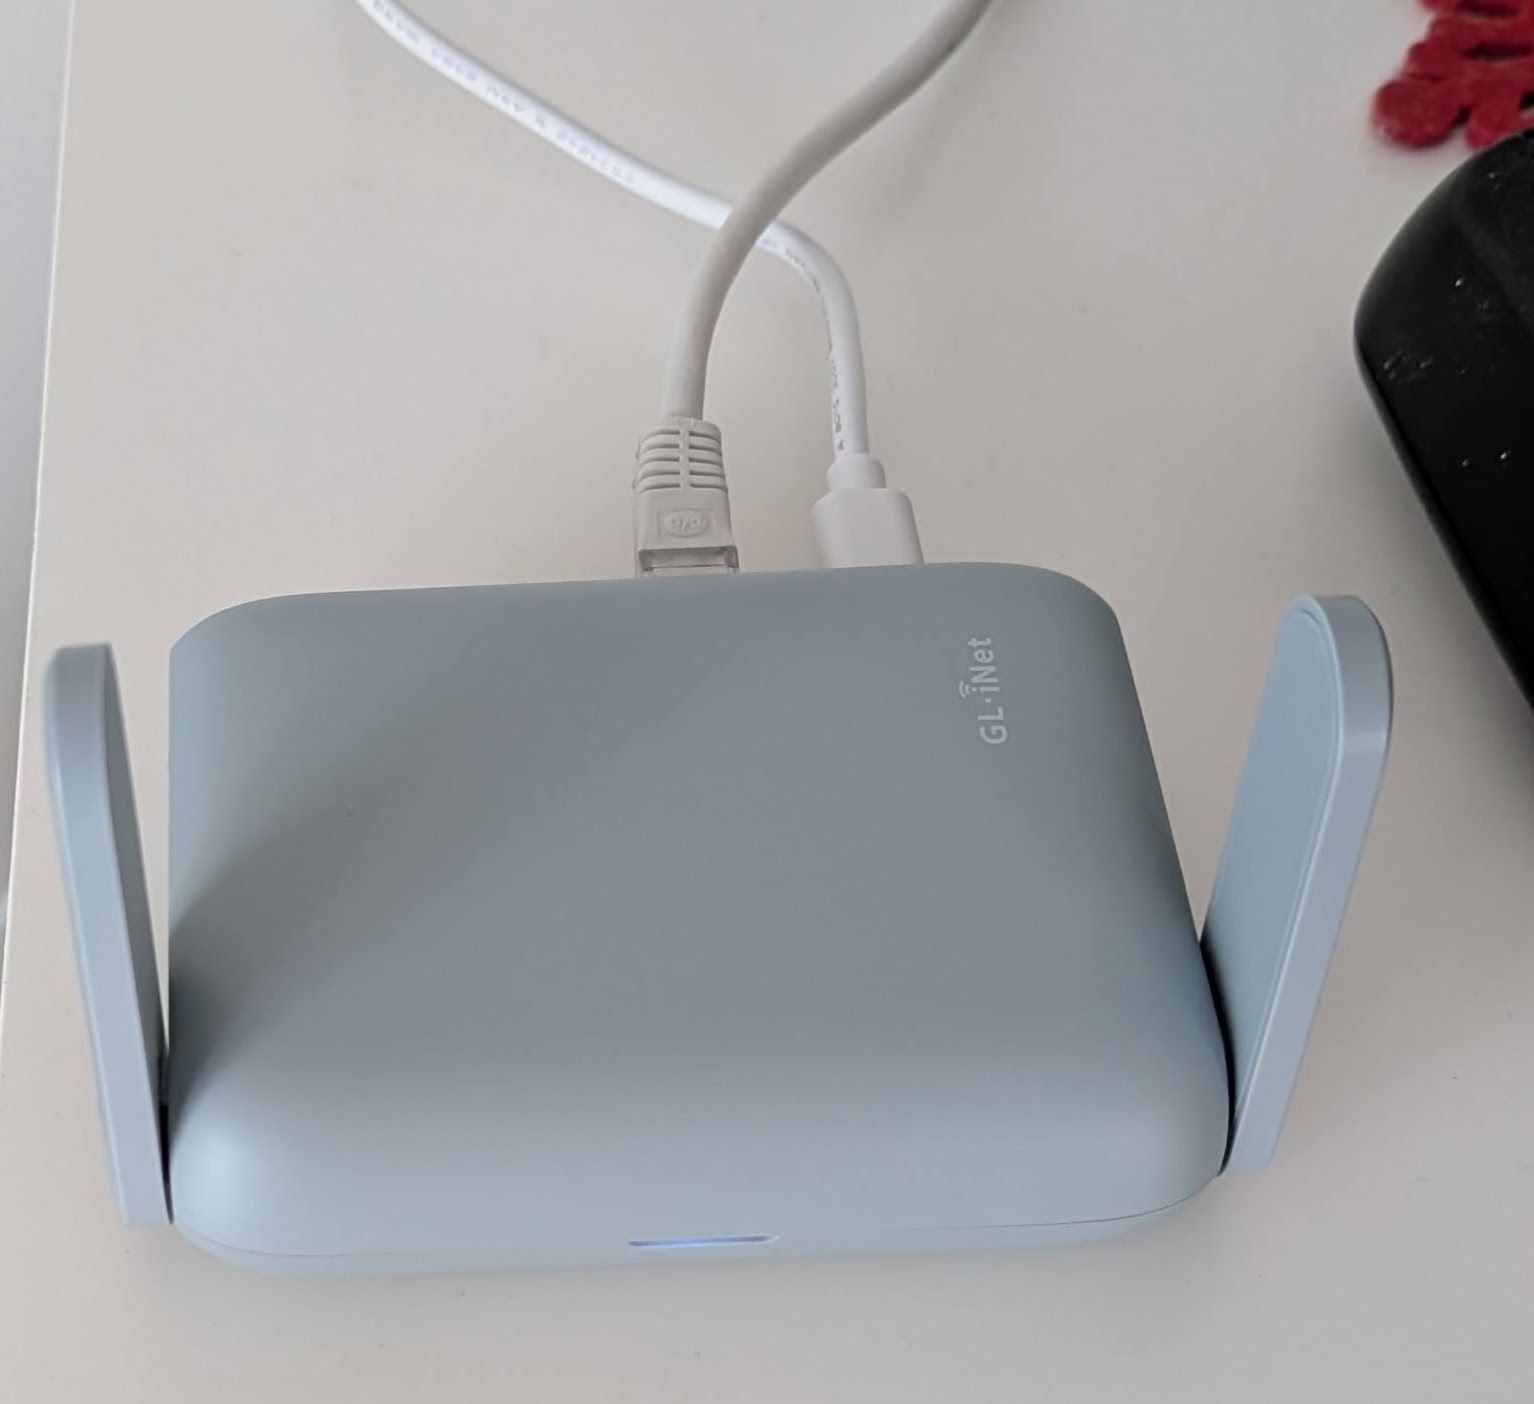
GL-MT3000 Travel Router
The GL.iNet GL-MT3000 has been a very interestin surprise this year.
- It uses OpenWRT as firmware and has AX3000 Wifi6 capabilities
- Currently using it with
Setup GL-MT3000 Router
- Connect to the router:
- Via WIFI signal, you will see the default SSID as
GL-MT3000 - Or connect simply via Ethernet at the LAN port
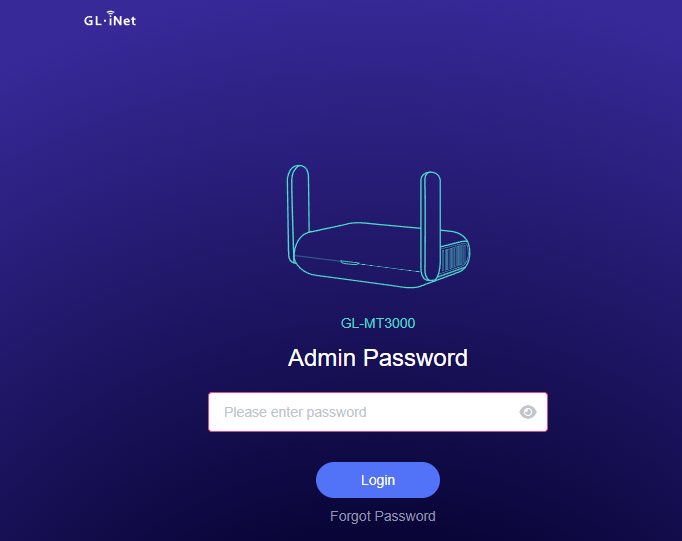
Connect to the router admin panel via the default
http://192.168.8.1/#/loginChange the master password (to login to admin UI) & select the language

Once inside of the admin Panel, you can configure on which mode the router will work.
For me it was very interesting to keep it as router.
And combine it with VPNs flavuours.
VPN Connectivity with GL-MT3000
This travel router allow us to use OpenVPN and Wireguard VPN connections.
We can just upload the .conf file and have our devices passed through that VPN.
Wireguard and the GL-MT3000
Recently I was tinkering with VPS’s and they can actually be used together with the GL-MT3000.
Tailscale and GL-MT3000
The cool thing with Tailscale is that you wont need to Port Forward with your router.
This is the general idea:
graph TD
    subgraph Hotel Room Network
        A[Travel Router]
        A --- B1[Device 1 Phone]
        A --- B2[Device 2 Laptop]
        A --- B3[Device 3 Tablet]
    end
    A -- Connected to --> C[Hotel Wi-Fi]
    C -- Internet Traffic --> D[Tailscale Network]
    D -- Routes Traffic --> E[Home Exit Node]
    E -- Forwards to --> F[Public Internet]
Just connect the GL-MT3000 to a hotel internet and then all the devices at your room will be connected to your home server.
And even get home address internet. Thanks to Tailscale.

How to Setup a Tailscale exit node 📌
You can do this on a VPS, but also at any home device.
For selfhosting, I like to setup Tailscale.
And you can use Tailscale as exit node, so that you get a home VPN so that your traffic is router to home.
I was covering how to all your traffic through a home device here.
But in a nutshell, once tailscale is installed…
This will make any device at home your (potential) exit node:
#tailscale status
echo 'net.ipv4.ip_forward = 1' | sudo tee -a /etc/sysctl.conf &&
echo 'net.ipv6.conf.all.forwarding = 1' | sudo tee -a /etc/sysctl.conf &&
sudo sysctl -p /etc/sysctl.conf &&
sudo tailscale down

sudo tailscale up --advertise-exit-node
Dont forget to go to the Tailscale admin UI and select: Route settings -> use as exit node
Then, other devices will be able to route their traffic through that device you leave at home.
Like what?
<a class=“hextra-card group flex flex-col justify-start overflow-hidden rounded-lg border border-gray-200 text-current no-underline dark:shadow-none hover:shadow-gray-100 dark:hover:shadow-none shadow-gray-100 active:shadow-sm active:shadow-gray-200 transition-all duration-200 hover:border-gray-300 bg-gray-100 shadow dark:border-neutral-700 dark:bg-neutral-800 dark:text-gray-50 hover:shadow-lg dark:hover:border-neutral-500 dark:hover:bg-neutral-700"href=“https://jalcocert.github.io/JAlcocerT/firebat-ak2-plus-minipc-review/" target="_blank” rel=“noreferrer”><img alt=“FireBat AK2 Plus” loading=“lazy” decoding=“async” src="/JAlcocerT/blog_img/hardware/firebat.jpg”
/><span class="flex font-semibold items-start gap-2 pt-4 px-4 text-gray-700 hover:text-gray-900 dark:text-neutral-200 dark:hover:text-neutral-50">FireBat AK2 Plus</span><div class="line-clamp-3 text-sm font-normal text-gray-500 dark:text-gray-400 px-4 mb-4 mt-2">Less than 1L mini PC with decent 4C/4T - The Review</div></a>
<a class=“hextra-card group flex flex-col justify-start overflow-hidden rounded-lg border border-gray-200 text-current no-underline dark:shadow-none hover:shadow-gray-100 dark:hover:shadow-none shadow-gray-100 active:shadow-sm active:shadow-gray-200 transition-all duration-200 hover:border-gray-300 bg-gray-100 shadow dark:border-neutral-700 dark:bg-neutral-800 dark:text-gray-50 hover:shadow-lg dark:hover:border-neutral-500 dark:hover:bg-neutral-700"href=“https://jalcocert.github.io/JAlcocerT/cloud-vs-single-board-computers/" target="_blank” rel=“noreferrer”><img alt=“BMax B4 MiniPC Review” loading=“lazy” decoding=“async” src="/JAlcocerT/blog_img/hardware/bmax-b4.jpg”
/><span class="flex font-semibold items-start gap-2 pt-4 px-4 text-gray-700 hover:text-gray-900 dark:text-neutral-200 dark:hover:text-neutral-50">BMax B4 MiniPC Review</span><div class="line-clamp-3 text-sm font-normal text-gray-500 dark:text-gray-400 px-4 mb-4 mt-2">BMax vs Pi vs Cloud Comparison</div></a>
Any old laptop, miniPC, SBC… will do the trick.
And ofc this can also be applied to any VPS, same as wireguard.
Then, you need to Setup Tailscale on the MT-3000: you will be asked to accept the device in Tailscale admin UI with a hyperlink.
When you activate the option to use an exit node (like the one we have just configured), you will see a warning message.
What are Subnet Routes? 📌
Subnet routes are like “maps” that tell a network how to reach specific groups of devices (subnets).
Analogy: A Neighborhood Map Imagine your home network is like a neighborhood with many houses (devices). Each street in the neighborhood represents a subnet (a group of devices sharing a common range of IP addresses).
- Subnet: A street with houses numbered in a specific range, e.g., “192.168.8.0 to 192.168.8.255.”
- Subnet Route: A map that says, “To reach houses on this street (subnet), take this specific path.”
What Are Subnet Routes in Networking?
Subnets:
- Subnets group IP addresses to organize devices in a network (e.g., your home Wi-Fi or office network).
- Example:
192.168.8.0/24means a group of IP addresses from192.168.8.0to192.168.8.255.
Routes:
- A route tells devices how to send traffic to a specific subnet. Without a route, devices won’t know how to communicate with others outside their immediate network.
Subnet Routes:
- These are instructions added to a device or network (like Tailscale) to enable it to connect to devices in a specific subnet.
Why Are Subnet Routes Important? Without subnet routes:
- Devices wouldn’t know how to reach other devices in different subnets.
- For example, your phone (connected to a VPN) couldn’t access your printer or IoT devices in your home network.
With subnet routes:
- Traffic destined for a specific subnet (e.g., your home devices) knows where to go.
- A router or VPN (like Tailscale) can act as a “bridge” between networks, enabling access to those devices.
Tailscale Example:
- Advertise Routes: A device (like a travel router) tells Tailscale about its subnets (e.g.,
192.168.8.0/24). - Accept Routes: Another device (e.g., your laptop) accepts these routes and knows how to reach the subnet through the travel router.
This setup enables seamless access to all devices in your subnet, even when you’re remote!
graph TD
    subgraph Subnet A 192.168.8.0/24
        A1[Device 1 192.168.8.10]
        A2[Device 2 192.168.8.20]
        A3[Device 3 192.168.8.30]
    end

    subgraph Subnet B 10.0.0.0/24
        B1[Device 4 10.0.0.10]
        B2[Device 5 10.0.0.20]
        B3[Device 6 10.0.0.30]
    end

    subgraph VPN/Router
        R[Travel Router]
    end

    subgraph Tailscale Network
        T1[Home Desktop Exit Node]
        T2[Remote Laptop]
    end

    %% Connections
    A1 --- R
    A2 --- R
    A3 --- R
    B1 --- R
    B2 --- R
    B3 --- R
    R -- Advertises Subnets --> TailscaleNetwork
    T2 -- Sends Requests to Subnets --> T1
    T1 -- Routes Traffic to Subnets --> R
    R -- Forwards to --> SubnetA
    R -- Forwards to --> SubnetB
Travel Router Configuration
On your travel router (the Gl-MT3000):
- Advertise the local subnets that the router controls (e.g.,
192.168.8.0/24and10.0.0.0/24) to the Tailscale network.
Run the following command on the travel router:
sudo tailscale set --advertise-routes=192.168.8.0/24,10.0.0.0/24
# sudo tailscale down
# sudo tailscale up --advertise-routes=192.168.8.0/24- This tells Tailscale that your travel router can route traffic to these subnets.
- Other devices in your Tailscale network will be able to reach the devices on these subnets through the travel router.
How to do SSH to the MT-3000 Router? 📌
ssh root@192.168.8.1 #the password es the same you set to login to the router ADMIN PANELDesktop Configuration
On your desktop (the device acting as the exit node):
- Configure it to:
Accept routes advertised by other devices (like your travel router).
Advertise itself as an exit node to handle internet traffic for other devices in the Tailscale network.
Run the following command on the desktop (the device you will user as exit node at home):
sudo tailscale up --reset --accept-routes --advertise-exit-node--accept-routes: Allows the desktop to accept routes advertised by the travel router.--advertise-exit-node: Makes the desktop an exit node for internet-bound traffic from other Tailscale devices.
Traffic Flow
Subnet Traffic (Travel Router to Desktop):
- The travel router advertises its local subnets (
192.168.8.0/24,10.0.0.0/24) to the Tailscale network. - The desktop, configured to accept routes, can now route traffic to these subnets through the travel router.
- The travel router advertises its local subnets (
Internet Traffic (Other Devices to Desktop):
- Other Tailscale devices (like your laptop or phone) can configure the desktop as their exit node.
- These devices’ internet traffic will be routed through the desktop’s public IP, providing privacy or access to geo-specific content.
How to Use This Configuration
Test the Setup
- Check if you can reach the devices in the travel router’s subnets (
192.168.8.0/24and10.0.0.0/24). - Verify your public IP address (e.g., by visiting https://whatismyipaddress.com/) to confirm internet traffic is routed through the desktop.
graph TD
    A[Travel Router] -- Advertises 192.168.8.0/24, 10.0.0.0/24 --> B[Tailscale Network]
    B -- Shares Subnet Routes --> C[Desktop Exit Node]
    C -- Advertises Exit Node --> B
    D[Laptop/Phone] -- Uses Exit Node for Internet Traffic --> C
    D -- Accesses Subnet Devices via Travel Router --> A
    C -- Routes Internet Traffic --> E[Public Internet]
Closing Thoughts
We can also use Wireguard and OpenVPN with the ML3000.
FAQ
- How to get Wireguard details from NordVPN - https://gist.github.com/bluewalk/7b3db071c488c82c604baf76a42eaad3
Interesting VPNs Solutions
Tailscale
HeadScale
ZeroTier
Wireguard - Requires Port Forwarding at home (with a VPS/Cloud Server you dont need it)
- WGEasy to get a WG server very quick!
Wireguard Linux Clients
VPS to Deploy a Wireguard Server
I tried some VPSs, and Wireguard worked perfectly with:
DO added recently GPU Droplets which can be interesting to try out!