Docker 101
Docker
Docker is a platform that allows developers to create, deploy, and run applications in containers.
These containers are lightweight and self-contained, which makes them easy to manage and deploy across different environments.
Consider it as a powerful tool that can help developers streamline the application development and deployment process, while also providing a range of benefits in terms of portability, consistency, efficiency, and isolation.
For you, this means that when a service/app runs in one computer, it will behave in the same way in any other device.
To install docker, docker compose and portainer, simply copy the following code chunks:
sudo apt-get update && sudo apt-get upgrade && curl -fsSL https://get.docker.com -o get-docker.sh
sudo sh get-docker.sh && sudo apt install docker-compose -y
This might not be the latest version of docker-compose, but it will work.
Testing that Docker works with:
sudo systemctl status dockerAnd check the installed versions with:
docker --version
docker-compose --version
Portainer - GUI for Containers
Not really confortable with the command line yet?
No worries, once Docker is installed, you can use a GUI, thanks to Portainer to install deploy your Apps.
sudo docker run -d -p 8000:8000 -p 9000:9000 --name=portainer --restart=always -v /var/run/docker.sock:/var/run/docker.sock -v portainer_data:/data portainer/portainer-ceDockge - A Great Container GUI
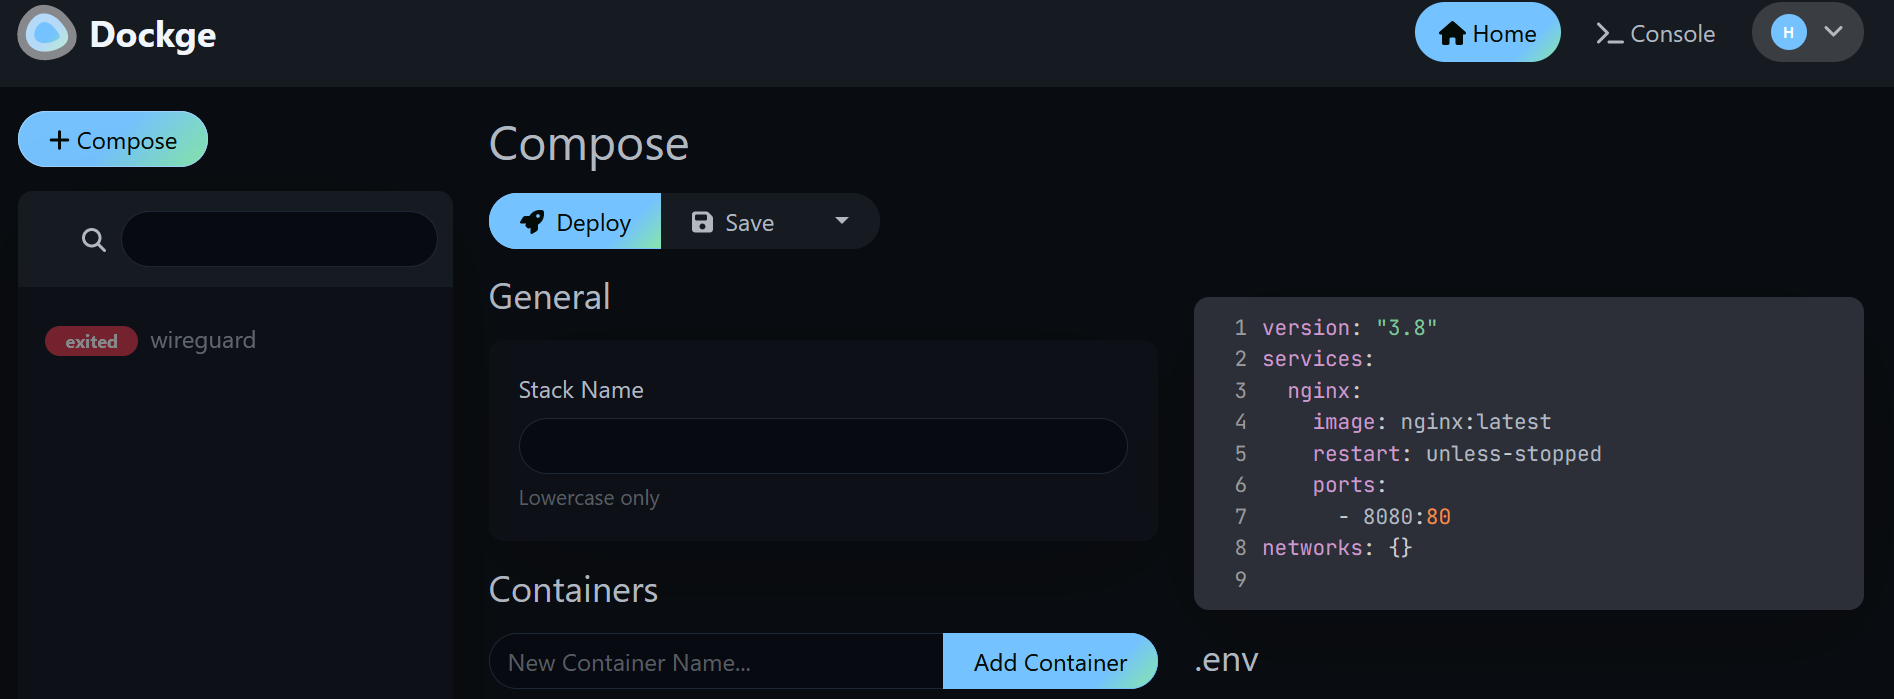
Today, I discovered another great project to manage our containers via GUI: Dockge
To use it we just need:
# Create directories that store your stacks and stores Dockge's stack
mkdir -p /opt/stacks /opt/dockge
cd /opt/dockge

# Download the compose.yaml
curl https://raw.githubusercontent.com/louislam/dockge/master/compose.yaml --output compose.yaml
#curl https://raw.githubusercontent.com/louislam/dockge/master/compose.yaml --output docker-compose.yaml

# Start the server
docker compose up -d

# If you are using docker-compose V1 or Podman
# docker-compose up -d #change version to 2.2 if error
And that’s it, Dockge is waiting for us on: localhost:5001
Podman - A Docker Alternative
Podman is a container management tool that is similar to Docker but has some differences in its approach.
It allows you to run and manage containers on your system, just like Docker, but it offers some advantages, such as being daemonless (no central server) and providing compatibility with Docker commands and images.
flatpak install flathub io.podman_desktop.PodmanDesktop
flatpak run io.podman_desktop.PodmanDesktop
Why Podman?
Both Podman and Docker are open-source projects, and they are released under different open-source licenses.
Licensing stuff 😴
Docker uses a combination of open-source licenses for its various components. Docker Engine, the core container runtime, was historically under the Apache License 2.0. However, as of Docker CE 19.03 and later, it is released under the “Community Edition License Agreement” (formerly the Docker Software End User License Agreement).
This license allows free use of Docker for non-commercial purposes but may have some restrictions for commercial use.
Be sure to review the license agreement for specific terms and conditions.
Docker also incorporates various open-source components and libraries, each with its own licensing terms.
For example, Docker Compose, which is often used with Docker, is typically licensed under the MIT License.
Podman is released under the terms of the Apache License 2.0, which is an open-source license that is generally considered permissive and business-friendly.
It allows you to use, modify, and distribute the software freely, including for commercial purposes, with relatively few restrictions.
It’s worth noting that the choice of open-source license can impact how the software can be used, modified, and redistributed.
The Apache License 2.0 used by Podman is considered more permissive and less restrictive than some other open-source licenses, providing greater flexibility for users and developers.
How to use Podman?
Here’s a brief introduction to Podman and how to use it like Docker:
- Installation: You can install Podman on a Linux system by using the package manager specific to your distribution. For example, on Ubuntu, you can install it with:
sudo apt install podman
#flatpak install flathub io.podman_desktop.PodmanDesktop

#nix-shell -p podman- Running Containers:
To run a container with Podman, you can use the
podman runcommand. It works similarly to Docker’sdocker runcommand. For example:
podman run -it --rm ubuntu:latest /bin/bashThis command runs an Ubuntu container and opens an interactive shell inside it. The --rm flag removes the container when it exits.
- Pulling Images:
You can pull container images from container registries using the
podman pullcommand. For example:
podman pull nginxThis command pulls the official Nginx image from the default container registry (Docker Hub).
Listing Containers and Images: To list running containers, you can use
podman ps. To list all containers (including stopped ones), usepodman ps -a. To list downloaded images, usepodman images.Stopping and Removing Containers: You can stop a running container with
podman stop <container-id>and remove it withpodman rm <container-id>. You can also use the--rmflag when running containers to automatically remove them when they exit.Docker Compatibility: Podman is designed to be compatible with Docker commands and syntax. Most Docker commands can be used with Podman without modification, making it easy for Docker users to switch.
Rootless Containers: Podman supports running containers as a non-root user, which enhances security and is similar to Docker’s “rootless” mode.
Pods: Podman introduces the concept of “pods,” which allow you to group multiple containers together and manage them as a single unit. This is similar to Docker Compose but integrated into Podman.
Podman provides a robust and compatible alternative for container management, and you can explore its features and options further by referring to its documentation and using the man command for detailed information on specific commands and flags.
FAQ
Docker, another Tool? Why should I bother?
Shortly? Because it will save you hours.
Let’s say that you were trying to host a Wordpress Site and because you did not know about Docker, you were running all this steps (Wathching some YT in the meantime etc):
Time consuming CLI steps
sudo apt install apache2 -y
sudo apt install mariadb-server mariadb-client -y
sudo systemctl start mariadb
sudo systemctl status mariadb
sudo mysql_secure_installation
clear
sudo apt install php -y
sudo apt install wget -y
wget https://wordpress.org/latest.zip
sudo apt install unzip -y
ls
unzip ./latest.zip
cd wordpress
sudo mkdir /var/www/html
#sudo rm /var/www/html/index.html
sudo cp -r * /var/www/html
sudo apt install php-mysql php-cgi php-cli php-gd -y
sudo systemctl restart apache2
sudo chown -R www-data:www-data /var/www
ip a #----> to browser
sudo mysql -u root -p
create database wordpress;
show databases;
create user "wordpress"@"%" identified by "password";
grant all privileges on wordpress.* to "wordpress"@"%";
exit
/var/www/html/wp-content/plugins/simply-static/static-files/
And now, you simply install Docker with Portainer.
And just copy and paste the Wordpress configuration as a Stack.
Yes, and you already have Wordpress running with Docker. It’s that simple.
And of course, you can use it for much more than just Wordpress. Welcome to Self-Hosting with Docker rabbit hole.
How to install the latest version of Docker-Compose?
Get the Latest Docker-Compose
Visit their Github Repo: https://github.com/docker/compose/tags
And execute the code below with the desired version (example v2.23.0):
#sudo rm /usr/local/bin/docker-compose #if you installed other version before
sudo curl -L "https://github.com/docker/compose/releases/download/v2.23.0/docker-compose-$(uname -s)-$(uname -m)" -o /usr/local/bin/docker-compose
sudo chmod +x /usr/local/bin/docker-compose
How to keep my containers to the latest version?
You can get help of WatchTower.
Run WatchTower with Docker
version: '3'

services:
  watchtower:
    image: containrrr/watchtower
    container_name: watchtower
    volumes:
      - /var/run/docker.sock:/var/run/docker.sock
    environment:
      - WATCHTOWER_LABELS=com.watchtower.autoupdate=true
And use the environment flag in the containers that you want to be updated:
services:
  nextcloud:
    image: nextcloud:latest
    container_name: nextcloud
    labels:
      - com.watchtower.autoupdate=true # ADD THIS to be updated automatically by WT
    # Other Nextcloud service configuration that you had